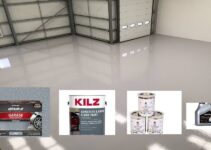
Revitalizing your worn-out garage floor can be a rewarding DIY project. In this comprehensive guide, I will walk you through the process of creating a brand new epoxy flake floor system for your garage. No need for a professional contractor charging thousands of dollars; with our step-by-step instructions, you can achieve professional-looking results at a fraction of the cost.
Phase One: Prepping the Concrete
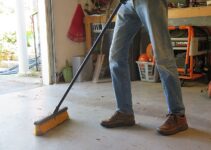
Clearing and Cleaning
Before diving into the epoxy flake system, the initial step involves clearing out the garage and giving the concrete floor a thorough clean. Remove any items, debris, and accumulated dirt to provide a clean canvas for the upcoming project.
Simplified Flooring System for DIYers
Our flooring system is designed with the do-it-yourselfer in mind. It offers an extended working time and reduces unpleasant smells, making it more user-friendly. With this system, you can achieve professional results without the hefty contractor price tag.
Handling Cracks in the Concrete
Assess any cracks in the concrete. For cracks larger than a playing card, expand and clean them before applying epoxy gel floor patch. Smaller cracks can be addressed with the moisture-sealing epoxy during the flake application process.
Grinding the Concrete
Select the appropriate grinder blade for concrete grinding. Ensure proper safety measures, including wearing personal protective equipment (PPE) and adequate ventilation. Grinding the concrete is crucial to preparing the surface for optimal adhesion of the epoxy flakes.
Moisture Sealing Primer Application
Importance of Moisture Seal
Moisture sealing primer is a critical step in preventing moisture buildup, which can lead to delamination. This primer also provides a smooth base for the epoxy flake system. Application to vertical surfaces is possible, offering a cohesive look throughout the garage.
Applying Primer to Vertical Surfaces
Applying the moisture-sealing epoxy primer to vertical surfaces requires a thin, even coat. The porous nature of cinder block walls may necessitate a second light coat for absorption. This step sets the foundation for the epoxy flake application.
Epoxy Flakes Application
Different Flake Coverage Options
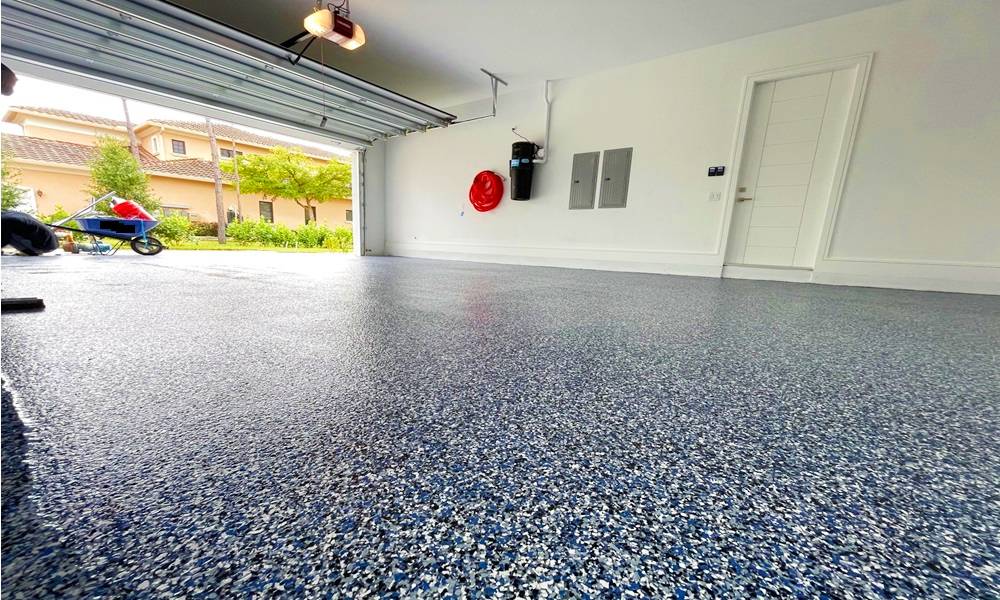
Epoxy flake coverage comes in three options: light, mid, and full flake. The choice depends on the desired visual contrast and the size of the garage. Proper broadcasting techniques ensure even distribution and a professional finish.
Choosing Flake Colors
The color scheme of your epoxy flakes contributes significantly to the overall look of your garage floor. With five standard colors available, you have the flexibility to choose a combination that complements your personal style and the existing aesthetic of your garage.
Consider the overall theme and color palette of your garage space when selecting epoxy flake colors. Whether you prefer a subtle, monochromatic look or a bold and vibrant appearance, the choice is yours. For those seeking a truly unique floor, explore the option of custom ordering specific colors to match your vision precisely.
Scraping Excess Flakes
For full flake coverage, scraping off excess flakes is necessary to prevent uneven surfaces. Light pressure and attention to detail during this step contribute to a smoother application of the subsequent top coat.
Mixing and Applying Polyaspartic Top Coat
Properties of Polyaspartic Top Coat
The polyaspartic top coat offers durability, scratch resistance, and a quick curing time. Its properties make it an ideal choice for protecting the epoxy flakes and providing a glossy finish to the garage floor.
Adding Non-Slip Grip
Enhance safety by incorporating a non-slip grip into the top coat. This additive ensures stability, especially in areas prone to moisture. Mixing it thoroughly into the top coat guarantees an even distribution across the floor.
Rolling Top Coat onto Vertical Surfaces
Cross-Hatching Technique
When applying the polyaspartic top coat to vertical surfaces, utilize the cross-hatching technique. This involves rolling the coat in different directions to ensure complete coverage and a uniform finish.
Ensuring Full Encapsulation
The final step is to confirm that the epoxy flakes are fully encapsulated in the polyaspartic top coat. This prevents any loose flakes and provides a smooth, even surface for the garage floor.
Final Steps
Removing Tape
Before the epoxy fully cures, remove any tape that might be touching the wet surface. This step ensures a clean and polished edge, contributing to the overall professional appearance of the project.
Cure Time and Walkability
After completing the transformative process of painting garage floor with epoxy flakes, the key to a successful finish lies in patience and precision during the curing stage. Here’s a breakdown of the crucial cure time and when you can comfortably walk or drive on your newly rejuvenated garage floor:
1. Overnight Curing
Allow the entire epoxy flake system to cure overnight. This period ensures that the materials bond effectively, setting the foundation for a resilient and aesthetically pleasing surface.
2. Light Foot Traffic in 24 Hours
Once the epoxy has undergone its overnight curing process, your garage floor will be ready for light foot traffic within the next 24 hours. This means you can confidently step onto your renewed floor without compromising the finish.
3. Full Vehicle Use: 3 to 4 Days
For those eager to park their vehicles in the garage, exercise patience. To ensure the utmost durability and resistance, wait for a period of three to four days before allowing full vehicle use on the epoxy-coated floor.
4. Ideal Curing Temperature: Above 70°F
Crucially, maintain an ambient temperature of at least 70 degrees Fahrenheit during the curing process. This temperature threshold is pivotal for the epoxy to cure optimally, ensuring a robust and long-lasting finish.
Conclusion
The journey to transforming garage floor with epoxy flakes is not just a functional upgrade but a visual enhancement as well. As you navigate through the meticulous steps of application, from surface preparation to the final curing phase, you’re not only investing in durability but also elevating the overall aesthetics of your garage.
The careful selection of epoxy flakes adds a personalized touch, turning a mundane garage into a space that reflects your style. The curing process, outlined with precision, is the bridge between application and resilience, ensuring that your garage floor stands the test of time.
FAQs
How long does the entire process take?
The process typically spans several days, allowing for proper curing and ensuring a durable finish.
Can I customize the color of the epoxy flakes?
Yes, with five standard colors and custom ordering options, you can personalize your garage floor to suit your preferences.
Is it necessary to scrape off excess flakes?
Scraping is essential for full flake coverage to prevent uneven surfaces and ensure a smooth application of the top coat.
How soon can I walk on the garage floor after completion?
Light foot traffic is possible within 24 hours, with full vehicle use recommended after three to four days, depending on curing conditions.
What safety precautions should I take during the process?
Ensure proper ventilation, wear personal protective equipment (PPE), and use non-slip shoes to enhance safety throughout the project.