How to Repair Cracks in Concrete Garage Floor
Cracks in your concrete garage floor can be unsightly and dangerous. They not only detract from the aesthetics of your garage but can also lead to further damage if left unattended.
In this comprehensive guide, I will walk you through the process of repairing cracks in your concrete garage floor.
We’ll cover everything you need to know, from identifying the types of cracks to choosing the right materials, and provide a step-by-step guide to help you tackle this DIY project effectively.
What are the Different Types of Cracks in Concrete Garage Floors?
Before you embark on the journey of repairing your concrete garage floor, it’s essential to understand the types of cracks you might encounter. Recognizing the characteristics of these cracks will help you determine the appropriate repair method.
Here are the most common types of cracks:
- Hairline Cracks: These are thin, shallow cracks that are usually less than 1/8 inch wide. They are often caused by surface shrinkage and are generally not structurally significant.
- Minor Cracks: These cracks are typically between 1/8 and 1/4 inch wide. While they may not pose an immediate structural threat, it’s essential to address them to prevent them from expanding.
- Major Cracks: Major cracks can be wider than 1/4 inch and may indicate more severe underlying issues. Repairing these cracks is crucial to maintain the structural integrity of your garage floor.
- Pattern Cracks: These cracks may form a distinctive pattern, such as a grid or web, often due to the concrete’s curing process or changes in temperature and moisture.
Why is it Important to Repair Cracks in Concrete Garage Floors?
Repairing cracks in your concrete garage floor is not just about aesthetics; it’s a matter of safety and preserving the longevity of your flooring. Here’s why it’s essential:
- Safety: Cracks in your garage floor can become tripping hazards, putting you and your family at risk. Moreover, they can damage your vehicle’s tires and cause accidents.
- Preventing Further Damage: If left untreated, minor cracks can expand and lead to more extensive damage. Repairing them promptly can save you from costly repairs in the future.
- Enhancing Aesthetics: A well-maintained garage floor improves the overall look and value of your property.
Tools and Materials Needed to Repair Cracks in Concrete Garage Floors
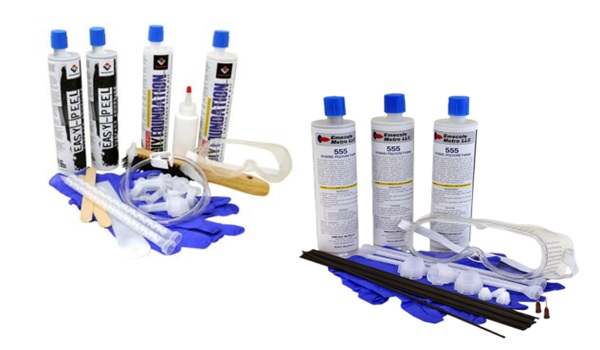
Before you begin the repair process, it’s vital to gather the necessary tools and materials. Here’s a list to get you started:
Tools:
- Chisel and Hammer: Used for cleaning and widening cracks.
- Wire Brush: To remove debris and loose concrete.
- Shop Vacuum: For thorough cleaning.
- Caulk Gun: For applying the filler material.
- Trowel or Putty Knife: To smooth out the filler.
- Safety Glasses and Gloves: For protection during the repair process.
Materials:
- Concrete Crack Filler: Choose the appropriate filler based on the crack size and type.
- Concrete Sealer: To finish the repair and protect the floor.
- Safety Tips for Repairing Cracks in Concrete Garage Floors
Safety Tips for Repairing Cracks in Concrete Garage Floors
Your safety should be a top priority during the repair process. Follow these safety guidelines:
- Wear Safety Gear: Always wear safety glasses and gloves to protect your eyes and hands from debris and chemicals.
- Work in a Well-Ventilated Area: Ensure proper ventilation to avoid inhaling fumes from the filler and sealer.
- Handle Tools with Care: Use tools like chisels and hammers cautiously to prevent accidents.
- Follow Manufacturer Instructions: Read and adhere to the instructions on the filler and sealer products.
How to Repair Cracks in Concrete Garage Floors (Step-by-Step Guide)

Repairing cracks in your concrete garage floor is a methodical process that requires attention to detail and the right tools.
In this step-by-step guide, we’ll break down the repair process into easy-to-follow instructions, ensuring that your garage floor is restored to its former glory. Let’s get started:
Step 1: Prepare the Crack
- Safety First: Before diving into the repair process, it’s crucial to prioritize safety. Wear gloves and safety glasses to protect your hands and eyes from debris and chemicals.
- Clean the Crack: Begin by using a wire brush to thoroughly clean the crack. This step is essential as it removes any loose concrete, dirt, and debris, providing a clean surface for the filler to adhere to. Once the cleaning is complete, use a shop vacuum to remove any remaining particles.
- Widen the Crack: In some cases, the crack may be too narrow to effectively accommodate the filler. If this is the case, use a chisel and hammer to widen the crack slightly. Creating a V-shaped groove will provide more surface area for the filler to bond with, improving the repair’s longevity.
Step 2: Fill the Crack
- Select the Filler: The success of your repair project hinges on choosing the right concrete crack filler. The selection should be based on the type and size of the crack. Manufacturers provide specific instructions regarding their products, so be sure to follow them meticulously.
- Apply the Filler: Using a caulk gun, apply the chosen filler into the crack. Start at one end and work your way to the other, ensuring the filler is level with the surface of the garage floor. Be patient and methodical during this step, as a smooth application will result in a more aesthetically pleasing and effective repair.
Step 3: Smooth out the Filler
After filling the crack, it’s crucial to ensure that the repaired area is flush with the surrounding surface. To achieve this, you’ll need to use a trowel or putty knife.
Gently press the tool against the filled crack and run it smoothly over the surface, leveling the filler with the rest of the floor. A well-smoothed filler not only looks better but also minimizes the chances of tripping hazards.
Step 4: Allow the Filler to Dry
Drying time is a critical aspect of the repair process. Different fillers have varying drying times, so it’s essential to follow the manufacturer’s instructions.
In general, it may take several hours or even a few days for the filler to fully cure. During this time, it’s crucial to avoid any foot traffic or heavy loads on the repaired area to ensure a durable, long-lasting repair.
Step 5: Seal the Crack
Once the filler is dry and has fully cured, it’s time to apply the sealer. This step is vital as it not only provides a finishing touch to the repair but also adds a protective layer to the repaired area and the surrounding concrete.
- Select the Sealer: Choose a concrete sealer that is compatible with the filler you’ve used. This compatibility ensures that the two products work harmoniously to protect your garage floor.
- Apply the Sealer: Using a clean trowel or a brush, apply the sealer evenly over the filled crack and the surrounding area. Be thorough in your application, ensuring that the entire repaired section is adequately covered.
Tips for Maintaining Your Repaired Concrete Garage Floor
To ensure the longevity of your repaired concrete garage floor, consider these maintenance tips:
- Regularly clean your garage floor to remove dirt and debris.
- Avoid using harsh chemicals or de-icing salts that can damage the concrete.
- Reapply sealer as needed to maintain a protective barrier.
How to Prevent Cracks in Your Concrete Garage Floor in the Future
Preventing cracks in your garage floor is key to avoiding future repairs. Here are some preventive measures:
- Ensure proper drainage to divert water away from the garage.
- Apply an epoxy coating to the surface for added protection.
- Avoid heavy loads and sharp impacts that can damage the concrete.
In conclusion, repairing cracks in your concrete garage floor is a manageable DIY project. With the right tools, materials, and safety precautions, you can restore the functionality and appearance of your garage floor.
Remember, a well-maintained garage floor enhances safety and adds value to your property. So, don’t wait; take action now and learn how to repair cracks in your concrete garage floor.