Install Garage Door Opener Genie
Install garage door opener genie is a decision that requires careful consideration. Selecting the right model is crucial to meet the specific needs of your garage.
This comprehensive guide will walk you through the step-by-step process of replacing your existing garage door opener with the Genie Stealth 750, a robust one and a quarter horsepower motor designed for optimal performance.
Assessing the Need for an Upgrade
Recognizing the Struggle
As you take the initiative to enhance the insulation of your garage door, it’s essential to pay attention to how your current garage door opener is coping with the changes.
If you find that the opener is noticeably struggling to lift the door after the insulation upgrade, this is a clear indication that it may be time for an upgrade.
The added weight and resistance from the insulated door might be pushing your existing half-horsepower motor to its limits.
Recognizing this struggle is the first step in acknowledging the need for a more robust and powerful garage door opener. An opener that struggles can lead to issues such as wear and tear, increased energy consumption, and overall inefficiency.
Understanding the Challenge
While manually opening the garage door is an option, it’s not a practical or convenient solution, especially when dealing with a heavier door.
The challenge lies in the fact that the existing half-horsepower motor may not possess the strength needed to effortlessly lift the insulated garage door.
Upgrading to the Genie Stealth 750, equipped with a powerful one and a quarter horsepower motor, becomes a logical and effective solution.
This upgrade ensures that the motor has the necessary strength and capacity to handle the increased weight and resistance posed by the insulated door.
By understanding this challenge, you’re making a proactive choice to invest in a garage door opener that aligns with the specific requirements of your upgraded garage door.
The Genie Stealth 750’s enhanced power capacity not only addresses the immediate challenge but also provides a long-term solution, offering smoother and more efficient operation for your garage door.
This upgrade is not just about addressing current issues but also about future-proofing your garage door opener to handle any potential modifications or changes in the door’s characteristics.
Unboxing and Preparation
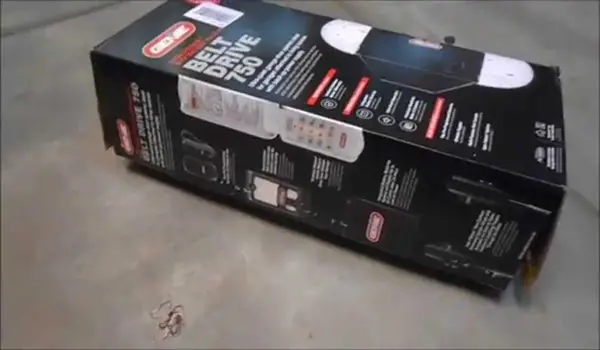
1. Examining the Contents
As you embark on the installation journey of the Genie Stealth 750, the first step is to delve into the package and thoroughly examine its contents. The package should include various essential components:
- Rails: These are the foundational structures that guide the movement of the garage door. Ensure all rail components are present and undamaged.
- Mounting Parts: Check for brackets, screws, and any additional mounting hardware required for a secure installation.
- Sides: Components that contribute to the lateral stability of the garage door opener system.
- Battery Backup: This crucial component ensures your garage door remains operational during power outages. Inspect the backup unit and its accompanying hardware.
- Wall Mount Control: The interface for controlling the garage door. Confirm that all control buttons and features are intact.
- Idle Pulley: This component plays a role in maintaining tension in the system. Verify its presence and condition.
- Motor: The powerhouse of the garage door opener. Examine the motor unit for any signs of damage during transit.
2. Assembling the Rails
Following the provided instructions, assemble the rails with precision. Proper attachment and alignment are crucial for the smooth movement of the garage door.
Take note of any specific orientations or configurations specified in the instructions to guarantee optimal performance.
During this stage, attention to detail is key. Ensuring that the rails are securely connected and aligned correctly sets the stage for a stable and reliable garage door opener system.
3. Installing the Belt
Understand the correct placement of the belt in the system. The belt is a vital component that facilitates the transfer of motion from the motor to the garage door. Ensure it is securely tightened, providing the necessary tension for efficient operation.
Proper slack is essential for the longevity and smooth functioning of the belt. Follow the guidelines in the instructions to achieve the appropriate slack, preventing unnecessary strain on the system.
4. Attaching the Rail to the Motorhead
Align the assembled rail with the motorhead, the central unit housing the motor. Secure the connection with bolts, ensuring a stable and robust attachment. The alignment at this stage is critical for the flawless operation of the garage door opener.
5. Adding the Battery Backup
Install the battery backup unit to ensure uninterrupted operation during power outages. Secure it in place using the screws provided in the kit. This step adds an extra layer of convenience and reliability to your garage door system.
The battery backup is a crucial feature, offering peace of mind and functionality even when external power sources are unavailable.
Removing the Old Opener

1. Disconnecting Wires
Before bidding farewell to the old garage door opener, it’s essential to disconnect the wires with precision.
Begin by identifying and separating the wires responsible for crucial functions, such as safety sensors and the wall-mounted control. Exercise caution during this step to avoid damaging any wires or components.
- Safety Sensors: Locate the wires connected to the safety sensors, which play a vital role in preventing accidents by detecting obstacles in the door’s path. Safely unplug these wires, keeping track of their colors and positions for later reconnection.
- Wall-Mounted Control: Identify the wires leading to the wall-mounted control panel. Carefully disconnect these wires, ensuring a clean separation without any damage to the connectors.
Properly labeling or taking note of the wiring configuration can simplify the reinstallation process later on.
2. Removing the Old Opener
With the wires safely disconnected, it’s time to bid farewell to the old garage door opener. Detach the opener from its mounts systematically, taking necessary precautions to prevent any accidents during the removal process. This may involve removing bolts, screws, or any fasteners securing the opener to its mounting points.
- Safety Measures: Consider taking extra safety measures, such as securing the garage door in its open position, to prevent any unexpected movements during the removal process. Additionally, if the old opener is heavy, consider seeking assistance or using appropriate tools to handle the removal safely.
- Preservation for Reuse: If there are components, brackets, or mounts that can be reused for the new Genie Stealth 750 opener, set them aside for later use. This eco-friendly approach can save resources and streamline the installation process.
3. Preparing for the New Opener
Before installing the new Genie Stealth 750 opener, it’s crucial to prepare the existing mounts. This involves a few key steps:
- Cleaning and Inspection: Thoroughly clean the mounting area, removing any debris or accumulated dirt. Inspect the mounts for any signs of wear or damage. If necessary, address any issues to ensure a secure foundation for the new opener.
- Alignment Check: Confirm that the existing mounts align with the specifications outlined in the Genie Stealth 750 installation instructions. Adjustments may be necessary to ensure a perfect fit.
- Compatibility Verification: Ensure that the existing mounts are compatible with the Genie Stealth 750 model. Cross-reference the specifications to avoid any compatibility issues during installation.
Install Garage Door Opener Genie

1. Securing the New Opener
With the old opener removed and the mounts prepped, it’s time to introduce the new and powerful Genie Stealth 750 to your garage door system. Align the Genie Stealth 750 with the existing mounts, ensuring a perfect match.
Secure the opener in place by fastening it with bolts. Pay close attention to the manufacturer’s recommendations for torque specifications, ensuring a tight and secure attachment.
- Alignment Precision: Double-check that the new opener aligns seamlessly with the existing mounts. An accurate alignment is crucial for the smooth and efficient operation of the garage door.
- Balanced Positioning: Ensure the Genie Stealth 750 is positioned evenly to distribute the weight evenly across the mounting points. This balanced placement contributes to the longevity of the opener and its components.
2. Connecting Wires
Reconnect the wires that were carefully disconnected from the old opener. Exercise precision in aligning the wires with their respective connectors, following any labeling or notes made during the disconnection process.
- Safety Sensors: Reconnect the safety sensor wires, paying attention to the correct color-coding. Ensure a secure and snug connection to guarantee the sensors function correctly.
- Wall-Mounted Control: Reattach the wires leading to the wall-mounted control panel. Confirm that each wire is securely connected to the corresponding terminal.
- Thorough Check: Conduct a thorough check to verify that all wires are correctly connected, minimizing the risk of malfunctions during operation.
3. Testing the Opener
The success of the installation hinges on the proper functioning of the Genie Stealth 750. Program the travel buttons according to the manufacturer’s instructions. This involves setting the upper and lower travel limits for the garage door’s movement.
- Install the battery backup: Test the opener’s functionality by activating the travel buttons. Ensure that the garage door moves smoothly and stops at the designated upper and lower limits. Any unusual noises or erratic movements should be addressed promptly.
- Sensor Verification: Check the functionality of safety sensors by obstructing the garage door’s path. The door should halt its movement and reverse if any obstruction is detected.
4. Final Adjustments
Fine-tune the travel settings if necessary. Make any adjustments to the travel limits to ensure optimal performance. This may involve tweaking the settings to achieve the perfect balance between door travel and stopping points.
- Noise Assessment: Listen for any unusual sounds during the garage door’s operation. If any issues arise, inspect the opener for potential causes and make adjustments accordingly.
5. Enjoying the Upgrade
With the Genie Stealth 750 seamlessly installed and fully operational, it’s time to revel in the upgraded functionality of your garage door opener. Experience the enhanced power and efficiency provided by the new one and a quarter horsepower motor.
- Peace of Mind: Enjoy the peace of mind that comes with a reliable and powerful garage door opener. The Genie Stealth 750 not only addresses immediate concerns but also sets the stage for consistent and dependable performance.
- Long-Term Satisfaction: The upgraded opener ensures a long-term solution to the challenges posed by a heavier, insulated garage door. Experience the convenience and satisfaction of a garage door system optimized for performance and durability.
Opener Genie Problem:
- Solid Red Light on Genie Garage Door Opener
- Genie Garage Door Opener Light Bulbs
- Genie Garage Door Won’t Open With Wall Switch
- How to Program Genie Intellicode Garage Door Opener
Conclusion
Upgrading your garage door opener becomes not just a necessity but a strategic investment, especially when faced with the challenges of a heavier, insulated door.
The introduction of the Genie Stealth 750, armed with its robust one and a quarter horsepower motor, guarantees a level of operation that is both smooth and efficient.
By following this comprehensive guide, you can navigate through the installation process seamlessly, ushering in a new era of enhanced functionality to your garage.
Frequently Asked Questions
Do I need to replace my garage door opener if it struggles with a heavier door?
Yes, it is highly advisable to upgrade to a more powerful motor for optimal performance. The Genie Stealth 750 provides the necessary strength to handle the increased weight and resistance of a heavier, insulated door.
Can I reuse the existing rails when installing a new opener?
While it is possible to reuse existing rails, it is recommended to use the new rails provided with the Genie Stealth 750 for a secure and stable installation. This ensures compatibility and optimal performance.
What is the purpose of the battery backup?
The battery backup serves a crucial role in ensuring your garage door remains operational during power outages. It provides a reliable power source, allowing you to access your garage even when the main power supply is unavailable.
How often should the belt be replaced?
The belt is designed to last a lifetime, making replacement rarely necessary. The durable construction of the belt in the Genie Stealth 750 ensures long-term reliability and efficiency.
Can I use the existing safety sensors with the new opener?
While it is possible to use existing safety sensors, employing all new components ensures a seamless and reliable garage door system. The Genie Stealth 750 is optimized for compatibility with its provided sensors, contributing to a more dependable setup.


