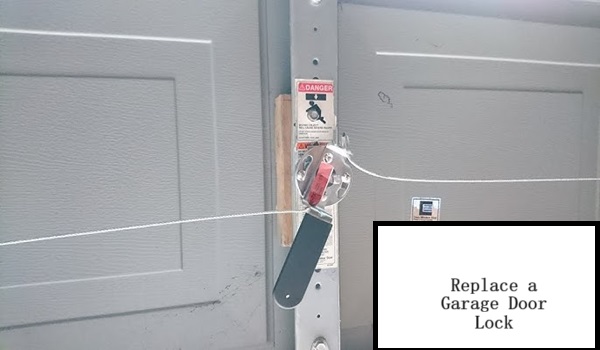
Replace a Garage Door Lock
Garage doors are not just a functional part of your home; they are a critical component of your home’s security system.
The garage door lock, often overlooked, plays a pivotal role in ensuring the safety of your property.
In this comprehensive guide, I will take you through the step-by-step process of replace a garage door lock, empowering you to enhance the security of your home with a hands-on approach.
Understanding Garage Door Locks
Garage door locks come in various types, ranging from the traditional T-handle locks to more sophisticated electronic systems.
Each type serves the common purpose of securing your garage, where valuable possessions such as vehicles and tools are stored. Understanding the nuances of these locks is crucial before embarking on the replacement journey.
Assessing Garage Door Lock
Before diving into the replacement process, it’s essential to assess the condition of your current lock.
Regular wear and tear, rust, or visible damage can compromise the effectiveness of the lock. If any issues are detected, it’s a clear signal that a replacement is in order.
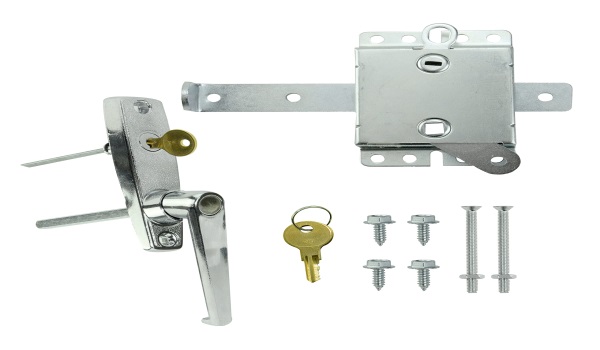
Tools and Materials Needed
A successful lock replacement requires the right tools and materials. Collect essentials such as screwdrivers, pliers, and, of course, the new lock.
Follow the manufacturer’s recommendations for any specific materials needed, ensuring a seamless replacement process.
Step 1 – Start from the Inside: Initiating the Replacement Process
Embarking on the replacement journey from the interior of garage is a calculated and strategic approach. This methodical beginning allows you to gain a comprehensive understanding of the internal mechanisms.
To kickstart this process, identify and meticulously remove the fasteners that tightly hold the various door components together. This initial step sets the groundwork for what follows, ensuring a seamless and systematic replacement.
Step 2 – Removing the Outside Assembly: Precision in Dismantling
Moving seamlessly from the interior, the next crucial phase involves addressing the external components. Identify the intricate components and fasteners constituting the outside assembly.
Execute a careful removal of the existing lock from the front of the door, creating a clean slate for the forthcoming installation of the new lock. This step is pivotal in ensuring a smooth transition from the old to the new, preparing the space for enhanced security.
Step 3 – Replacing the Lock: Elevating Security Measures
Selecting a lock that aligns perfectly with your security requirements is paramount to the success of the entire replacement process. The chosen lock should not only meet your security needs but also seamlessly integrate with your garage door system.
Installing the new lock demands precision, ensuring a snug fit and optimal functionality. This step serves as the crux of the entire process, as the effectiveness of your upgraded security system hinges on this meticulous installation.
Step 4 – Reassembling the Door: The Puzzle of Components
Reassembling the door components, albeit in reverse order, is a task that demands both patience and attention to detail. This phase can be complex, and having an assistant proves immensely helpful.
An extra set of hands ensures that exterior components are held in place, easing the intricacies of reassembly. Navigating through this puzzle of components requires methodical precision to guarantee that each piece falls into place seamlessly.
Step 5 – Installing the Handle: The Final Touch
With the lock securely in its designated place, the subsequent step involves the installation of the handle. Confirming that the handle aligns perfectly and operates with smooth efficiency is the ultimate touch in restoring your garage door to its full functionality.
The handle is not just a functional component; it is the tactile connection between you and your secured space. Ensuring its proper installation is the last step towards a successfully upgraded garage security system.
Testing the New Lock: Meticulous Assurance
After the replacement process is complete, thorough testing becomes paramount. This meticulous phase ensures that the newly installed lock effectively secures the door, leaving no room for vulnerabilities.
Rigorous testing guarantees that the lock operates seamlessly, without any issues in alignment or functionality. This final step is the ultimate assurance of the success of your DIY lock replacement, providing peace of mind regarding the enhanced security of your garage.
You may also like:
How to Lock Garage Door Manually
Common Mistakes to Avoid
Embarking on a DIY garage door lock replacement journey is empowering, but it comes with its own set of challenges. To ensure a successful outcome, it’s crucial to steer clear of common mistakes that may compromise the effectiveness of your efforts. Here are key pitfalls to avoid:
- Mishandling Components: One of the most common errors is mishandling crucial components during the replacement process. Rough handling can lead to damage, affecting the overall functionality of the door lock. Take a gentle and methodical approach to prevent unnecessary wear and tear.
- Using Incorrect Tools: Each step in the replacement process requires specific tools. Using the wrong tools can not only make the process more challenging but may also cause damage to components. Ensure you have the right tools as per the manufacturer’s recommendations to avoid complications.
- Rushing Through Steps: DIY projects often tempt individuals to rush through the steps, especially when faced with challenging tasks like reassembling the door components. Resist the urge to hurry and instead, take your time to follow each step meticulously. Patience is key to a successful DIY lock replacement.
- Neglecting Safety Precautions: Safety should always be a top priority. Ignoring safety precautions can lead to injuries or accidents during the replacement process. Use protective gear, follow safety guidelines, and exercise caution to create a secure environment for yourself and others.
By avoiding these common mistakes, you increase the likelihood of a smooth and successful DIY garage door lock replacement.
Benefits of DIY Garage Door Lock Replacement
Engaging in a DIY garage door lock replacement extends beyond the evident cost savings. While saving money is undoubtedly a significant benefit, there are broader advantages to consider:
- Empowerment through Skill Acquisition: Undertaking a DIY project imparts essential maintenance skills to homeowners. It transforms you from a passive homeowner to an active participant in the upkeep of your property. The knowledge gained during the process becomes a valuable asset.
- Enhanced Security: Taking proactive measures to replace your garage door lock enhances the security of your home. By understanding the intricacies of your garage door system, you gain greater control over your home’s safety. This sense of control fosters peace of mind and confidence in your property’s security.
- Customization Possibilities: DIY projects allow for a personalized touch. You can choose a lock that aligns with your specific security needs and preferences. This level of customization ensures that your security system meets your unique requirements.
Conclusion
In conclusion, replace a garage door lock lock is not just a task; it is a manageable and empowering DIY endeavor. Following the outlined steps ensures not only a safer living space but also equips you with insights into basic garage door maintenance.
This empowerment transcends the immediate task at hand, instilling a sense of confidence and control over your home’s security.
By embracing the benefits of DIY and avoiding common pitfalls, you emerge not only as a homeowner but as an active guardian of your property’s safety.


