Welcome to this comprehensive guide on how to program a LiftMaster garage door opener. Whether you’ve recently installed a new opener or need to reprogram an existing one, this step-by-step tutorial will walk you through the process. How to program Liftmaster garage door opener ensures that it works smoothly, providing convenience and security for your home.
Understanding LiftMaster Garage Door Openers
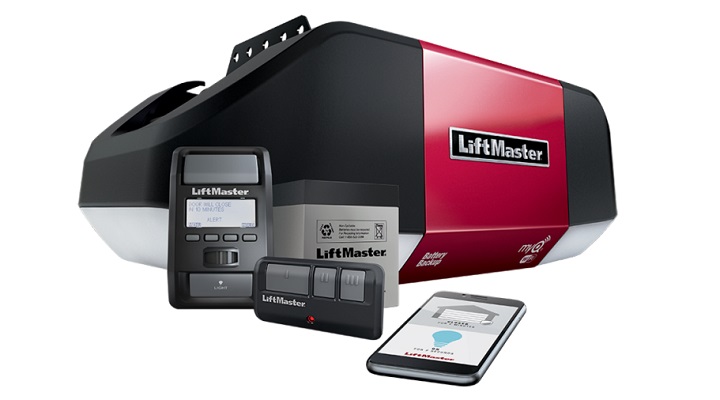
LiftMaster is a reputable brand that offers a range of high-quality garage door openers. These openers use advanced technology to provide secure and reliable access to your garage. Before diving into the programming process, it’s important to understand the key components of a LiftMaster garage door opener:
- Remote Control: The handheld device used to open and close the garage door remotely.
- Keypad: An optional accessory that allows you to enter a PIN to operate the garage door.
- Opener Unit: The main component installed in your garage, responsible for lifting and lowering the door.
Now that you have a basic understanding of LiftMaster garage door openers, let’s move on to preparing for the programming process.
Read Also: Chamberlain vs LiftMaster Garage Door Openers
Preparing for Programming
Before you begin programming your LiftMaster garage door opener, make sure you have the following items ready:
- A ladder, if needed, to access the opener unit.
- The remote control(s) and keypad you want to program.
- New batteries for the remote control(s) and keypad, if necessary.
It’s important to note that the programming instructions may vary slightly depending on the model of your LiftMaster garage door opener. Refer to the user manual or manufacturer’s website for specific instructions related to your model.
How to Program Liftmaster Garage Door Opener
Follow these steps to successfully program your LiftMaster garage door opener:
1. Clearing Existing Codes
Before programming new remote controls or keypads, it’s essential to clear any existing codes from the opener unit. This ensures that only the desired devices can operate the garage door. Here’s how to clear the existing codes:
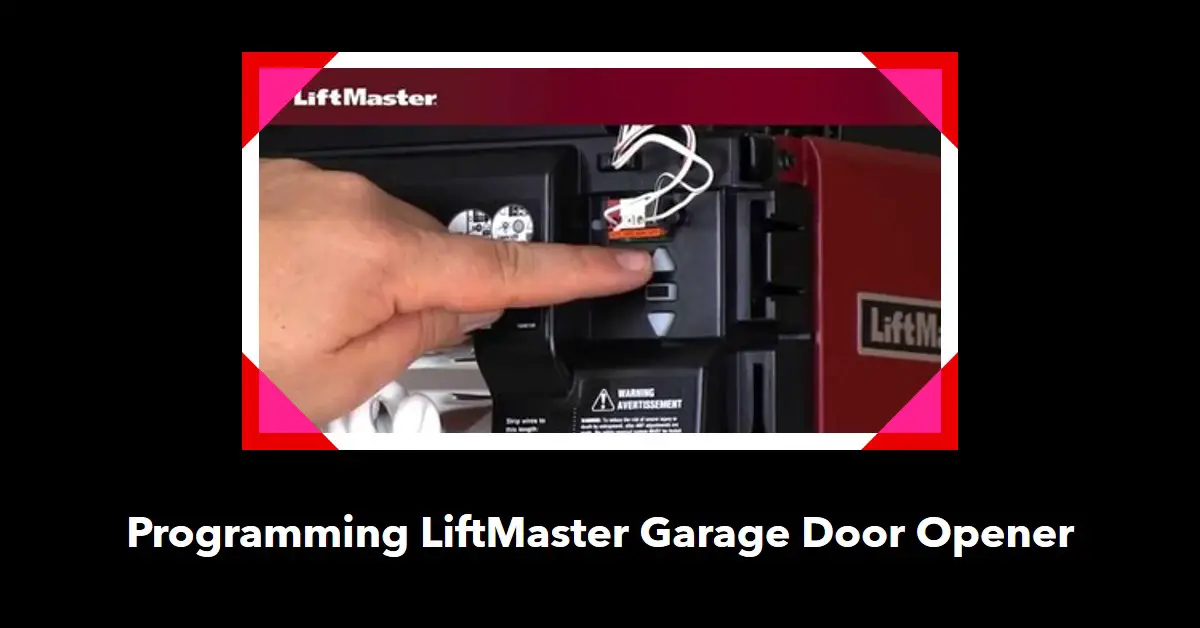
- Locate the “Learn” button on your opener unit. The button is typically near the antenna wire.
- Press and hold the “Learn” button for about 6 seconds until the indicator light next to it turns off.
- Release the “Learn” button. The existing codes are now cleared, and the opener is ready for programming.
2. Locating the Learn Button
To proceed with programming, you need to locate the “Learn” button on your LiftMaster garage door opener. The exact location of the button may vary depending on the model, but it is usually found near the antenna wire or on the back panel of the opener unit.
Refer to your user manual or manufacturer’s instructions to locate the specific position of the “Learn” button for your opener.
3. Initiating the Programming Mode
Once you have identified the “Learn” button, you can initiate the programming mode. This mode allows the opener to learn the unique codes of your remote control and keypad. Follow these steps to enter the programming mode:
- Stand within a few feet of the opener unit with your remote control or keypad in hand.
- Press and release the “Learn” button on the opener unit. The indicator light will begin to blink, indicating that the opener is ready to learn the codes.
4. Programming the Remote Control
Now it’s time to program your LiftMaster garage door opener remote control. The process may slightly vary depending on the model, but here is a general procedure to follow:
- Press and release the desired button on the remote control that you want to program to the opener.
- Within 30 seconds of pressing the button, return to the opener unit.
- Press and hold the same button on the remote control until the opener unit’s indicator light blinks or clicks. This indicates that the remote control has been successfully programmed.
Repeat the same steps for each remote control you want to program, ensuring you follow the specified time limits.
5. Programming the Keypad
If you have a LiftMaster garage door opener keypad, you can also program it to operate your opener. Here’s how to do it:
- Enter the four-digit PIN code you want to assign to the keypad. Make sure it’s a code that you can easily remember.
- Within 30 seconds of entering the PIN code, press and hold the “Enter” button on the keypad.
- While holding the “Enter” button, also press and release the “Learn” button on the opener unit.
- Release both buttons. The opener unit’s indicator light should blink or click, indicating that the keypad has been successfully programmed.
6. Testing the Programming
Once you have programmed your remote control(s) and keypad, it’s important to test if the programming was successful. Follow these steps to ensure everything is working correctly:
- Stand within the range of the opener unit with your remote control or keypad.
- Press the button you programmed on the remote control or enter the PIN code on the keypad.
- Observe if the garage door responds by opening or closing accordingly.
- Repeat the test with each programmed remote control and the keypad to verify their functionality.
Congratulations! You have successfully programmed your LiftMaster garage door opener and tested its operation.
Troubleshooting Common Issues
While programming a LiftMaster garage door opener is a straightforward process, you may encounter some issues along the way. Here are some common problems and their possible solutions:
Remote Control Not Working
If your remote control is not working after programming, try the following troubleshooting steps:
- Ensure the batteries are properly installed and have sufficient power.
- Check if the remote control is within range of the opener unit.
- Reprogram the remote control following the programming steps carefully.
Keypad Not Responding
If your keypad is not responding after programming, try these troubleshooting steps:
- Double-check that you entered the correct PIN code during programming.
- Ensure the keypad is within range of the opener unit.
- Reprogram the keypad, making sure to follow the programming steps accurately.
Opener Not Recognizing the Remote Control or Keypad
If your opener does not recognize the remote control or keypad after programming, consider the following solutions:
- Ensure that you cleared any existing codes before programming.
- Check if the remote control or keypad is compatible with your LiftMaster opener model.
- Reprogram the remote control or keypad, ensuring that you follow the programming steps precisely.
If you continue to experience issues with programming or operation, consult your user manual or contact LiftMaster customer support for further assistance.
Read Also: Liftmaster Garage Door Not Closing
Maintenance and Tips
To keep your LiftMaster garage door opener in optimal condition and ensure its longevity, follow these maintenance tips:
Keeping the Remote Control and Keypad Clean
Regularly clean the surface of your remote control and keypad to remove dust, dirt, and debris. Use a soft cloth dampened with a mild cleaning solution. Avoid using abrasive cleaners that may damage the devices.
Changing Batteries Regularly
Monitor the battery level of your remote control and keypad. Replace the batteries as needed to ensure reliable operation. Refer to the user manual for instructions on battery replacement specific to your devices.
Additional Security Measures
Consider enhancing the security of your garage by implementing additional measures such as:
- Installing a security camera system to monitor activity around your garage.
- Using a garage door lock or slide lock to secure the door when you’re away for an extended period.
- Keeping the remote control and keypad in a secure location to prevent unauthorized access.
By following these maintenance tips and security measures, you can maximize the performance and security of your LiftMaster garage door opener.
Conclusion
Programming a LiftMaster garage door opener is a straightforward process that allows you to enjoy the convenience and security of remote access to your garage. By following the step-by-step guide in this article, you can program your remote control and keypad with ease. Remember to consult your user manual or manufacturer’s instructions for specific details related to your LiftMaster opener model.
Maintaining your opener and troubleshooting common issues ensures smooth operation and enhances the longevity of your garage door opener. Regular cleaning, battery replacement, and implementing additional security measures contribute to the overall functionality and security of your garage.
If you encounter any difficulties during the programming process or experience persistent issues, don’t hesitate to reach out to LiftMaster customer support for assistance. Enjoy the convenience and peace of mind that a properly programmed LiftMaster garage door opener brings to your daily life.


