Welcome to our step-by-step guide on programming and mounting your universal wireless keypad.
We appreciate you choosing Genie, and we’re here to ensure a smooth and hassle-free setup process.
In this guide, we will walk you through the necessary steps to program your keypad and mount it securely. Let’s get started!
Step 1: Reviewing the Keypad
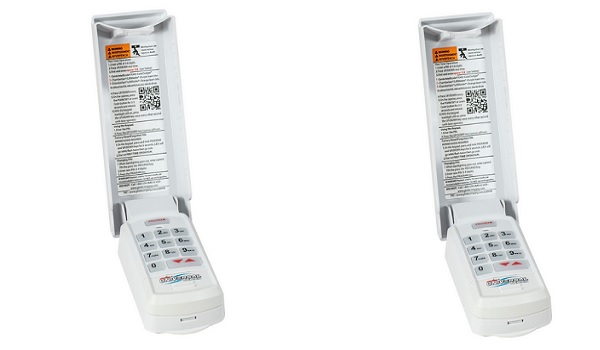
Before we dive into programming, let’s familiarize ourselves with the keypad’s buttons and indicators.
The keypad features a program key at the top, an LED indicator below it, and a numbered keypad with an up and down key.
Each time you press a button, a tone will sound, and the LED will flash, indicating that the entry is accepted.
Step 2: Activating the Keypad
To activate the keypad, open the battery compartment and pull the protective tab. Then, reinstall the compartment door.
It’s recommended to complete the programming process before mounting the keypad. Remember that programming will not be lost when you replace the batteries after completing the programming.
Step 3: Programming the Keypad
Now, let’s start programming your keypad. Make sure the keypad backlighting is off unless otherwise noted. Follow these substeps:
Substep 1: Finding Specifications and Learning the Program Button
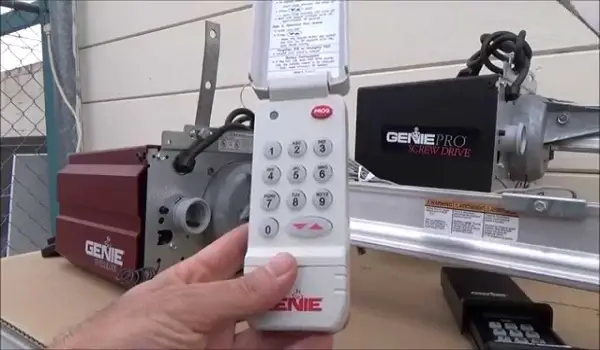
First, locate the brand and specifications of your opener. Check the label, instruction manual, or current remote to find the necessary information.
Next, identify the programming or learn code button on your garage door opener. These buttons are usually found at the bottom of the opener, facing the floor, under the light bulb cover, or on the rear of the unit, facing away from the garage door.
In some cases, the button may be on the circuit board or an external receiver mounted on or nearby the product.
Substep 2: Clearing the Keypad (Factory Reset)
Perform a factory reset on the keypad by pressing and holding both the program and up/down keys simultaneously for 5 seconds. You will hear a tone, and the green LED will flash and go out. The keypad is now reset and ready to be programmed.
Substep 3: Programming to One or More Openers
The keypad can be programmed to up to three individual garage door openers. You must complete programming for opener 1 before proceeding to opener 2 and/or 3. Follow these instructions:
- Enter a personal PIN (three to eight digits) on the keypad.
- Press and release the up/down key. The LED will flash slowly.
- Enter the ID number of the opener from the provided chart.
- Press and release the up/down key. The LED will flash rapidly.
- On the opener, press and hold the learn/program button for two to three seconds, then release.
- On the keypad, press the up/down key once every two seconds until the opener operates. Avoid pressing additional buttons once the door starts moving.
- Let the door run until it stops. The programming of opener 1 is complete.
If you have a Chamberlain, LiftMaster, or Craftsman opener with a yellow learn code button, follow the instructions displayed on the screen.
Substep 4: Programming Additional Openers (Chamberlain, LiftMaster, Craftsman)
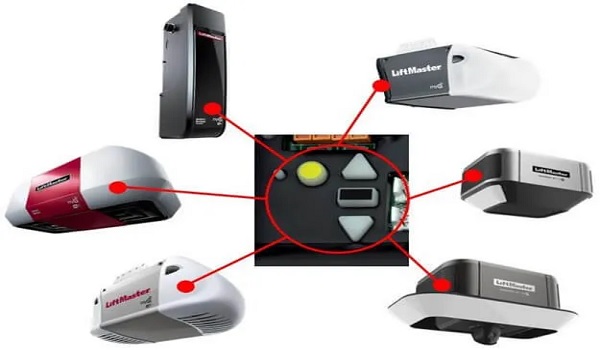
If you have a Chamberlain, LiftMaster, or Craftsman opener with a yellow learn code button, follow these additional steps:
- Ensure the keypad backlighting is off.
- Press the program button two times for the second opener or three times for the third opener. The blue LED will flash slowly.
- With the LED flashing, enter the ID number of the opener from the provided chart.
- Press and release the up/down key. The LED will flash rapidly.
- On the opener, press and hold the learn/program button for two to three seconds, then release.
- On the keypad, press the up/down key once every two seconds until the opener operates. Avoid pressing additional buttons once the door starts moving.
- Let the door run until it stops. The programming of openers 2 or 3 is complete.
Substep 5: Dip Switch Programming
If your opener uses dip switches to pair the signal with your keypad, follow these steps:
- Determine if your opener uses three positions per switch or two positions per switch.
- Refer to the provided chart to identify the button press numbers corresponding to your opener’s dip switch configuration.
- Use the chart to determine the ID number for your opener’s brand.
- On the keypad, enter a personal PIN (three to eight digits) and press the up/down key. The LED will flash slowly.
- Enter the ID number from the chart and press the up/down key. The LED will flash quickly.
- Enter the converted code on the keypad and press the up/down key once every two seconds until the door begins to operate. Programming is now complete for a single dip switch opener.
To program additional dip switch openers, repeat the process while ensuring that programming for opener 1 is already complete.
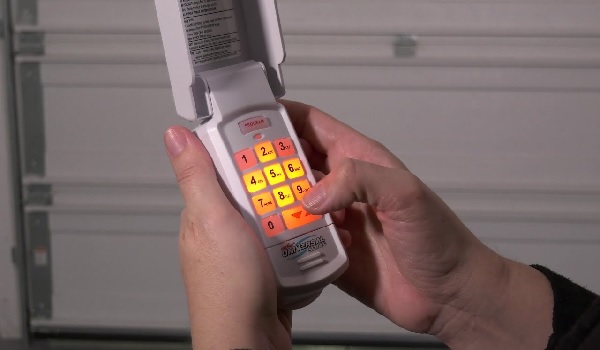
Step 4: Using the Keypad to Operate the Openers
Once the programming is complete, you can use the keypad to operate your garage door openers. Remember to turn off the number pad backlighting.
For single-door operation, enter your PIN and press the up/down key to operate the opener.
For multi-door operation, enter your PIN, press the up/down key, and then push the number corresponding to the desired door (1, 2, or 3).
Step 5: Mounting the Keypad
To mount the keypad, follow these steps:
- Remove the battery cover and batteries.
- Drill a 3/32-inch pilot hole for the top mounting screw.
- Install the provided screw into the pilot hole, leaving a 1/8-inch gap between the screw head and the wall.
- Hook the slotted mount on the back of the keypad over the screw.
- Mark and drill another 3/32-inch pilot hole for the bottom mounting screw.
- Secure the keypad to the wall, being careful not to over-tighten the screws.
- Reinsert the batteries and battery cover.
Optional: Programming Settings
If you wish to set a temporary PIN or change the main PIN, follow these optional programming settings:
1. Setting a Temporary PIN:
- Enter the current PIN and press the program key three times.
- Enter a temporary PIN (3-8 digits) and push the program key. The temporary PIN is now active.
- Note that using the original main PIN will delete the temporary PIN.
2. Changing the Main PIN:
- If you need to change the main PIN, enter the current original main PIN number.
- Press the program key once. The LED will turn solid, indicating readiness for a new main PIN.
- Enter the new PIN (3-8 digits) and press the program key once. The LED will blink twice and go out, indicating the new main PIN is set.
- The original main PIN can be used to delete the temporary PIN.
Read Also:
Solid Red Light on Genie Garage Door Opener
Conclusion
Happy! You have successfully programmed and installed your universal wireless keypad. We hope this guide was helpful in helping you through the process.
If you have further questions or need additional assistance, please visit the geniecompany.com website and select the live chat option or call customer support at 1-800-354-3643.


