Best DIY Garage Floor Epoxy
Are you tired of your drab and stained garage floor? If so, it’s time to consider a DIY garage floor epoxy project.
With the right knowledge and materials, you can transform your garage into a space that not only looks professional but also stands up to the rigors of everyday use.
In this article, I will walk you through every step of the process, from choosing the best DIY garage floor epoxy kit to applying it with finesse.
Whether you’re a seasoned DIY enthusiast or a beginner, our step-by-step instructions and expert tips will help you achieve a beautiful and durable garage floor.
What is DIY Garage Floor Epoxy?
First, let’s clarify what DIY garage floor epoxy is. Epoxy is a type of resin that, when applied to a concrete floor, creates a tough, durable, and visually appealing surface.
Epoxy coatings are available in a variety of colors and styles, allowing you to customize your garage floor to suit your preferences.
Why Should You Use DIY Garage Floor Epoxy?
There are several compelling reasons to consider DIY garage floor epoxy:
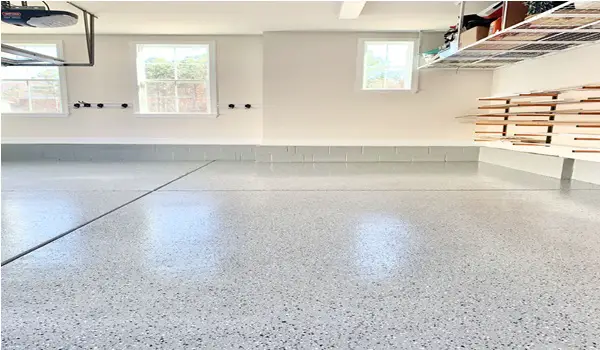
- Enhanced Durability: Epoxy coatings can withstand the heavy wear and tear of a garage, including vehicular traffic, chemicals, and abrasions.
- Improved Aesthetics: Epoxy provides a glossy, sleek finish that transforms your garage into a more inviting and professional space.
- Easy Maintenance: Epoxy is easy to clean and maintain, making it an ideal choice for busy homeowners.
Benefits of DIY Garage Floor Epoxy
Before delving into the specifics of the DIY process, let’s explore the key benefits of opting for a DIY garage floor epoxy project:
- Cost Savings: DIY projects are generally more budget-friendly than hiring professionals.
- Customization: You have control over the color and design of your garage floor.
- Personal Satisfaction: Completing a DIY project can be immensely rewarding.
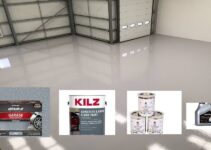
How to Choose the Best DIY Garage Floor Epoxy Kit
Selecting the right epoxy kit is crucial to ensure that your DIY garage floor epoxy project is a resounding success.
To make an informed decision, it’s essential to consider several key factors that will influence the outcome of your project. Here, we’ll delve into these considerations, offering you valuable insights to guide your choice of the best DIY garage floor epoxy kit.
Type of Epoxy
One of the first decisions you’ll face is selecting the type of epoxy for garage floor. Two primary categories are available: water-based and solvent-based epoxy formulations. Each has its own set of advantages and disadvantages.
- Water-Based Epoxy: This option is environmentally friendly, with low VOC content. It’s generally easier to work with, making it an excellent choice for DIY enthusiasts. Water-based epoxy is known for its quick drying time and minimal odor. However, it may not be as durable as its solvent-based counterpart, making it better suited for less demanding garage environments.
- Solvent-Based Epoxy: Solvent-based epoxy is renowned for its exceptional durability and chemical resistance, making it ideal for high-traffic and industrial garages. It offers a glossy, professional finish that’s hard to beat. However, it often emits strong fumes during application, necessitating proper ventilation, and has a longer curing time.
To determine the best fit for your garage, consider your specific needs and preferences. If you prioritize a fast, user-friendly application and a more eco-friendly product, water-based epoxy may be your best choice.
On the other hand, if you require exceptional durability and are willing to tolerate longer curing times and stronger odors, solvent-based epoxy is a suitable option.
Coverage and Thickness
Calculating the square footage of your garage is an essential step to determine how much epoxy you’ll need. Most DIY garage floor epoxy kits provide coverage information on their packaging, typically in square feet. It’s crucial to ensure that the kit you select offers sufficient coverage for your garage floor.
Pay attention to the thickness of the epoxy coating provided by the kit. A thicker coat generally translates to increased durability, which is especially important if your garage receives heavy use.
To calculate the square footage of your garage, simply multiply the length by the width. This figure will help you identify the right kit for your project, ensuring that you have adequate epoxy to cover the entire area.
Color Options
One of the remarkable features of epoxy is its wide range of color options. Epoxy coatings are available in various colors, allowing you to customize your garage floor to match your personal aesthetic preferences.
When selecting a color, consider how it complements the overall look and feel of your garage space. A cohesive color scheme can transform your garage into an appealing and professional environment.
Choose a color that not only enhances the visual appeal of your garage but also complements your walls, storage, and any other design elements.
Whether you opt for a sleek, solid color or a dynamic blend of decorative chips, your choice will have a significant impact on the overall aesthetics of your garage.
Additional Features
When evaluating DIY garage floor epoxy kits, take note of any additional features or options that might enhance the functionality and appearance of your floor. Some kits may offer the following:
- Decorative Chips: These chips, often included in the kit, can be scattered across the wet epoxy to create a textured and visually appealing surface. The chips also provide additional traction, improving the floor’s slip resistance.
- Anti-Slip Properties: For garages that may become slippery when wet, look for epoxy kits that explicitly provide anti-slip properties. This feature can contribute to safety, especially in areas prone to moisture.
- UV Resistance: Epoxy coatings with UV resistance are less likely to yellow or deteriorate when exposed to direct sunlight. This is an essential feature if your garage has ample natural light.
Before making your final choice, assess your specific needs and preferences. These additional features can make a significant difference in the performance and aesthetics of your garage floor.
How to Prepare a Concrete Garage Floor for Epoxy Application
The success of your DIY garage floor epoxy project depends heavily on proper preparation. Without thorough and meticulous floor preparation, you may encounter adhesion issues and imperfections in the final epoxy coating. Follow these crucial steps to ensure that your garage floor is well-prepared for the epoxy application:
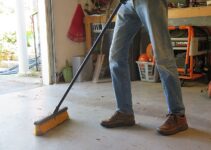
Cleaning
Cleaning your garage floor is the first and most essential step in the preparation process. Over time, garage floors accumulate a layer of dirt, dust, oil, and grease, which must be completely removed to create a surface that the epoxy can bond to effectively.
- Sweep: Begin by sweeping the entire garage floor to remove loose debris and dust. A broom or dust mop is ideal for this purpose.
- Degreasing: For oil and grease stains, use a commercial degreaser or a mixture of water and a few drops of dish soap. Scrub the stained areas with a stiff bristle brush to break down and remove the contaminants.
- Rinsing: Rinse the entire floor with clean water to remove any remaining cleaning residues. Make sure that all cleaning solutions are completely removed.
The goal of this cleaning step is to create a clean, pristine surface for the epoxy to adhere to. Any remaining dirt or contaminants can compromise the bond between the epoxy and the concrete.
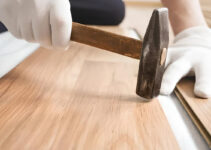
Repair Any Cracks
Before applying epoxy, it’s essential to address any cracks or imperfections in the concrete. These imperfections not only affect the appearance of the finished floor but can also weaken the epoxy’s structural integrity.
- Crack Assessment: Inspect the entire floor for cracks, chips, or holes. Identify the areas that require repair.
- Crack Filling: For small cracks, use a concrete patching compound or epoxy filler. Fill the cracks, ensuring that the material is level with the surrounding surface. For larger cracks or deep holes, consult a professional for proper repair.
By addressing these imperfections, you’ll create a smoother, more uniform surface, ensuring a more attractive and durable epoxy coating.
Etching
Etching is a critical step in preparing the concrete surface for epoxy application. The purpose of etching is to create a rough texture on the concrete, allowing the epoxy to adhere better. The method you use for etching depends on the type of epoxy you’ve selected and the manufacturer’s recommendations.
- Acid Etch: Acid etching involves the use of a diluted acid solution, typically muriatic acid. Be sure to follow safety guidelines, including wearing protective gear, when using acids. After applying the acid solution and allowing it to sit for a specified time, rinse thoroughly with water to neutralize the acid.
- Mechanical Grinding: For some epoxy types, mechanical grinding is the preferred method of etching. This involves using a concrete grinder to abrade the surface, creating the necessary texture for epoxy adhesion. Be sure to follow safety precautions when using power tools.
The choice between acid etching and mechanical grinding depends on the epoxy manufacturer’s recommendations and your comfort level with the process. Regardless of the method used, proper etching is essential to achieving a strong bond between the epoxy and the concrete.
Priming
Before applying the epoxy, it’s crucial to apply a primer to the prepared concrete surface. The primer serves several vital functions, including improving adhesion and preventing air bubbles from forming beneath the epoxy coating.
- Mixing: Follow the manufacturer’s instructions to mix the epoxy primer thoroughly.
- Application: Using a roller or brush, apply the primer evenly across the entire floor. Make sure that the primer is applied in a thin, uniform layer.
- Drying Time: Allow the primer to dry for the time specified by the manufacturer. This typically ranges from a few hours to overnight.
The primer creates a strong foundation for the epoxy to adhere to, ensuring that the final coating is not only durable but also visually appealing.
With the concrete floor well-prepared, your garage is now ready for the application of the epoxy coating. Proper preparation ensures that the epoxy adheres well and provides a long-lasting, beautiful finish.
How to Apply Garage Floor Epoxy: A Step-by-Step Guide
Once your garage floor is prepped and ready, it’s time to embark on the exciting phase of applying the epoxy coating.
To achieve a professional finish, it’s crucial to follow a precise step-by-step guide that covers every aspect of the application process.
This ensures that your DIY garage floor epoxy project results in a beautiful and long-lasting floor. Let’s dive into the details of each step:
Mixing
Epoxy coatings consist of two components: the epoxy resin and the epoxy hardener. It’s imperative to mix these components together thoroughly to activate the chemical reaction necessary for the epoxy to cure properly. Follow these steps for accurate mixing:
- Read the Instructions: Begin by carefully reading the manufacturer’s instructions included with your epoxy kit. The specific mixing ratios and instructions may vary depending on the product.
- Preparation: Wear the recommended protective gear, such as gloves and safety glasses, to protect your skin and eyes from contact with epoxy. Adequate ventilation is also crucial to dissipate any fumes.
- Pour and Mix: In a clean and suitable container, pour the epoxy resin and epoxy hardener according to the specified ratio. Typically, this is a one-to-one ratio. Use a stir stick or paddle to mix the components thoroughly. Stir until the mixture is homogenous.
- Limited Time: Keep in mind that epoxy has a limited pot life, meaning it will remain workable for a specific duration. Be sure to use the mixed epoxy within the recommended time frame.
Cut-in
Before you start rolling epoxy onto the main floor, it’s essential to create a clean and precise edge around the perimeter of the garage. This process is known as “cutting in” and is typically done using a brush or roller. Here’s how to achieve a professional cut-in:
- Brush or Roller: Depending on your preference and the kit’s instructions, use either a brush or roller for this step. Brushes allow for more precision, while rollers cover larger areas more quickly.
- Start at Edges: Begin by applying epoxy to the edges and corners of the garage floor. This creates a clean border, ensuring that the epoxy covers all areas uniformly.
- Maintain a Wet Edge: As you work your way around the garage, it’s crucial to maintain a wet edge. This means that the epoxy you apply should still be wet as you move on to the next section. This prevents visible seams or lines from forming in the final finish.
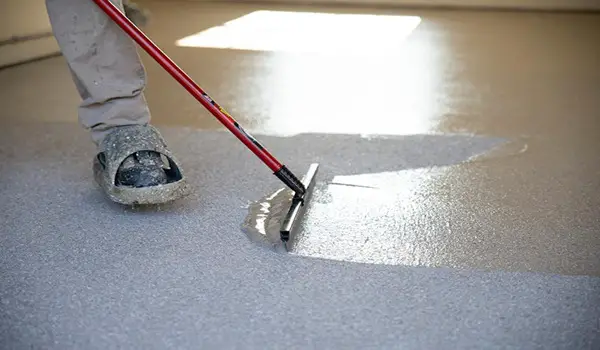
Rolling
With the edges cut in, it’s time to apply epoxy to the main floor using a roller. A roller with an extension handle is an excellent choice for this step, as it allows you to work comfortably and efficiently. Follow these steps for a smooth and even application:
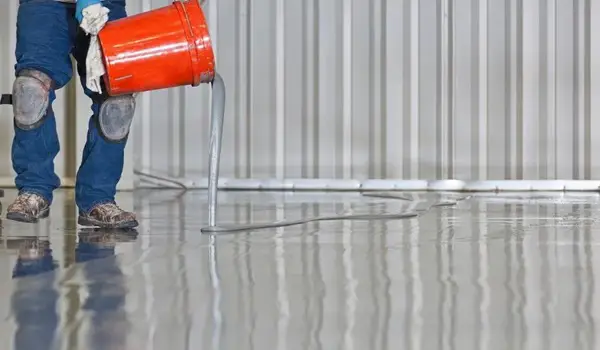
- Sectional Approach: Divide the garage floor into smaller sections to ensure that you can work while the epoxy is still wet.
- Pour and Spread: Pour a small amount of epoxy onto the floor in one section. Then, use the roller to spread the epoxy evenly across the area. Work methodically, ensuring that the coating is uniform and free of thick or thin spots.
- Overlap and Blend: As you move from one section to the next, overlap the edges of the previously coated area slightly to ensure a seamless finish. This blending technique helps prevent visible transition lines.
- Continue Working: Repeat these steps for each section of the garage floor, maintaining a wet edge as you progress.
Scatter Chips
One of the aesthetic enhancements you can include in your DIY garage floor epoxy project is decorative chips. These chips add texture and style to the epoxy coating and are often included in epoxy kits. Here’s how to scatter chips evenly across the wet epoxy:
- Begin with a Plan: Before you start, decide how densely you want the chips to cover the floor. Some people prefer a sparse scattering for a subtle effect, while others go for a denser coverage for a more textured appearance.
- Scatter Method: Start by sprinkling the chips evenly over a small section of the wet epoxy. You can use a hand scoop or simply scatter them by hand.
- Patting In: After scattering the chips, gently press them into the epoxy using a roller or a trowel. This ensures they adhere well and become an integral part of the coating.
- Repeat: Continue this process section by section until the entire garage floor is covered to your desired level of chip density.
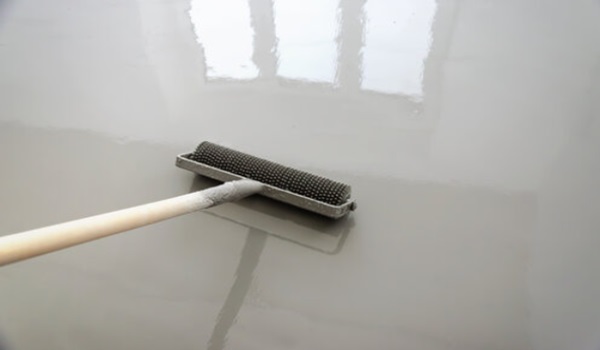
Topcoat
The final step in the epoxy application process is to apply a clear epoxy topcoat. This serves multiple purposes, including protecting the epoxy from wear and tear, creating a glossy finish, and sealing in the decorative chips. Here’s how to apply the topcoat:
- Mix the Topcoat: Just as you did with the base coat, mix the epoxy topcoat according to the manufacturer’s instructions.
- Application: Use a roller with a clean, dry nap for applying the topcoat. Make sure the roller is clean and free of debris.
- Even Application: Apply the topcoat evenly and methodically, working in small sections and maintaining a wet edge, just as you did with the base coat.
- Protective Finish: The clear topcoat provides a protective layer over the entire garage floor, enhancing durability and giving it a glossy appearance.
Curing Time
After you’ve completed the epoxy application, it’s important to allow ample time for the coating to cure. The curing time can vary depending on factors such as temperature and humidity.
Refer to the manufacturer’s instructions for specific guidance. In general, epoxy coatings may be ready for light foot traffic within 12-24 hours, but it’s advisable to wait at least 72 hours before parking vehicles on the surface to allow for complete curing.
By carefully following this step-by-step guide for applying garage floor epoxy, you can achieve a professional finish that not only looks fantastic but also withstands the demands of your garage’s daily use.
Garage Floor Epoxy Troubleshooting Tips
As with any DIY project, challenges can arise during the application of garage floor epoxy. With the right knowledge and troubleshooting techniques, you can address common issues and achieve a flawless finish. Here are some common problems you may encounter and how to tackle them:
Bubbles
Bubbles in your epoxy coating can be a frustrating issue, but they can be addressed with a little patience and the right technique.
Bubbles may appear for various reasons, such as air trapped in the epoxy during mixing or application. Here’s how to deal with them:
- Heat Gun or Torch: To remove bubbles, gently pass a heat gun or propane torch over the affected areas. Keep the flame or heat source moving to avoid overheating the epoxy.
- Bubble Prevention: To prevent bubbles in the first place, avoid over-mixing the epoxy, as excessive stirring can introduce air. Also, work in a well-ventilated space to minimize the risk of airborne contaminants.
Uneven Finish
Achieving a smooth, uniform finish can be challenging, especially if you’re new to working with epoxy. If you notice an uneven finish, you can correct it with the following steps:
- Light Sanding: For small imperfections or uneven spots, lightly sand the affected areas with fine-grit sandpaper. This helps level the surface and creates a better adhesion surface for a new topcoat.
- Reapply Topcoat: After sanding, apply a new topcoat over the entire floor. This additional topcoat can help even out the surface and create a consistent finish.
Stains
Stains on your epoxy-coated garage floor are often a result of chemical spills or accidents. While epoxy is highly resistant to stains, addressing them promptly is essential to maintain the pristine appearance of your floor. Here’s how to tackle stains:
- Immediate Cleanup: As soon as you notice a chemical spill or stain, clean it up promptly using an absorbent material, like cat litter or sawdust. Gently blot the affected area to prevent spreading.
- Gentle Cleaning: After absorbing the spilled material, gently clean the stained area with a mild detergent and warm water. Avoid using harsh chemicals, as they can damage the epoxy.
- Rinse Thoroughly: Rinse the cleaned area thoroughly with clean water to remove any detergent residue. Pat the floor dry with a clean cloth.
Remember, prevention is the best strategy for avoiding stains. Store chemicals in a safe, spill-proof manner and take care when working with potentially staining substances.
By addressing these common issues and following the recommended solutions, you can maintain the integrity and appearance of your garage floor epoxy coating, ensuring that it remains beautiful and durable over time.
How to Clean and Maintain a Garage Floor Epoxy Coating
Proper maintenance is essential to keep your garage floor epoxy looking pristine and extending its lifespan. With routine cleaning and care, your epoxy-coated floor can maintain its glossy finish and durability for years to come. Follow these steps to ensure your garage floor stays in top condition:
Regular Cleaning
Regular cleaning is essential to prevent dirt and debris buildup on your garage floor. Here’s how to keep your floor free from everyday contaminants:
- Sweep or Dust Mop: Use a broom or dust mop to sweep away dirt, dust, and loose debris. Frequent sweeping prevents these particles from grinding into the epoxy surface.
- Spot Cleaning: Address spills or stains promptly by blotting or wiping them with a clean, damp cloth. This prevents the stain from setting in and becoming more challenging to remove.
Spill Cleanup
Garages are often exposed to various spills, from oil and chemicals to beverages and other liquids. To prevent staining and maintain the appearance of your epoxy-coated floor, follow these spill cleanup guidelines:
- Absorbent Material: For liquid spills, immediately sprinkle absorbent material such as cat litter, sawdust, or baking soda over the spill. This will help soak up the liquid and prevent it from spreading.
- Gentle Cleaning: Once the spilled material has absorbed the liquid, gently clean the area with a mild detergent and warm water. Avoid using abrasive or harsh cleaning chemicals, as these can damage the epoxy.
- Rinse Thoroughly: Rinse the cleaned area with clean water to remove any detergent residue. Pat it dry with a clean cloth to prevent water spots.
Deep Cleaning
Periodic deep cleaning helps remove embedded dirt and grime and keeps your epoxy-coated garage floor looking its best. Here’s how to perform a deep cleaning:
- Prepare a Mild Detergent Solution: Mix a mild detergent with warm water in a bucket. Use a detergent that is gentle and non-abrasive to avoid damaging the epoxy.
- Scrubbing: Dip a soft-bristle brush or a mop with a soft microfiber pad into the detergent solution. Scrub the floor using a circular motion, focusing on areas with stubborn stains or dirt buildup.
- Rinse Thoroughly: After scrubbing, rinse the floor thoroughly with clean water to remove any detergent residue. Ensure that no soap film is left behind.
- Drying: To prevent water spots and maintain the glossy finish, pat the floor dry with a clean, lint-free cloth or allow it to air dry.
Avoid Harsh Chemicals
Epoxy coatings are highly resistant to most chemicals, but it’s still essential to avoid using harsh or abrasive chemicals when cleaning your garage floor.
Substances like ammonia, bleach, or citrus-based cleaners can degrade the epoxy finish over time. Stick to mild detergents and gentle cleaning solutions to preserve the integrity of your epoxy coating.
By following these cleaning and maintenance guidelines, you can extend the life of your garage floor epoxy and keep it looking pristine. Regular care and prompt spill cleanup are key to preserving the beautiful and durable finish of your DIY garage floor epoxy project.
Conclusion
A DIY garage floor epoxy project offers a fantastic opportunity to enhance the durability, aesthetics, and functionality of your garage. By carefully considering the type of epoxy, coverage, color options, and additional features of your epoxy kit, you can make an informed choice that best suits your needs and preferences.
Proper preparation of the concrete floor is a fundamental step in ensuring a strong bond between the epoxy coating and the surface. By cleaning, repairing cracks, etching, and applying a suitable primer, you create a foundation for a durable and visually appealing garage floor.
Following a step-by-step guide for the application of garage floor epoxy, including mixing, cut-in, rolling, scattering chips, and applying a topcoat, allows you to achieve a professional finish that not only looks fantastic but can withstand the demands of your garage.
In the event of common issues such as bubbles, an uneven finish, or stains, troubleshooting tips can help you address these challenges effectively. Remember, proper maintenance, including regular cleaning, spill cleanup, deep cleaning, and avoiding harsh chemicals, is essential to maintain the pristine appearance of your epoxy-coated garage floor.
Embark on your DIY garage floor epoxy project with confidence, and transform your garage into a space you can be proud of.
Achieving the best DIY garage floor epoxy is a rewarding endeavor that combines aesthetics and functionality, offering a durable, visually appealing finish that can stand the test of time. We hope this comprehensive guide has equipped you with the knowledge and skills to make your garage floor transformation a resounding success.
Don’t hesitate to share your experience with DIY garage floor epoxy in the comments section. We’d love to hear your success stories or help with any questions you might have.
Transform your garage into a space you can be proud of and get started on your DIY garage floor epoxy project today. Remember, when it comes to achieving the best DIY garage floor epoxy, the key is in the details.