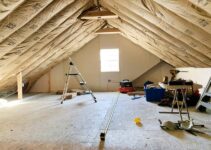
How to Insulate a Garage Ceiling
Many homeowners overlook the importance of insulating their garage ceilings, often focusing solely on insulating their living spaces.
A well-insulated garage can provide several benefits, such as energy savings, improved comfort, and protection for items stored in the garage.
In this article, we will discuss why you should insulate garage ceilings and provide a step-by-step guide on how to do it effectively.
Why Insulate Garage Ceiling?
Insulating your garage ceiling can significantly contribute to energy efficiency in your home.
Garages are often connected to the house, and an uninsulated garage ceiling can allow heat or cold to infiltrate, affecting the overall temperature inside the living space.
By insulating the garage ceiling, you create a thermal barrier that prevents outdoor temperatures from seeping in, reducing the strain on your HVAC system and lowering energy costs.
Another crucial reason to insulate your garage ceiling is to enhance comfort. Whether you use the garage as a workshop, or storage space, or simply park your vehicles there, maintaining a consistent temperature makes the space more enjoyable year-round.
Insulation helps to regulate temperatures and reduce temperature fluctuations, providing a more pleasant environment.
How to Insulate a Garage Ceiling
1. Gather Your Supplies
Before you begin insulating your garage ceiling, gather all the necessary supplies. This ensures a smooth installation process without interruptions.
Common materials required for this project include insulation material (fiberglass batt, rigid foam, or spray foam), rafter vents, a utility knife, a measuring tape, safety goggles, gloves, and a dust mask.
2. Choose Your Insulation Material
Selecting the right insulation material is crucial for effective and long-lasting insulation. There are various options available, each with its own advantages. Fiberglass batt insulation is a popular choice due to its affordability and ease of installation.
Rigid foam insulation offers higher R-values and acts as a moisture barrier, making it ideal for regions with extreme weather conditions. Spray foam insulation provides excellent coverage, sealing even hard-to-reach areas, but it may require professional installation.
3. Install Rafter Vents
Before placing the insulation, install rafter vents to promote proper ventilation in the attic space. Rafter vents are essential to prevent condensation and maintain the integrity of the insulation. Place the rafter vents along the eaves and ensure they align with the vents in the soffit.
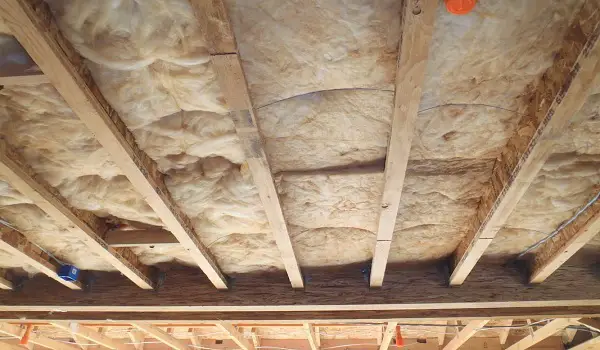
4. Cut Insulation to Fit Between the Rafters
Measure the distance between the rafters and cut the insulation material accordingly. Make sure the insulation fits snugly between the rafters without leaving any gaps or overstuffing, as either can compromise the insulation’s effectiveness.
5. Shove the Insulation into Position
Gently slide the cut insulation between the rafters, ensuring it sits flush with the ceiling. Be cautious not to compress the insulation excessively, as it can reduce its insulating properties.
For fiberglass batt insulation, use your hands to unroll and place it, while rigid foam insulation can be easily slid into position.
6. Seal Any Gaps or Crevices
To maximize the insulation’s efficiency, seal any gaps or crevices around the insulation using foam sealant or caulk. This step prevents air leakage, ensuring that the insulation functions as a continuous barrier against heat transfer.
Summary of Steps:
- Gather all the necessary supplies, including insulation material, rafter vents, utility knife, measuring tape, safety goggles, gloves, and a dust mask.
- Choose the appropriate insulation material based on your needs and budget options include fiberglass batt, rigid foam, or spray foam insulation.
- Install rafter vents to ensure proper attic ventilation.
- Cut the insulation material to fit between the rafters without leaving gaps or compressing it excessively.
- Carefully place the insulation between the rafters, ensuring it sits flush with the ceiling.
- Seal any gaps or crevices to prevent air leakage and maximize the insulation’s efficiency.
Tips for Choosing the Right Insulation Material and Tools
- Consider the climate in your area and choose an insulation material with an appropriate R-value for optimal energy efficiency.
- Wear safety goggles, gloves, and a dust mask when handling insulation materials to protect yourself from irritants and particles.
- If you’re unsure about which insulation material is best for your garage ceiling, consult with a professional to get personalized recommendations.
- Take accurate measurements to avoid wastage and ensure a precise fit for the insulation.
- When using spray foam insulation, follow the manufacturer’s instructions carefully and consider hiring a professional for large-scale applications.
Cost to Insulate a Garage Ceiling
The cost of insulating a garage ceiling can vary depending on the chosen insulation material, the size of the garage, and whether you opt for a DIY approach or hire a professional.
Fiberglass batt insulation is generally more budget-friendly, while spray foam insulation may be more expensive but offers higher performance.
For a rough estimate, DIY installation of fiberglass batt insulation in an average-sized garage could cost between $300 to $600, while professional installation or using rigid foam insulation may increase the cost to $1,000 or more.
How Much Does It Cost to Insulate a Garage Ceiling?
The total cost for insulating a garage ceiling will depend on factors such as the insulation material, labor costs, and any additional tools or materials required.
To get an accurate cost estimate, it’s best to obtain quotes from local contractors or suppliers based on your specific project requirements.
Conclusion
Insulating your garage ceiling is a smart investment that pays off through energy savings, improved comfort, and protection for your belongings.
By following the steps outlined in this guide, you can effectively insulate your garage ceiling and enjoy the benefits for years to come.