Garage Door Sensor Blinking Red
Is your garage door sensor blinking red? That flashing red light can be both frustrating and confusing, especially if you’re not sure what it means. But don’t worry! In this article, we’ll dive deep into what causes this issue and how you can troubleshoot it like a pro.
What Are Garage Door Sensors?
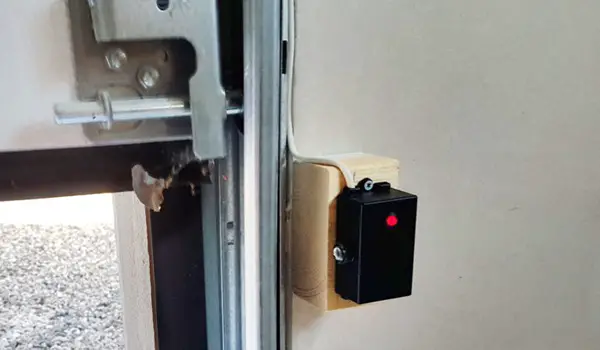
Garage door sensors are an essential component of any automatic garage door system. These small but vital devices are typically mounted near the floor on each side of the garage door. They work by sending an invisible infrared beam from one sensor to the other. If the beam is broken—whether by a person, a vehicle, or even an object like a box—the sensors will stop the garage door from closing.
How Do They Work?
The two sensors on either side of the garage door communicate with each other using infrared signals. One sensor is a transmitter that sends the infrared beam, while the other is a receiver that detects the beam. As long as the receiver “sees” the beam, the garage door system understands that the path is clear, and it’s safe to close the door. However, if something interrupts the beam, the system will prevent the door from closing to avoid accidents.
Why Are They Important?
Garage door sensors are not just convenient—they are an important safety feature. These sensors help to prevent the garage door from closing on anything—or anyone—in its path. Imagine the risk if your car was halfway inside the garage and the door decided to close, or worse, if a child or pet was nearby. Thanks to garage door sensors, such accidents are avoided, making them an integral part of modern garage doors.
Understanding the Blinking Red Light
What Does a Blinking Red Light Mean?
A blinking red light on your garage door sensor typically indicates that something is wrong. It’s like a warning flag, alerting you that the system isn’t functioning correctly. Usually, this means the sensors are unable to communicate with each other, which could prevent your garage door from closing altogether.
The Safety Function of Garage Door Sensors
Garage door sensors are designed to ensure safety. If the sensors are not properly functioning—indicated by the blinking red light—the door will not close as a precautionary measure. This is to prevent accidents such as the door closing on objects, pets, or people. The red blinking light serves as a visual signal that something needs your attention to restore the system’s safety.
Common Causes of Blinking Red Sensors
Several things can cause your garage door sensors to blink red. Let’s explore the most common reasons why this happens:
Obstructions Blocking the Sensor Path
One of the most frequent causes of a blinking red sensor is an obstruction. This could be anything from a pile of leaves, a box, or even a small toy that’s in the way of the infrared beam. Sometimes, even something as subtle as a cobweb or dust on the sensor lens can interfere with the signal. In most cases, a quick inspection will reveal the culprit.
Sensor Misalignment
For the sensors to work correctly, they must be perfectly aligned with each other. If one sensor is even slightly out of place, the infrared beam won’t make it across, and the red light will blink. Misalignment can occur from a bump, vibration, or even the ground shifting over time.
Power Supply Issues
Sometimes, the issue is related to the power supply. A blown fuse, a loose connection, or a power surge can disrupt the signal between the sensors. If one of the sensors loses power, it can’t communicate with the other, causing the red light to blink.
Dirty or Fogged-Up Lenses
Over time, dirt, dust, or even moisture can accumulate on the sensor lenses, making it harder for them to communicate effectively. This can especially be a problem in areas with high humidity or during certain weather conditions. If the lenses are dirty or fogged, the sensors may act as if there’s an obstruction, even when there isn’t one.
Faulty Sensor
In some cases, the sensor itself may be faulty due to age, wear and tear, or a manufacturing defect. If none of the other troubleshooting steps seem to work, it’s possible that the sensor is broken and needs to be replaced.
How to Troubleshoot Garage Door Sensors
If you’re dealing with a blinking red light, here are some troubleshooting steps to help you get your garage door sensors back in working order:
Step 1: Check for Obstructions
Start by looking around the sensors for any debris or objects that may be blocking the path. Clear away anything that could interfere with the signal. Pay special attention to small items like leaves or even spider webs that may have gone unnoticed.
Step 2: Align the Sensors
Next, check the alignment of your sensors. Both sensors should be facing directly at each other. If they’re misaligned, adjust their position until the lights on both sensors turn solid (usually green). This indicates that they are aligned correctly.
Step 3: Clean the Sensor Lenses
Using a soft, lint-free cloth, gently clean the lenses of the sensors. If the lenses are particularly dirty, you may use a damp cloth to remove stubborn dirt. Avoid using any harsh chemicals that could damage the plastic covering.
Step 4: Verify Power Supply and Wiring
Check that the sensors are receiving power by inspecting the wiring. Look for any loose or disconnected wires and make sure they are properly plugged into the garage door opener. If there’s any visible damage to the wires, it’s a good idea to call a professional for repairs.
Step 5: Reset the Garage Door Opener
Sometimes, resetting the garage door opener can solve sensor issues. This is usually as simple as unplugging the opener from the power outlet for about 30 seconds, then plugging it back in. This can help reset the system and clear any glitches.
Step 6: Call a Professional Technician
If you’ve tried all the above steps and the red light is still blinking, it might be time to call in a professional. Garage door technicians have the expertise to diagnose more complex issues and recommend the best course of action, whether that’s replacing a faulty sensor or repairing wiring.
Detailed Fixes for Each Problem
Fixing Obstruction Issues
Clearing away obstructions is one of the simplest fixes. Take a good look around the garage door sensors and remove anything that could potentially block the infrared beam. Don’t forget to check both sides of the door!
Realigning the Sensors
If the sensors are misaligned, you may need to tighten or loosen the screws holding them in place. Small adjustments can make a big difference, so be sure the sensors are directly facing each other.
Cleaning the Lenses
Keeping the lenses clean should be part of regular maintenance. Dust, dirt, or moisture on the lenses can easily be wiped away with a soft cloth. Consider adding this to your seasonal home maintenance checklist.
Handling Power Issues
If you suspect the problem is with the power supply, check the wiring for any visible damage. You might also want to check the circuit breaker or fuse box to ensure the garage door opener is receiving power.
Dealing with Faulty Sensors
If none of these solutions seem to work, your sensor may be faulty. In this case, replacement is often the only option. Make sure to purchase a sensor that is compatible with your garage door system.
When to Replace Your Garage Door Sensors
If your sensors are several years old or you notice frequent issues, it may be time to replace them. Typically, garage door sensors last between 5 to 10 years, depending on the environment and frequency of use. If they are starting to malfunction more often, investing in new sensors might save you the trouble of constant troubleshooting.
How to Prevent Future Sensor Problems
To avoid future issues with your garage door sensors, regular maintenance is key. Keep the lenses clean, make sure there are no obstructions in the way, and periodically check the alignment. This simple routine can help ensure your sensors work smoothly for years to come.
Conclusion
A blinking red light on your garage door sensor can be a minor inconvenience, but with a little troubleshooting, you can quickly identify and fix the problem. Whether it’s an obstruction, misalignment, or a more serious issue like faulty wiring, these sensors play a critical role in keeping your home safe. By understanding how they work and maintaining them regularly, you can avoid future headaches and keep your garage door running smoothly.
FAQs
- Why is my garage door sensor blinking red and green? This usually indicates that one sensor is sending a signal (green) while the other isn’t receiving it (red). Check for misalignment or obstruction.
- How do I reset my garage door sensor? Refer to your garage door opener’s manual for reset instructions, but most sensors can be reset by unplugging the system for 30 seconds and plugging it back in.
- Can I bypass the garage door sensors? It’s not recommended to bypass sensors as they are a crucial safety feature designed to prevent accidents.
- How long do garage door sensors last? On average, garage door sensors last about 5 to 10 years depending on usage and environmental conditions.
- How much does it cost to replace a garage door sensor? The cost of a new garage door sensor ranges from $20 to $60, plus any installation fees if you hire a professional.


