Plaster walls are a traditional and durable wall finishing material that has been used for centuries.
They offer a unique charm and character to any interior space, but when it comes to hanging objects on these walls, it can present some challenges.
Unlike drywall, which is more forgiving and easy to work with, plaster walls require special anchors to ensure a secure and reliable attachment.
In this article, we will explore the best anchors for plaster walls, their pros and cons, and how to properly install them to avoid any potential damage.
What are Plaster Walls?
Before delving into the world of anchors, it’s essential to understand what plaster walls are.
Plaster walls consist of multiple layers of plaster applied over a lath base, which is usually made of wood or metal.
This construction method results in a strong and sturdy surface that provides excellent insulation and soundproofing.
The hardness and brittleness of plaster can pose challenges when attempting to attach objects to the wall.
Why Use Special Anchors for Plaster Walls?
Plaster walls differ significantly from drywall, which is a more common wall material today.
Regular drywall anchors may not be sufficient for plaster walls due to their thickness and hardness.
Special anchors are designed to distribute weight evenly and provide a secure grip within the plaster, preventing it from cracking or crumbling under the pressure of heavy objects.
The 10 Best Anchors for Plaster Walls
There are several types of anchors that work well with plaster walls. Let’s explore each of them along with their pros and cons and the proper installation process.
1. Toggle Bolts
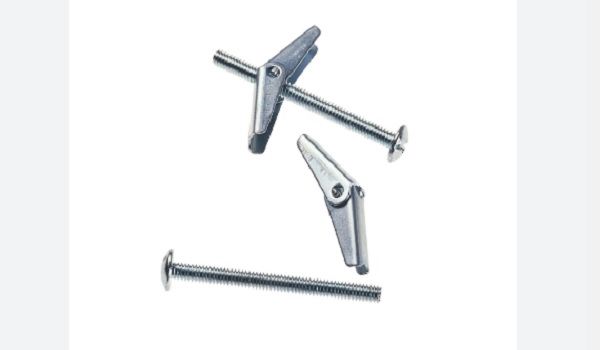
Toggle bolts are a good option for hanging heavy objects on plaster walls. They are easy to install and can support a lot of weight.
When installing a toggle bolt, you will need to drill a hole in the plaster that is the same size as the toggle. Then, insert the toggle into the hole and screw it in. As you screw in the toggle, it will expand behind the plaster, providing support.
Toggle bolts are available in a variety of sizes, so you can choose the right size for the weight of the object you are hanging.
For example, a toggle bolt that is 1/4 inch in diameter can support up to 50 pounds. A toggle bolt that is 3/8 inch in diameter can support up to 100 pounds.
When choosing a toggle bolt, it is important to make sure that the toggle is the right size for the hole you have drilled. You should also make sure that the toggle is made of a strong metal, such as steel or brass.
Pros:
- High weight capacity.
- Ideal for heavy mirrors, shelves, and large frames.
- Reusable and removable.
Cons:
- Requires a larger hole for installation.
- Not suitable for hollow walls.
How to Install:
- Drill a hole in the plaster, making sure it’s the same size as the toggle when folded.
- Insert the folded toggle through the hole.
- Allow the toggle to spring open on the other side of the plaster.
- Tighten the machine screw into the toggle until snug.
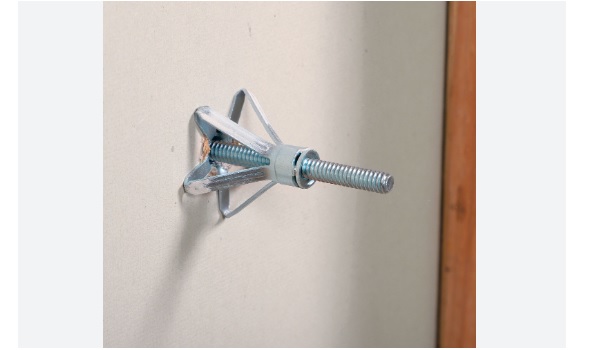
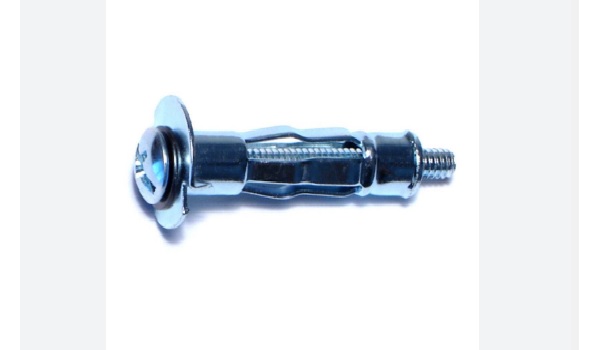
2. Molly Bolts
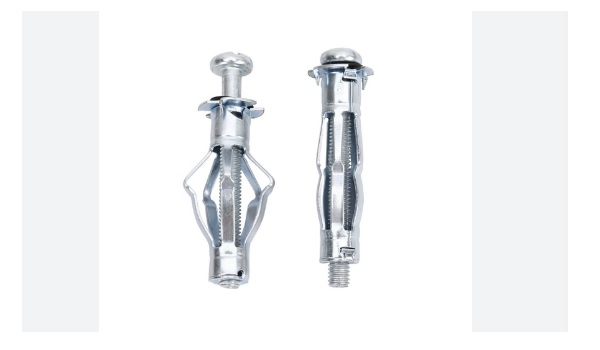
Molly bolts are a good option for hanging very heavy objects on plaster walls. They are more secure than toggle bolts because the sleeve expands behind the plaster in a wider area, providing more support. However, molly bolts are also more difficult to install because you need to use a special tool to expand the sleeve.
Molly bolts are available in a variety of sizes, so you can choose the right size for the weight of the object you are hanging. For example, a molly bolt that is 1/4 inch in diameter can support up to 50 pounds. A molly bolt that is 3/8 inch in diameter can support up to 100 pounds.
When choosing a molly bolt, it is important to make sure that the molly is the right size for the hole you have drilled. You should also make sure that the molly is made of a strong metal, such as steel or brass.
Pros:
- High weight capacity.
- Excellent for medium to heavy objects.
- Provides a flush mount.
Cons:
- Requires a larger hole for installation.
- Not reusable and may damage the plaster if removed.
How to Install:
- Drill a hole in the plaster to fit the folded molly bolt.
- Insert the molly bolt into the hole.
- Use a screwdriver to tighten the screw, causing the metal sleeve to expand.
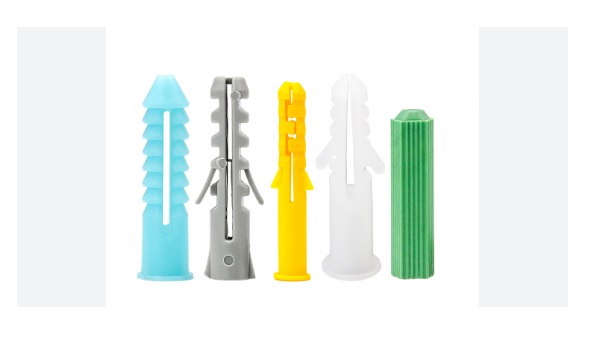
3. Plaster Anchors
Plaster anchors are specifically designed for use with plaster walls. They are simple plastic anchors that offer a reliable hold for light to medium-weight objects.
Plaster anchors are available in a variety of sizes, so you can choose the right size for the weight of the object you are hanging. For example, a plaster anchor that is 1/4 inch in diameter can support up to 25 pounds. A plaster anchor that is 3/8 inch in diameter can support up to 50 pounds.
Pros:
- Easy to install.
- Suitable for lightweight objects like picture frames.
Cons:
- Limited weight capacity.
- Not suitable for heavy items.
How to Install:
- Drill a small hole in the plaster.
- Gently tap the plastic anchor into the hole until flush with the wall surface.
- Insert the screw into the anchor and tighten it until secure.
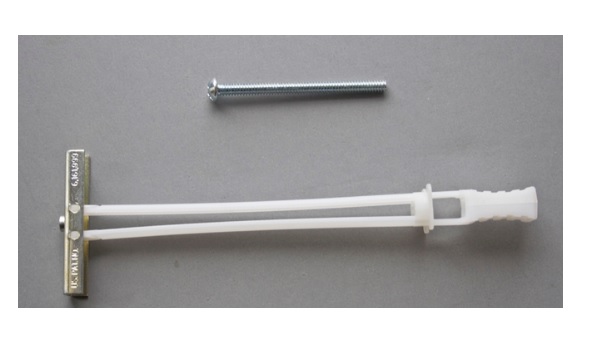
4. Plastic Expansion Anchors
Plastic expansion anchors are a less expensive option than other types of anchors, but they are also less secure.
They are made of plastic, which is not as strong as metal. They also have a smaller sleeve than other types of anchors, which means they cannot support as much weight.
Plastic expansion anchors are a good option for hanging lightweight objects on plaster walls. They should not be used to hang heavy objects. If you are hanging a heavy object, you should use a more secure type of anchor, such as a toggle bolt or a molly bolt.
Pros:
- Easy to use.
- Suitable for light to medium-weight objects.
- Inexpensive.
Cons:
- May not provide a secure hold for heavy items.
How to Install:
- Drill a hole in the plaster to fit the anchor.
- Insert the anchor into the hole.
- Turn the screw into the anchor, causing it to expand and grip the plaster.
5. Drywall Anchors
Drywall anchors, also known as screw anchors, are not the best option for plaster walls. They can be used for very lightweight items if no other specialized anchors are available.
Plaster hooks are available in a variety of sizes, so you can choose the right size for the weight of the object you are hanging.
For example, a plaster hook that is 1/4 inch in diameter can support up to 25 pounds. A plaster hook that is 3/8 inch in diameter can support up to 50 pounds.
Pros:
- Widely available.
- Easy to use.
Cons:
- Limited weight capacity on plaster walls.
- May not provide a secure hold.
How to Install:
- Drill a hole in the plaster.
- Insert the drywall anchor into the hole.
- Screw the anchor in until flush with the wall.
6. Plaster Hooks
Plaster hooks are specifically designed to hook onto the top edge of a plaster wall without any need for drilling or making holes. They are a good option for hanging lightweight items.
Plaster hooks are available in a variety of sizes, so you can choose the right size for the weight of the object you are hanging. For example, a plaster hook that is 1/4 inch in diameter can support up to 25 pounds. A plaster hook that is 3/8 inch in diameter can support up to 50 pounds.
Pros:
- No drilling is required.
- Easy to move and reposition.
Cons:
- Limited weight capacity.
- Only suitable for lightweight items.
How to Install:
- Simply hook the plaster hook over the top edge of the plaster wall.
7. Adhesive Hooks
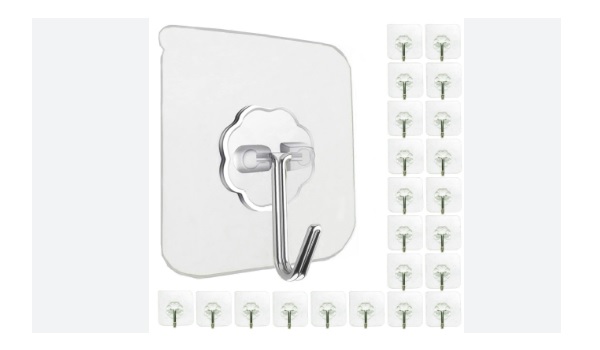
Adhesive hooks are a type of anchor that does not require drilling into the wall. They are made of a strong adhesive that bonds to the plaster.
Adhesive hooks are a good option for lightweight objects, such as pictures, mirrors, and shelves.
They are easy to install and remove. Adhesive hooks are not as secure as other types of anchors, and they may not be suitable for hanging heavy objects.
Pros:
- No drilling is required.
- Easy to use and remove.
- Leaves minimal damage.
Cons:
- Limited weight capacity.
- May lose adhesive strength over time.
How to Install:
- Clean the wall surface.
- Remove the backing from the adhesive hook.
- Press the hook firmly against the wall for several seconds.
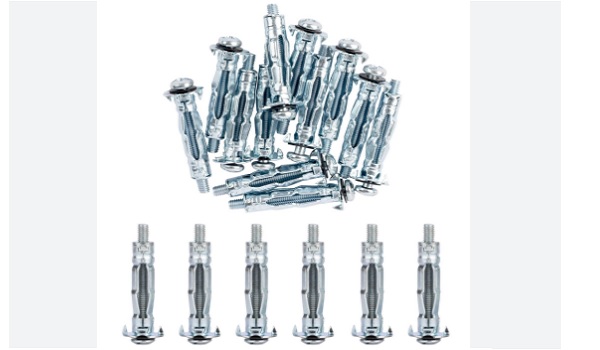
8. Molly Screws
Molly screws are less common than other types of anchors, but they are a good option for heavy-weight objects.
They are more secure than toggle bolts because the sleeve expands behind the plaster in a wider area, providing more support. Molly screws are also more difficult to install because you need to use a special tool to expand the sleeve.
Pros:
- Good weight capacity for medium-weight items.
- Provides a flush mount.
Cons:
- Requires a larger hole for installation.
- Not reusable and may damage the plaster if removed.
How to Install:
- Drill a hole in the plaster.
- Insert the molly screw into the hole.
- Use a screwdriver to tighten the screw, causing the metal sleeve to expand.
9. Snap Toggle
Snap toggle anchors are a type of toggle bolt that is easier to install than traditional toggle bolts. They have a spring-loaded mechanism that expands the toggle behind the plaster, making them a good option for people who are not comfortable with DIY projects
Snap toggle anchors are available in a variety of sizes, so you can choose the right size for the weight of the object you are hanging. For example, a snap toggle anchor that is 1/4 inch in diameter can support up to 50 pounds. A snap toggle anchor that is 3/8 inch in diameter can support up to 100 pounds.
Pros:
- Excellent weight capacity.
- Ideal for heavy objects.
- Reusable and removable.
Cons:
- Requires a larger hole for installation.
- Not suitable for hollow walls.
How to Install:
- Drill a hole in the plaster.
- Insert the folded toggle through the hole.
- Pull back on the bolt while tightening it to open the wings inside the wall.
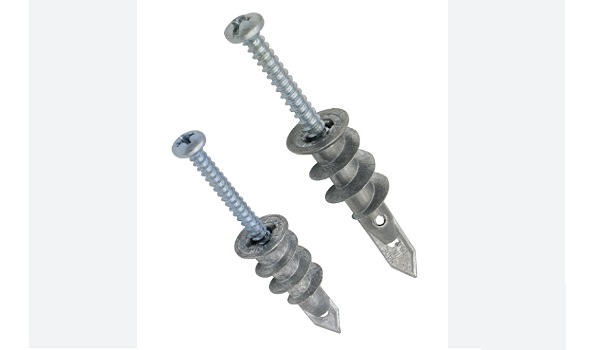
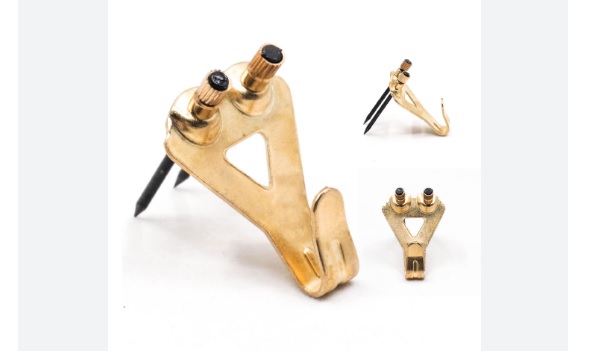
10. ZigZag Anchors
Zigzag anchors are a type of anchor that is made of metal and has a zigzag pattern that expands behind the plaster.
They are a good option for heavy-weight objects because the zigzag pattern provides more surface area for the anchor to grip the plaster.
Pros:
- High weight capacity.
- Reliable and durable.
Cons:
- Requires careful installation.
How to Install:
- Drill a hole in the plaster.
- Insert the zigzag anchor into the hole.
- Tighten the screw to expand the anchor.
Choosing the Right Anchor
When selecting the appropriate anchor for your plaster wall, consider the weight and size of the object you want to hang.
For heavier items, opt for toggle bolts, molly bolts, snap toggles, or zigzag anchors. Lighter items can be hung with plaster anchors, plastic expansion anchors, plaster hooks, adhesive hooks, or molly screws.
Hanging Objects on Plaster Walls
Before installing any anchor, ensure you know the location of studs or other solid structural elements behind the plaster. Anchoring items to studs provides the most secure hold. Use a stud finder or gently tap the wall to locate studs, which will produce a more solid sound compared to hollow areas.
Safety Tips
Always wear appropriate safety gear, such as safety glasses, when drilling or using anchors. Test the weight capacity of the anchor and the integrity of the installation before hanging heavy items.
Conclusion
Hanging objects on plaster walls don’t have to be a daunting task. By choosing the right anchors and following the proper installation methods, you can securely and confidently display your favorite decorations and functional items without compromising the integrity of your beautiful plaster walls.
Whether you’re a seasoned DIY enthusiast or a beginner, with the right tools and knowledge, you can achieve a successful and safe installation on plaster walls. Happy decorating!