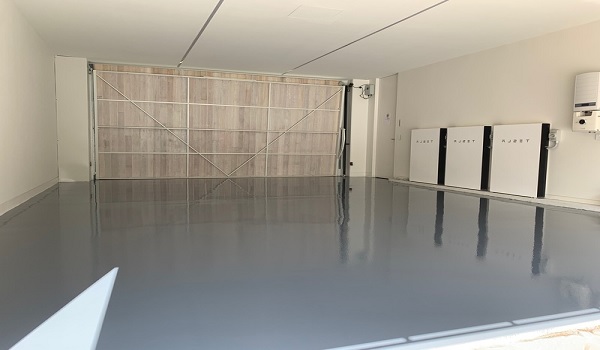
Resurface Pitted Garage Floor
As a homeowner and car enthusiast, I’ve always taken pride in maintaining my garage space.
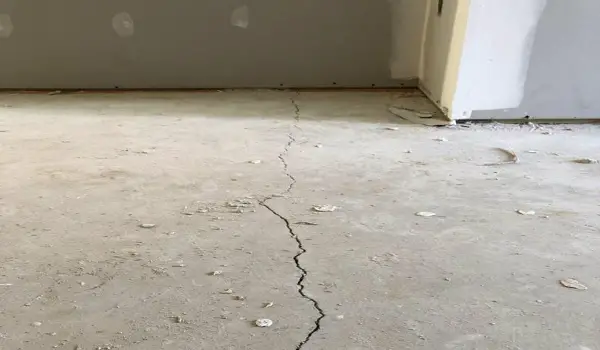
Over the years, I noticed my garage floor developing unsightly cracks, pitted areas, and signs of wear and tear due to heavy use and exposure to chemicals.
Realizing the importance of garage floor resurfacing, I embarked on a comprehensive journey to enhance both the aesthetics and functionality of my garage.
Ensuring Safety and Equipping with Necessary Tools
Before delving into the resurfacing process, I prioritized safety to avoid any potential injuries.
Equipped with safety glasses and gloves, I also ensured proper ventilation during the application of concrete products.
For effective cleaning, I gathered brooms, wire brushes, and a pressure washer to remove dust, debris, and stubborn stains.
How to Resurface Pitted Garage Floor
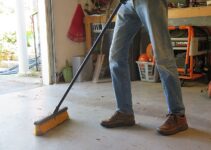
Step 1: Preparing the Surface
I began the resurfacing project by thoroughly sweeping and vacuuming the floor to create a clean canvas for the process.
Next, using a wire brush, I meticulously removed loose concrete and rust from the pitted areas, leaving behind a solid foundation for the resurfacing to adhere to.
Step 2: Repairing Cracks and Holes
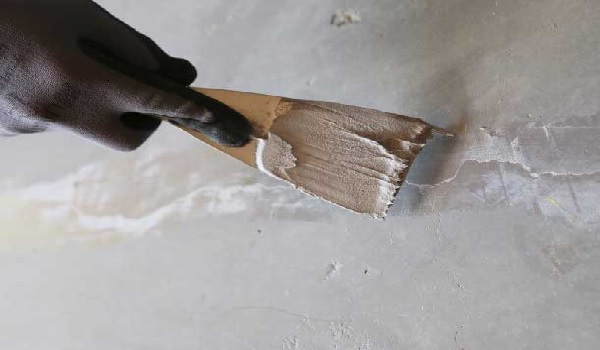
Inspecting the floor, I identified various cracks and holes of different sizes.
For smaller cracks, I applied a concrete patching compound, carefully filling in each crevice.
Allowing sufficient drying time for the compound to set, I ensured a smooth surface before proceeding.
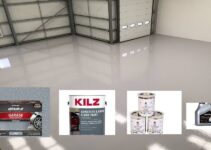
Step 3: Applying a Concrete Primer
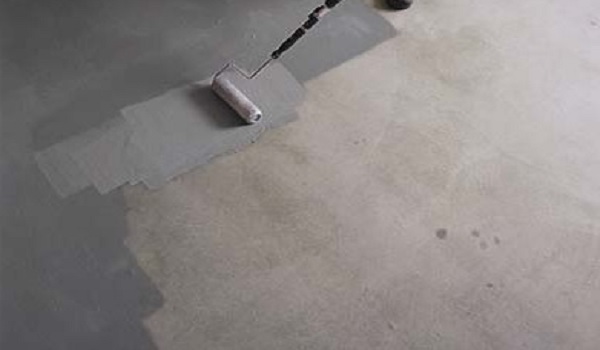
Understanding the significance of a strong bond between the existing floor and the resurfacer, I applied a concrete primer evenly over the entire surface.
Following the manufacturer’s instructions, I ensured optimal adhesion for a long-lasting finish.
Step 4: Choosing and Applying the Resurfacer

For the next step, I faced the choice between a self-leveling resurfacer and an overlay resurfacer.
Based on my floor’s condition, I opted for the overlay resurfacer to address the pitted areas more effectively.
Working in manageable sections, I applied the resurfacer evenly, diligently following the manufacturer’s guidelines to achieve the desired thickness.
Step 5: Drying Time and Curing
With the resurfacing complete, I allowed ample drying time as specified by the product manufacturer.
To enhance the strength and durability of the newly resurfaced floor, I maintained the area’s moisture levels for the recommended period, ensuring optimal curing.
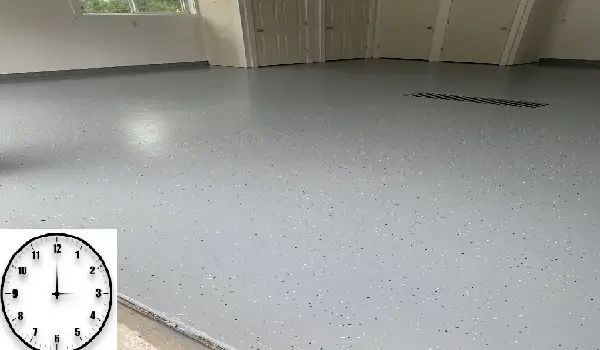
Step 6: Sealing the Resurfaced Floor
Understanding the need to protect my investment, I took the necessary step of sealing the resurfaced floor.
By choosing the right sealant for my floor’s requirements and applying it with precision, I safeguarded the surface from stains, moisture, and potential damage.
Read Also: What Is the Best Concrete Resurfacer?
Additional Tips for a Successful Garage Floor Resurfacing
Throughout this journey, I faced some deep-pitted areas that required extra attention. To achieve a smooth and even surface, I applied multiple layers of resurfacer to these problem spots.
In dealing with a large resurfacing area, I opted to rent a concrete mixer, which significantly sped up the mixing process and ensured consistent results.
Personal safety remained paramount, and I consistently wore the appropriate safety gear while working in a well-ventilated area to avoid any health hazards.
Resurface garage floor cost
The cost of resurfacing a garage floor varies depending on the size of the garage, the condition of the concrete, the type of coating used, and the cost of labor in your area. The average cost to resurface a garage floor is between $500 and $2,400.
Here is a breakdown of the factors that affect the cost of garage floor resurfacing:
- Size of the garage: The larger the garage, the more expensive it will be to resurface the floor.
- Condition of the concrete: If the concrete is in good condition, the resurfacing process will be less expensive than if the concrete is cracked, pitted, or stained.
- Type of coating: Epoxy coatings are more expensive than concrete sealers, but they are also more durable and easier to maintain.
- Cost of labor: The cost of labor varies depending on the location and the availability of contractors.
Here are some tips for saving money on garage floor resurfacing:
- Get multiple quotes from contractors. This will help you compare prices and find the best deal.
- Do some of the work yourself. If you are handy, you can save money by doing some of the preparation work yourself, such as cleaning the floor and removing any cracks or stains.
- Choose a less expensive type of coating. Concrete sealers are less expensive than epoxy coatings, but they are also less durable.
- Hire a contractor during the off-season. Contractors often charge lower rates during the winter months when demand is lower.
Read Also: How Much Does It Cost To Epoxy
Is finishing a garage floor worth it?
Whether or not finishing a garage floor is worth it depends on your individual needs and budget. If you have a concrete floor that is in good condition and you don’t mind the way it looks, there is no need to resurface it.
If your floor is cracked, pitted, or stained, resurfacing can improve the appearance of your garage and make it easier to clean.
Here are some of the benefits of finishing a garage floor:
- Improved appearance: A finished garage floor will look neat and tidy, and it will add value to your home.
- Easy to clean: A finished garage floor is easy to clean with soap and water. This can save you time and effort.
- More durable: A finished garage floor is more durable than an untreated concrete floor. It will resist cracks, stains, and fading.
- Safer: A finished garage floor is safer than an untreated concrete floor. It is less slippery when wet, and it can help to prevent accidents.
If you are considering finishing your garage floor, be sure to get multiple quotes from contractors and choose a type of coating that is right for your needs.
Conclusion
In conclusion, my experience with resurfacing a pitted garage floor has been incredibly rewarding.
By following the outlined steps, using the right materials and tools, and exercising patience, I achieved a revitalized garage floor that not only looks visually appealing but also offers enhanced durability and functionality.
Regular maintenance and timely resurfacing will undoubtedly keep my garage space a safe and functional area for my vehicles and various activities.
I never thought about sealing the floor. Thanks for the tip. It’ll protect my investment for sure.
You’re welcome! Sealing is crucial for long-term durability.