Garage Floor Resurfacing
Your garage floor takes a lot of abuse over the years, enduring heavy vehicles, spills, and constant foot traffic.
Over time, it’s normal for a garage floor to develop cracks, pits, and other signs of wear.
With the process of garage floor resurfacing, you can restore its appearance and functionality without the need for a complete replacement.
In this article, we will explore the ins and outs of garage floor resurfacing, guiding you through the steps to achieve a smooth and durable floor surface.
Understanding Garage Floor Resurfacing
Garage floor resurfacing is a cost-effective and efficient way to rejuvenate your garage floor. It involves applying a concrete resurfacer over the existing surface, creating a fresh and even layer.
This process not only covers up imperfections but also provides added protection to the floor, making it more resistant to future damage.
Signs Your Garage Floor Needs Resurfacing
Before diving into the resurfacing process, it’s essential to assess whether your garage floor truly requires it. Some common signs that indicate the need for resurfacing include:
- Cracks and Pits: If your garage floor has extensive cracks, pits, or spalling, resurfacing can help smooth out the surface and prevent further damage.
- Surface Stains: Stubborn oil stains, chemical spills, and other blemishes that won’t go away even after thorough cleaning may necessitate resurfacing.
- Uneven Surface: If your garage floor has become uneven due to wear and tear, resurfacing can level it out, providing a safer and more functional space.
Preparing for Garage Floor Resurfacing
Proper preparation is crucial for a successful resurfacing project. Here are the essential steps to prepare your garage floor:
- Clear the Garage: Remove all items, vehicles, and debris from the garage to ensure a clean and unobstructed working area.
- Clean the Surface: Thoroughly clean the garage floor to eliminate dirt, grease, and any loose material. A power washer can be highly effective for this task.
- Repair Cracks and Holes: Fill any cracks or holes in the floor with an appropriate patching compound and allow it to dry completely.
- Etch the Surface: Etching the concrete surface will help the resurfacer adhere better. Use a concrete etching solution following the manufacturer’s instructions.
Step-by-Step Guide to Resurfacing Your Garage Floor
Cleaning and Preparing the Surface
Begin by cleaning the floor with water and a mild detergent. Allow it to dry completely before proceeding.
Filling Cracks and Holes
Carefully inspect the floor for cracks and holes. Use a concrete patching compound to fill these imperfections and smooth the surface.
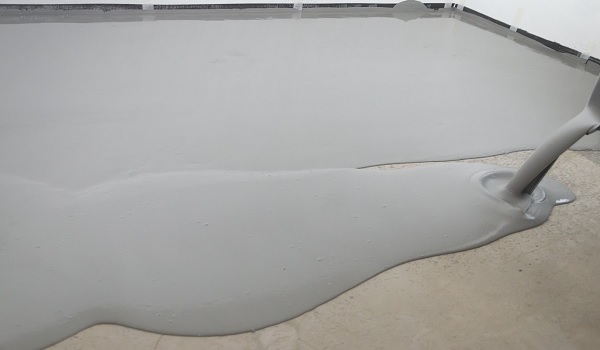
Applying the Resurfacer
Prepare the concrete resurfacer according to the manufacturer’s instructions. Pour it onto the garage floor and spread it evenly using a long-handled squeegee.
Smoothing and Leveling
Use a concrete float to smooth and level the resurfacer. Work systematically across the entire floor, ensuring an even application.
Drying and Curing
Allow the resurfacer to dry and cure for the recommended time, typically 24 to 48 hours. Avoid any foot or vehicle traffic during this period.
Tips for a Successful Garage Floor Resurfacing Project
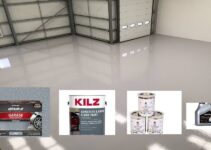
Use High-Quality Materials
Invest in a premium-quality concrete resurfacer to ensure a long-lasting and durable finish.
Follow Manufacturer’s Instructions
Always follow the instructions provided by the manufacturer for the best results.
Consider Hiring a Professional
For complex or extensive resurfacing projects, it’s advisable to hire a professional contractor to ensure a flawless outcome.
Ensure Proper Ventilation
When working with a concrete resurfacer, ensure adequate ventilation in the garage to allow fumes to disperse.
Allow Sufficient Curing Time
Be patient and let the resurfacer cure fully before subjecting the floor to heavy use.
Complete information : Resurfacing pitted concrete garage floor
Benefits of Garage Floor Resurfacing
Garage floor resurfacing offers several advantages, including:
- Cost-Effective: Resurfacing is more budget-friendly compared to complete floor replacement.
- Enhanced Aesthetics: It improves the appearance of the garage floor, giving it a fresh and polished look.
- Increased Durability: Resurfacing provides an additional layer of protection, making the floor more resistant to wear and damage.
- Quick Turnaround: The process can be completed in a relatively short time, minimizing disruptions to your daily routine.
Comparing Resurfacing and Replacement
While garage floor resurfacing is a great option for many, it’s essential to consider whether replacement might be more suitable in certain situations. Complete replacement may be necessary if:
- The existing floor has severe structural issues.
- The surface is extensively damaged or uneven beyond repair.
- You desire a completely different floor material or design.
Frequently Asked Questions (FAQs)
What is the cost of garage floor resurfacing?
The cost of garage floor resurfacing can vary based on factors like the size of the garage, the extent of damage, and chosen resurfacing materials. On average, it can range from $2 to $6 per square foot.
How long does the resurfaced garage floor last?
With proper maintenance, a resurfaced garage floor can last anywhere from 8 to 15 years or even more, depending on usage and environmental conditions.
Can I resurface my garage floor myself?
Yes, resurfacing can be a DIY project for those with adequate experience and the right tools. However, it’s essential to follow instructions carefully for optimal results.
Is garage floor resurfacing suitable for all types of floors?
Garage floor resurfacing is most effective for concrete floors. It may not be suitable for other flooring materials like wood or tile.
How can I maintain my resurfaced garage floor?
Regularly clean the floor with a mild detergent and avoid using harsh chemicals or abrasive cleaning tools. Additionally, apply a sealer every few years for added protection.
Conclusion
Garage floor resurfacing is a fantastic way to breathe new life into your worn-out garage floor.
By following the step-by-step guide and utilizing high-quality materials, you can achieve a smooth and durable surface that enhances the functionality and aesthetics of your garage space.
Whether you choose to take on this project yourself or hire a professional, resurfacing your garage floor is a smart investment that will pay off for years to come.