Why Your LiftMaster Garage Door Won’t Stay Closed
Garage doors play a vital role in our homes, offering both security and convenience. However, dealing with the frustration of […]
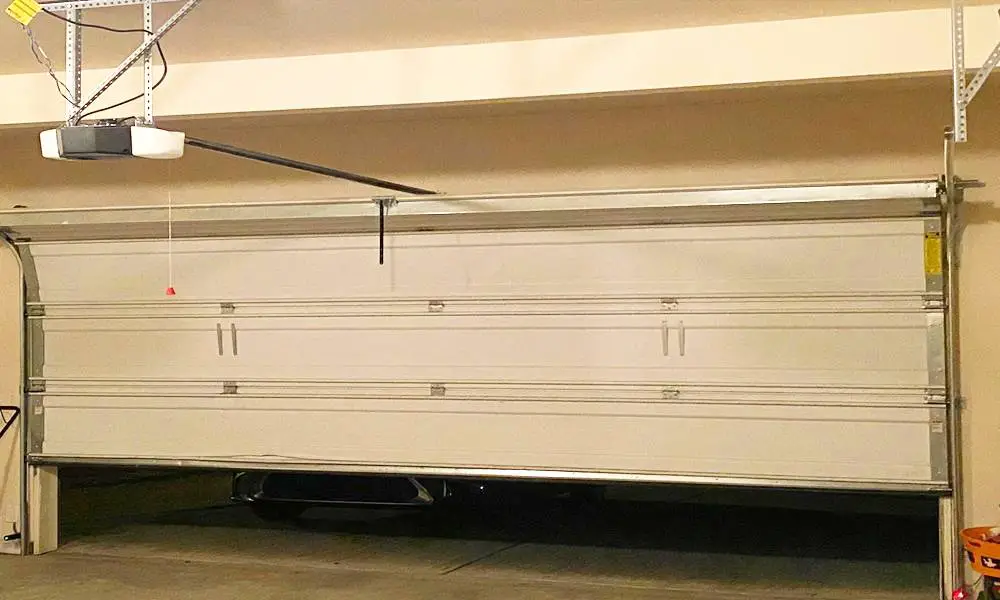
Garage doors play a vital role in our homes, offering both security and convenience. However, dealing with the frustration of a Liftmaster garage door that won’t stay closed can disrupt daily routines and compromise property safety. In this comprehensive article, I aim to guide you through the common reasons behind this issue and provide practical solutions to ensure your garage door operates seamlessly.
Whether you own the latest model, such as the 8500w, or an older version, understanding the intricacies of the problem is essential for maintaining the optimal functionality of your Liftmaster garage door.
Why Won’t My LiftMaster Garage Door Close Fully?
Understanding the complexities of your LiftMaster garage door system is the key to resolving closure issues. From MyQ Remote LED Light installations to aligning safety reversing sensors, we’ve got you covered. Let’s delve into the solutions step by step.

Common Reasons for Door Closure Issues
1. Door Binding or Sticking
One of the most common issues leading to a garage door not closing fully is when the door binds or sticks during its operation. This can occur due to several factors, including the presence of debris on the tracks or misalignment. Over time, these issues can affect the smooth movement of the door, hindering its complete closure.
To address this problem, it’s essential to inspect the tracks regularly for any obstructions and ensure proper alignment. Clearing debris and realigning the tracks can significantly improve the door’s functionality.
2. Engaged Garage Door Lock
An often overlooked yet critical aspect is checking whether the garage door lock is engaged. When the lock is activated, it prevents the door from closing properly, causing unnecessary frustration. This straightforward issue can be easily resolved by disengaging the lock mechanism, allowing the door to close without hindrance.
Regularly inspect the lock and ensure it is in the disengaged position, especially after manual operations or power outages. This simple step can save you from unnecessary troubleshooting.
3. Changes in Door Operation
Sometimes, unexpected changes in the door’s operation can lead to closure issues. Factors such as alterations in the door’s weight or balance can affect its movement, resulting in incomplete closures. It’s crucial to be attentive to any modifications in the door’s behavior and promptly address them to maintain optimal functionality.
Regularly check for any noticeable changes, and if needed, consult the manufacturer’s guidelines for adjustments. Ensuring that the door operates within its specified parameters can prevent closure problems in the long run.
4. MyQ Remote LED Light Issues
For owners of model 8500w openers, the MyQ remote LED light is a vital component for timer-based operations. Issues with the MyQ remote LED light can disrupt the door’s closing process when using the MyQ app or timer settings. To ensure seamless functionality, it is imperative to install and program the MyQ remote LED light correctly.
Begin by verifying the proper installation of the remote light, ensuring it is plugged into a functioning standard 120-volt outlet. Additionally, confirm that the remote light is within six feet of the outlet and not connected through extension cords or adapters. Proper programming and testing, as outlined in the manufacturer’s instructions, can address MyQ remote LED light issues effectively.
5. Safety Reversing Sensors
The safety reversing sensors are integral to preventing accidents involving the garage door. If the garage door opener’s remote light flashes ten times, it indicates a potential problem with the safety reversing sensors. These sensors, located on both sides of the garage door, must be installed and aligned correctly for the door opener to function correctly.
Inspect the sensors for proper alignment and ensure there are no obstructions blocking their operation. Adjust the sensors as needed, and if issues persist, check the wiring connections at the opener. Troubleshooting the safety reversing sensors is crucial for maintaining the safety features of your garage door system.
6. Cable Tension Monitor
For owners of 8500w models, a flashing MyQ remote LED light can signify issues with the cable tension monitor. This component is essential for the smooth operation of the garage door opener. To troubleshoot and resolve cable tension monitor problems, follow these steps:
- Ensure the MyQ remote LED light is properly installed.
- Verify the cable tension monitor’s secure connection to the opener terminals.
- Check for any broken or shorted wires in the cable tension monitor.
- Confirm that the roller is correctly positioned on top of the cable.
If issues persist, it may be necessary to replace the cable tension monitor, and consulting a trained professional is recommended for this task.
MyQ Remote LED Light Troubleshooting
1. Installation and Programming
Proper installation and programming of the MyQ remote LED light are crucial for its seamless integration with your LiftMaster garage door opener. Follow these steps to ensure a correct setup:
- Locate a Standard Outlet: Place the MyQ remote LED light within six feet of a functioning standard 120-volt outlet. Ensure that no extension cords or adapters are used for a direct connection.
- Plug In the Remote Light: Insert the plug of the MyQ remote LED light into the designated outlet securely.
- Mounting Position: Ensure the remote light is mounted appropriately within the specified range. This step is essential for optimal signal reception and performance.
- Programming the MyQ Remote LED Light: Press and release the light button on the smart control panel. Observe whether the remote light turns on and off in response. This basic test ensures that the light is powered and connected.
- MyQ App Compatibility: Verify compatibility with the MyQ app by attempting to open and close the garage door remotely using the app. If the door responds appropriately, the basic installation and programming are successful.
2. Testing the MyQ Remote LED Light
Before exploring potential complexities, it’s prudent to conduct a straightforward test to ensure the MyQ remote LED light is functioning correctly. Follow these steps:
- Smart Control Panel Test: Press and release the light button on the smart control panel. Observe the MyQ remote LED light’s response – it should turn on and off smoothly.
- MyQ App Test: Use the MyQ app to remotely control the garage door. If the MyQ remote LED light reacts appropriately to the app commands, it confirms that the communication between the MyQ app and the remote light is established.
This basic test helps identify whether the MyQ remote LED light is operational and responsive, providing a foundation for further troubleshooting if needed.
3. Programming for Timer to Close
The timer to close feature enhances the convenience of your garage door opener by allowing you to schedule automatic door closure. To program this feature using the MyQ app and the remote LED light, follow these steps:
- MyQ App Setup: Ensure the MyQ app is installed on your smartphone and connected to your garage door opener.
- Remote LED Light Connection: Confirm that the MyQ remote LED light is correctly connected and responsive, as tested in the previous steps.
- Access Timer Settings: Open the MyQ app and navigate to the timer settings section.
- Program Timer to Close: Follow the app’s prompts to program the desired time for the door to close automatically. This process often involves selecting specific days and setting a closing time.
- Test the Timer Feature: Once programmed, test the timer feature by allowing it to automatically close the door at the scheduled time. Ensure that the MyQ remote LED light responds accordingly, indicating successful timer programming.
4. Further Assistance from LiftMaster.com
If, despite following the above steps, issues with the MyQ remote LED light persist, seeking further assistance from LiftMaster.com’s MyQ support is recommended. Follow these guidelines:
- Visit LiftMaster.com: Go to the official LiftMaster website and navigate to the MyQ support section.
- Contact Support: Find the appropriate contact details, which may include a customer support hotline, email address, or a live chat option.
- Provide Information: When contacting support, be prepared to provide details about your MyQ remote LED light issue, including the model number, any error codes, and a description of the problem.
- Follow Expert Guidance: LiftMaster’s support team can provide expert guidance tailored to your specific situation, assisting in resolving complex issues with the MyQ remote LED light.
Safety Reversing Sensor Alignment
1. Identifying Sensor Issues
The safety reversing sensors are a vital component of your garage door system, playing a crucial role in preventing accidents and ensuring the safe operation of the door. To troubleshoot issues with these sensors, it’s essential to first identify potential problems:
- Visual Inspection: Begin by visually inspecting the safety reversing sensors. Check for any physical damage, misalignment, or obstructions in their line of sight. Clear away any debris or objects that might be blocking the sensors.
- LED Indicators: Most safety reversing sensors have LED indicators. Observe the status of these indicators – a steady glow usually indicates proper functioning, while flickering or being off may signal a problem.
- Flashing Opener Light: If your garage door opener’s remote light flashes ten times when attempting to close the door, it’s a clear indication that there’s an issue with the safety reversing sensors.
- Clear Path: Ensure that there are no objects or obstacles in the path between the sensors. Even small items can disrupt the sensors’ ability to communicate with each other.
Identifying sensor issues early on is crucial for maintaining the safety features of your garage door system.
2. Aligning Safety Reversing Sensors
Proper alignment of safety reversing sensors is essential for their optimal performance. Follow these detailed steps to align the sensors correctly:
- Loosen Wing Nuts: Begin by loosening the wing nuts on each sensor. This allows for adjustments to be made more easily.
- Adjust Sensors: Carefully adjust the sensors until their LED indicators glow steadily. This alignment ensures that the sensors have an unobstructed line of sight to each other.
- Tighten Wing Nuts: Once the sensors are aligned, tighten the wing nuts securely to maintain their position.
- Observe LED Indicators: Confirm that both sensors now exhibit a steady LED glow, indicating proper alignment.
- Test Operation: Test the garage door by attempting to close it. If the sensors are aligned correctly, the door should close without issues.
Proper alignment ensures that the safety reversing sensors communicate effectively, allowing the garage door opener to operate safely.
3. Checking Sensor Wires
Secure connections between the sensor wires and the garage door opener are crucial for their functionality. Follow this guide to check and ensure these connections are secure:
- Inspect Wiring: Examine the wiring connected to both sensors, ensuring they are securely attached to the garage door opener terminals.
- Tug Test: Gently tug on the wires to ensure they are firmly connected. Any looseness or disconnection can lead to flickering or non-functional sensors.
- Check for Damage: Inspect the wires for any signs of damage, such as cuts or frays. Damaged wires can disrupt the flow of signals between the sensors and the opener.
- Reconnect if Necessary: If any disconnections or damages are found, reconnect the wires securely or replace them if needed.
By ensuring the stability and integrity of sensor wires, you minimize the risk of signal interruptions and maintain the proper functioning of the safety reversing sensors.
4. Switching Sensor Positions
If aligning the sensors does not resolve the issue, switching their positions might provide a solution. Follow these steps:
- Loosen Wing Nuts: Similar to the alignment process, start by loosening the wing nuts on both sensors.
- Swap Positions: Switch the positions of the sensors, placing the sending sensor where the receiving sensor was and vice versa.
- Tighten Wing Nuts: Securely tighten the wing nuts after swapping positions.
- Check LED Indicators: Confirm that both sensors now exhibit a steady LED glow.
- Test Operation: Test the garage door by attempting to close it. If the sensors now function correctly, the issue may have been resolved by switching their positions.
This process ensures that any potential alignment issues are addressed by changing the orientation of the sensors.
Cable Tension Monitor Solutions
1. Identifying Cable Tension Monitor Issues
The MyQ remote LED light flashing a specific code can indicate problems with the cable tension monitor on model 8500w openers. Understand the code and follow troubleshooting steps:
- Flashing LED Code: If the MyQ remote LED light flashes five times, it signals a cable tension monitor issue for 8500w models.
- Troubleshooting Steps: Begin by identifying any visible issues with the cable tension monitor, such as loose connections, damaged wires, or misalignment.
- Inspect Wiring: Check the wiring connected to the cable tension monitor for any signs of damage or disconnection.
- Verify Roller Placement: Ensure the roller is positioned correctly on top of the cable, preventing any interference with the door’s movement.
By understanding the specific LED code and addressing potential issues, you can troubleshoot cable tension monitor problems effectively.
2. Manual Closing Procedure
When dealing with a door that won’t fully close, a manual closing procedure can be a temporary solution. Follow these steps:
- Disengage Door Locks: If you have an automatic garage door lock, disengage it by sliding the manual release to the unlocked position.
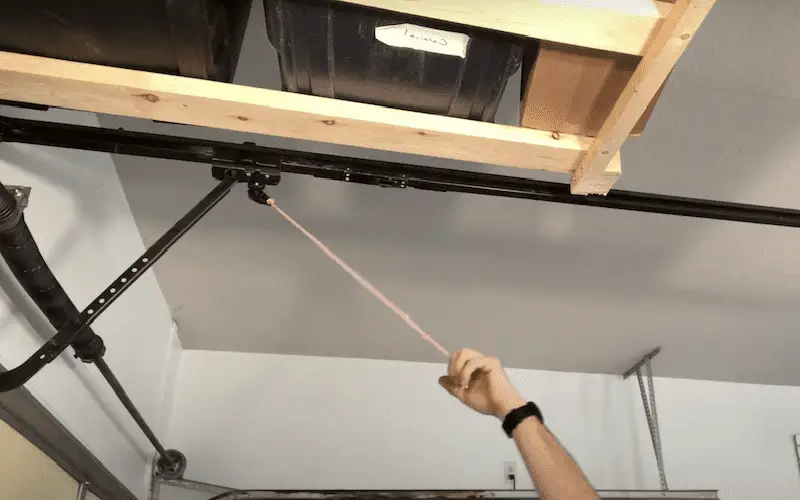
- Pull Emergency Release Handle: With all persons and pets clear of the door’s path, pull the emergency release handle until a click is heard.
- Lower the Door: Carefully lower the door to the fully closed position, paying attention to any resistance or obstructions.
- Re-engage the Door: Use the smart control panel or a remote control to open and then close the door. The door will re-engage once it begins to move.
Testing the manual closing procedure helps ensure the door can be operated manually in case of an emergency or when troubleshooting.
3. Checking Cable Tension Monitor Connections
To prevent issues with door closure related to the cable tension monitor, ensure secure connections:
- Inspect Connection: Examine the cable tension monitor’s connection to the terminals on the garage door opener. Make sure it’s plugged in securely.
- Check for Damaged Wires: Inspect the wires from the cable tension monitor for any signs of damage, such as cuts or frays.
- Verify Roller Position: Confirm that the roller is correctly positioned on top of the cable, ensuring proper tension.
By checking and maintaining secure connections, you can avoid potential disruptions in the operation of the cable tension monitor.
4. Replacing the Cable Tension Monitor
If troubleshooting efforts fail, replacing the cable tension monitor might be necessary:
- Locate Replacement Part: Identify the correct replacement cable tension monitor for your opener model.
- Disconnect Old Monitor: Unplug the old cable tension monitor from the garage door opener, ensuring the power is disconnected.
- Connect New Monitor: Attach the new cable tension monitor to the terminals on the garage door opener securely.
- Test Functionality: Perform a test by attempting to close the door using the MyQ app or timer settings.
By following these steps, you can replace a malfunctioning cable tension monitor and restore proper functionality to your garage door opener.
Balancing the Garage Door
1. Disengaging Door Locks
For those with automatic garage door locks, disengaging them can facilitate manual closing:
- Locate Automatic Lock: Identify the automatic lock mechanism, often labeled as the 841 lm automatic garage door lock.
- Slide Manual Release: Slide the manual release to the unlocked position, disengaging the automatic lock.
This simple step allows for easier manual closing of the door without the interference of the automatic lock.
2. Manual Closing and Balance Check
Guide on manually closing the door and checking for balance:
- Pull Emergency Release Handle: Disengage the door by pulling the emergency release handle until a click is heard.
- Lower the Door: Carefully lower the door to the fully closed position, assessing for any resistance or obstructions.
- Raise and Lower by Hand: Slowly raise and lower the door by hand, checking for balance. A balanced door should stay in place when raised halfway.
By performing these steps, you can manually close the door and ensure it maintains proper balance.
3. Examining Track, Rollers, and Jambs
In-depth examination of the tracks, rollers, and jambs to address issues causing the door to stick or bind:
- Inspect Tracks: Check the tracks for any misalignment, damage, or debris. Clean and align them as needed.
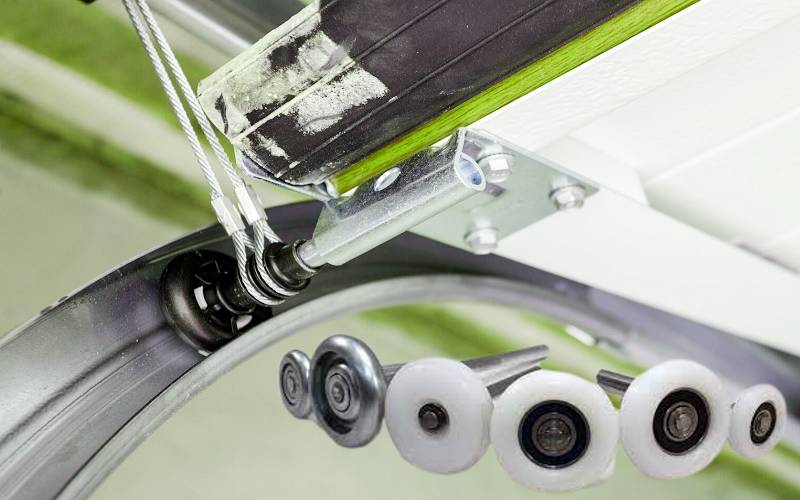
- Examine Rollers: Inspect the rollers for wear and tear. Lubricate them if necessary and replace any damaged rollers.
- Check Jambs: Examine the jambs for any obstructions or damage. Clear any debris and ensure smooth door movement.
Regular maintenance of tracks, rollers, and jambs prevents issues that may affect the door’s smooth operation.
Adjusting Travel for Garage Door Openers
1. Programming Travel for LiftMaster Openers
Step-by-step instructions on programming travel for your LiftMaster garage door opener:
- Access Setup: Lift the cover to locate the buttons for programming travel. Look for a step-saver setup label for openers manufactured starting in 2022.
- Press Adjustment Button: Press and hold the adjustment button until the up button begins to flash.
- Set Up Travel Limits: Hold the up button until the door is in the desired up or open position. Release the button.
- Program Down Position: The down button will start flashing. Hold it until the door is in the desired down or closed position.
- Complete Setup: Release the adjustment button. The opener lights will flash twice, indicating successful travel programming.
2. Testing the Safety Reversal System
Importance of testing the safety reversal system after making adjustments:
- Place Board Under Door: Open the door fully and place a 1.5-inch board or a 2×4 flat on the floor.
- Initiate Closing: Close the door using the remote control or wall-mounted door control. The door should stop and reverse upon contact with the board.
- Observe Reversal: Confirm that the door returns to the fully open position, and the opener beeps with lights flashing.
Testing the safety reversal system ensures it functions correctly, enhancing the safety of your garage door.
3. Troubleshooting Travel and Force Settings
Addressing issues that may arise during the adjustment process:
- Flashing Lights Indication: If the opener lights flash five times, it indicates that programming has timed out, and travel limits have not been set.
- Restart Process: Restart the travel programming process, ensuring the door is closed further onto the garage floor.
- Follow Steps Closely: Carefully follow the programming steps, paying attention to button presses and release timings.
Conclusion
Troubleshooting and resolving issues with your LiftMaster garage door not closing fully demand a systematic and thorough approach. The comprehensive steps outlined in this guide empower you to identify, address, and rectify specific problems, ultimately ensuring the seamless and optimal performance of your garage door system.
From understanding common reasons for door closure issues, such as binding, engaged locks, or changes in door operation, to diving into specific components like the MyQ remote LED light, safety reversing sensors, and cable tension monitor – this guide covers a spectrum of potential concerns. Each section provides a detailed outline of issues and step-by-step solutions, offering users a holistic toolkit for effective problem-solving
