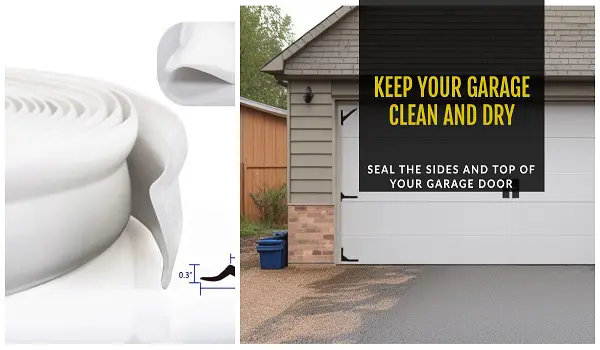
Your garage door is a crucial element of your home, providing protection against the elements and ensuring security.
However, it can also unintentionally allow energy loss, drafts, dust, and insects to enter. Fortunately, addressing these issues can be a straightforward and cost-effective task.
In this article, I’ll share my experience with garage door coatings, including the different types, how to install them step-by-step, and the many benefits they offer. Please read more clearly
You may also like:
Types of Garage Door Weatherstripping
Before we embark on the installation journey, it’s essential to familiarize ourselves with the different types of garage door weatherstripping options:
- Vinyl Weatherstripping: This is a popular choice due to its affordability, ease of installation, and availability in various colors to match your garage door’s aesthetic. However, vinyl weatherstripping may not be as durable as some other options, potentially requiring more frequent replacements.

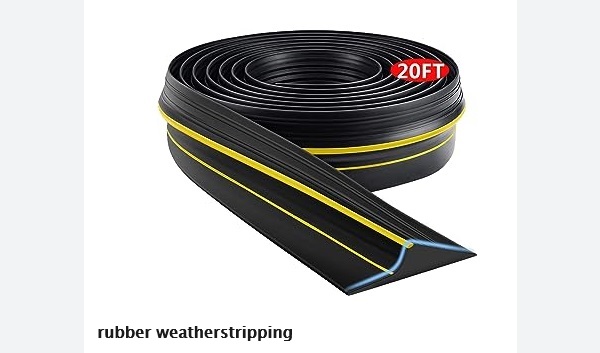
- Rubber Weatherstripping: If you’re looking for durability and the ability to withstand extreme temperatures, rubber weatherstripping is an excellent choice. While it may come with a slightly higher price tag compared to vinyl, its longevity makes it a cost-effective investment.
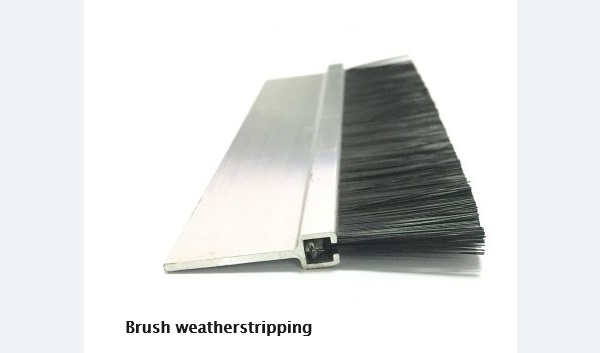
- Brush Weatherstripping: This innovative solution employs bristles to seal gaps around your garage door effectively. It excels in keeping out dust and insects. However, it’s worth noting that brush weatherstripping can be a bit more challenging to clean than other types.
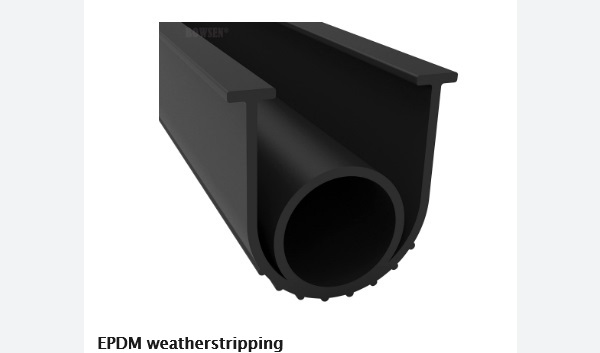
- EPDM Weatherstripping: EPDM, a type of rubber weatherstripping, stands out for its exceptional durability and resistance to extreme temperatures. It provides top-tier protection against dust and insects. Keep in mind that it is the most expensive option among garage door weatherstripping choices.
When choosing garage door weatherstripping, it is important to consider the following factors:
- Climate: If you live in a climate with extreme temperatures, you will need to choose a type of weatherstripping that can withstand those temperatures.
- Budget: Garage door weatherstripping can range in price from inexpensive to expensive. Choose a type of weatherstripping that fits your budget.
- Durability: If you have a busy garage, you will need to choose a type of weatherstripping that is durable and can withstand a lot of wear and tear.
- Ease of installation: Some types of garage door weatherstripping are easier to install than others. If you are not comfortable installing weatherstripping yourself, you may want to choose a type that is easy to install.
Once you have chosen the right type of garage door weatherstripping, you can install it yourself or have it installed by a professional.
With an understanding of the various weatherstripping options, let’s now move on to the step-by-step process of installing garage door weatherstripping.
How to Install Garage Door Side Weatherstripping
Sealing the sides of your garage door is a straightforward process that can significantly enhance energy efficiency and weather protection:
- Step 1: Accurately measure the sides of your garage door to determine the length of weatherstripping needed.
- Step 2: Cut the weatherstripping to the required length using a utility knife or scissors. Ensure the cut is clean and precise.
- Step 3: Thoroughly clean the sides of the garage door to ensure proper adhesion. Remove any dirt, debris, or old weatherstripping.
- Step 4: Apply the adhesive, which is typically included with the weatherstripping, to the back of the weatherstripping material.
- Step 5: Carefully press the weatherstripping onto the sides of the garage door, ensuring it forms a tight seal. Make sure it adheres securely along the entire length.
How to Install Garage Door Top Weatherstripping
Don’t forget the importance of sealing the top of your garage door. Here’s how to do it effectively:
- Step 1: Measure the top of your garage door accurately to determine the required length of weatherstripping.
- Step 2: Cut the weatherstripping to the appropriate length, ensuring a clean and precise cut.
- Step 3: Thoroughly clean the top of the garage door to remove any dirt or debris.
- Step 4: Apply adhesive to the back of the weatherstripping material.
- Step 5: Gently attach the weatherstripping to the top of the garage door, ensuring a snug and secure fit. It’s crucial to maintain uniform contact along the entire length.
How to Test the Seal of Garage Door Weatherstripping
After the installation, it’s essential to verify that your garage door weatherstripping is performing as intended. Here’s how to conduct a thorough seal test:
- Visual Inspection: Close your garage door and inspect it for any visible gaps or daylight seeping through. These are clear indicators of gaps in the seal.
- Dollar Bill Test: To further assess the seal, perform a “dollar bill test.” Simply slide a dollar bill between the closed garage door and the weatherstripping. If the bill can be pulled out easily, it signifies that adjustments or replacement may be necessary to achieve an effective seal.
How to Improve Garage Door Energy Efficiency with Weatherstripping
Garage door weatherstripping significantly contributes to improving the overall energy efficiency of your home.
By effectively sealing gaps and preventing drafts, it helps maintain a stable indoor temperature.
This, in turn, reduces the strain on your heating and cooling systems, leading to potential energy savings and increased comfort.
How to Reduce Air Gaps and Drafts Around Garage Door with Weatherstripping
Air gaps and drafts around your garage door not only impact energy efficiency but also compromise the comfort of your garage space.
Garage door weatherstripping is a reliable solution to eliminate these issues, creating a more comfortable environment.
How to Protect Garage from the Weather with Weatherstripping

Weatherstripping goes beyond energy efficiency; it also serves as a protective barrier for your garage.
By effectively sealing your garage door, it prevents rain, snow, and debris from entering, keeping your belongings safe and dry.
How to Maintain Garage Door Weatherstripping
As with any component of your home, regular maintenance is crucial to ensure the longevity and effectiveness of your garage door weatherstripping.
Periodically inspect the weatherstripping for signs of wear and tear, and promptly replace it as needed to maintain optimal performance.
Conclusion
In summary, garage door weatherstripping is a practical, accessible, and highly effective solution to enhance energy efficiency, reduce air gaps and drafts, and safeguard your garage from adverse weather conditions.
Whether you opt for vinyl, rubber, brush, or EPDM weatherstripping, the benefits are substantial.
By following the installation steps and conducting periodic checks, you can ensure that your garage remains well-sealed, comfortable, and energy-efficient.
So, don’t hesitate invest in weatherstripping today to effectively seal your garage door sides and top and enjoy the numerous advantages it brings. A properly sealed garage door is the key to a more efficient and comfortable living space.


