Garage Workbench Ideas
In the realm of DIY enthusiasts and home improvement aficionados, the garage workbench stands as the cornerstone of a functional and organized workspace.
Whether you’re a seasoned craftsman or just starting your journey in the world of DIY projects, having a well-designed garage workbench can significantly enhance your efficiency and creativity. Let’s take a look at some ideas and considerations to help you get started on your garage workbench project.
What is a Garage Workbench?
A garage workbench is a dedicated and functional workspace within a garage, specifically designed for DIY projects, woodworking, crafting, or other hands-on activities. It serves as a central hub where individuals can engage in various tasks, from assembling furniture to repairing vehicles.
The primary purpose of a garage workbench is to provide a sturdy and organized surface for working on projects, offering a designated area equipped with tools, storage solutions, and a layout tailored to the user’s specific needs.
1. Simple Workbench
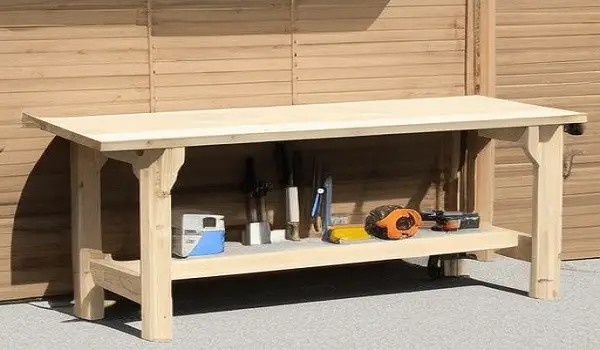
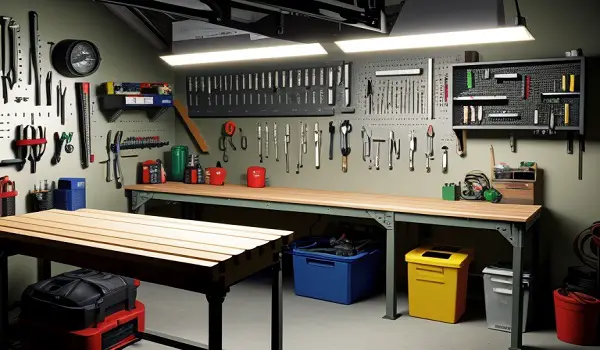
A simple workbench is the foundation of any garage workspace. These versatile benches are designed for general use and can be tailored to your preferences. You can opt for a wall-mounted version if you have limited space or choose a freestanding one if you need mobility. They can be constructed from wood or metal, allowing you to select the material that best suits your needs. Simple workbenches are perfect for various tasks, including woodworking, crafting, and general repairs.
Here are the instructions to build a simple workbench:
- Materials: You will need 2x4s, 3/4″ plywood, screws, and wood glue.
- Cut the Legs: Cut four 2x4s to the desired height of your workbench.
- Cut the Frame: Cut two 2x4s to the length of your workbench and two 2x4s to the width of your workbench. Attach the legs to the frame using screws and wood glue.
- Attach the Top: Cut a piece of 3/4″ plywood to the size of your workbench top. Attach the top to the frame using screws and wood glue.
- Finish: Sand the workbench and apply a finish of your choice.
2. Mobile Workbench
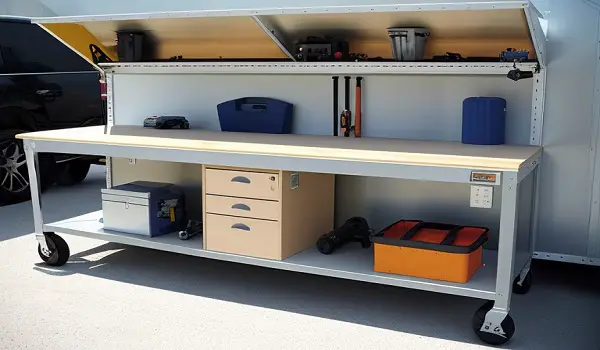
If space is at a premium in your garage or if you need flexibility in your workspace, consider a mobile workbench. These benches come equipped with wheels, making it easy to move them around. This mobility is especially useful if you have a multi-purpose garage that serves as both a workshop and parking space. You can bring your workbench closer to your project or tuck it away when not in use, maximizing your available space.
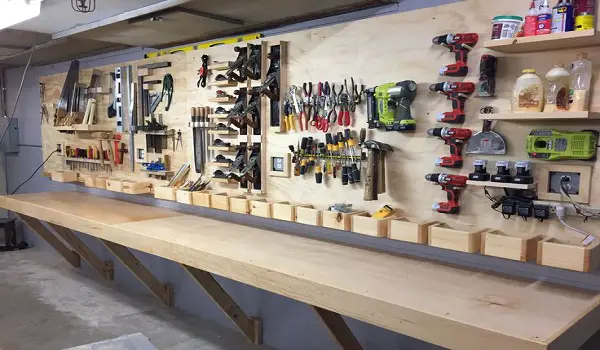
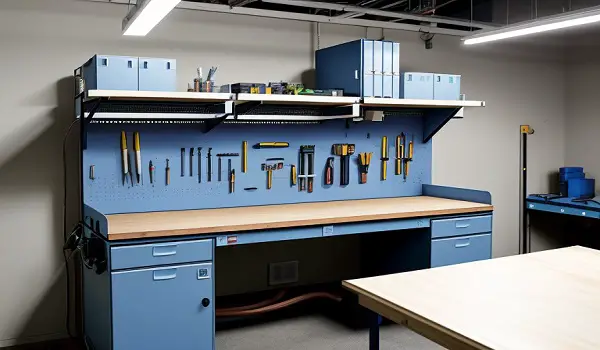
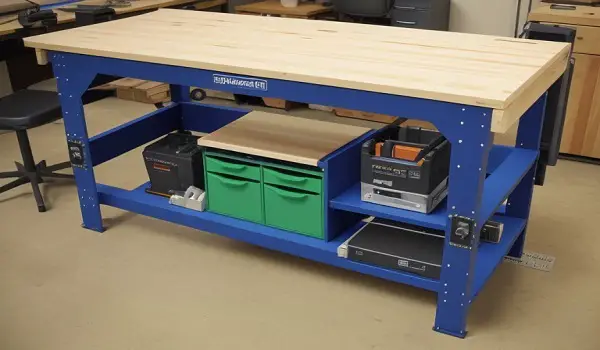
3. Workbench with Storage
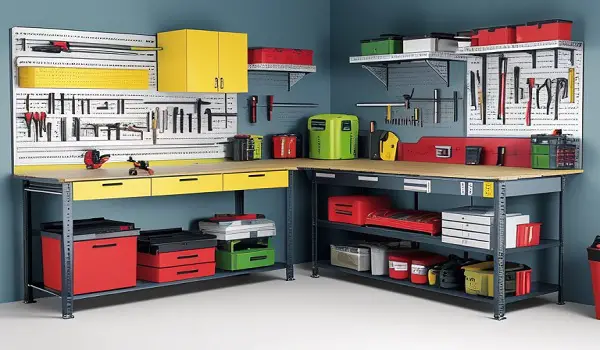
Organization is key in a productive garage, and workbenches with built-in storage solutions can help you achieve just that. These benches typically come with drawers, shelves, or cabinets, allowing you to keep your tools and materials neatly organized and readily accessible. Say goodbye to cluttered workspaces, as a workbench with storage provides dedicated spaces for your gear, helping you stay focused and efficient.
Here are the instructions to build a workbench with storage:
- Materials: You will need 2x4s, 3/4″ MDF, 3/4″ plywood, screws, and wood glue.
- Cut the Legs: Cut four 2x4s to the desired height of your workbench.
- Cut the Frame: Cut two 2x4s to the length of your workbench and two 2x4s to the width of your workbench. Attach the legs to the frame using screws and wood glue.
- Attach the Bottom Shelf: Cut a piece of 3/4″ MDF to the size of your workbench bottom shelf. Attach the shelf to the frame using screws and wood glue.
- Build the Middle Shelf: Cut two pieces of 3/4″ MDF to the size of your workbench middle shelf. Attach the shelves to the frame using screws and wood glue.
- Attach the Top Shelf: Cut a piece of 3/4″ plywood to the size of your workbench top shelf. Attach the shelf to the frame using screws and wood glue.
- Add Casters: Attach casters to the bottom of the legs to make the workbench mobile.
4. Workbench for Car Repair

Automotive enthusiasts require specialized workbenches tailored to their needs. A workbench designed for car repair is built to withstand heavy-duty tasks. These benches often feature robust materials, such as steel or hardwood, ensuring durability. They come equipped with drawers and compartments to store your tools, and some have a sloped surface to catch fluids, keeping your garage clean during maintenance and repairs.
Here are some workbench ideas that might be useful for car repair:
- BLACK+DECKER Workmate Workbench: This classic workbench design provides a 550-pound weight capacity and lets you fold the workbench down for easy storage. You can use its two-piece top as a vice or clamp to hold in place whatever you’re working on. Like other versions of this bench, BLACK+DECKER includes clamping pegs that fit into holes in the tabletop.
- KETER Jobmade Portable Workbench: This workbench has a weight capacity of 1000 pounds and is made of heavy-duty resin with aluminum legs.
- ATD Tools Heavy-Duty Mobile Workbench: This workbench has a weight capacity of 500 pounds and is made of heavy-duty steel.
- M539 Restorations’ Workbench: This workbench is designed specifically for car repair and has good lighting, an organizer for all your tools, a sturdy and easy-to-clean work table positioned at the right height, and plenty of storage space beneath.
5. Workbench with a Vise
For woodworking, metalworking, or any task that requires securing workpieces firmly in place, a workbench with a vise is indispensable. Vises provide stability and precision, allowing you to work on intricate projects with confidence. Whether you’re cutting, sanding, or shaping materials, a vise-equipped workbench is a valuable asset in your garage workshop.
Here are the instructions to build a workbench with a vise:
- Materials: You will need 2x4s, 3/4″ MDF, 3/4″ plywood, screws, and wood glue.
- Cut the Legs: Cut four 2x4s to the desired height of your workbench.
- Cut the Frame: Cut two 2x4s to the length of your workbench and two 2x4s to the width of your workbench. Attach the legs to the frame using screws and wood glue.
- Attach the Bottom Shelf: Cut a piece of 3/4″ MDF to the size of your workbench bottom shelf. Attach the shelf to the frame using screws and wood glue.
- Build the Middle Shelf: Cut two pieces of 3/4″ MDF to the size of your workbench middle shelf. Attach the shelves to the frame using screws and wood glue.
- Attach the Top Shelf: Cut a piece of 3/4″ plywood to the size of your workbench top shelf. Attach the shelf to the frame using screws and wood glue.
- Add Casters: Attach casters to the bottom of the legs to make the workbench mobile.
- Install the Vise: Install the vise on the workbench top according to the manufacturer’s instructions.
6. Workbench with a Light
When your garage doubles as a workspace during the evening or in low-light conditions, a workbench with built-in lighting is a must. Proper illumination enhances your visibility, ensuring accuracy and safety in your projects. These benches often come with adjustable lights, allowing you to direct the illumination exactly where you need it, reducing shadows and enhancing your work quality.
Here are some instructions to build a workbench with a light:
- Materials: You will need 2x4s, 3/4″ MDF, 3/4″ plywood, screws, wood glue, a 2-foot by 4-foot light panel, a light switch, and an outlet.
- Cut the Legs: Cut four 2x4s to the desired height of your workbench.
- Cut the Frame: Cut two 2x4s to the length of your workbench and two 2x4s to the width of your workbench. Attach the legs to the frame using screws and wood glue.
- Attach the Bottom Shelf: Cut a piece of 3/4″ MDF to the size of your workbench bottom shelf. Attach the shelf to the frame using screws and wood glue.
- Build the Middle Shelf: Cut two pieces of 3/4″ MDF to the size of your workbench middle shelf. Attach the shelves to the frame using screws and wood glue.
- Attach the Top Shelf: Cut a piece of 3/4″ plywood to the size of your workbench top shelf. Attach the shelf to the frame using screws and wood glue.
- Add Casters: Attach casters to the bottom of the legs to make the workbench mobile.
- Install the Light Panel: Install the light panel on the workbench top according to the manufacturer’s instructions.
- Install the Light Switch and Outlet: Install the light switch and outlet on the workbench according to the manufacturer’s instructions.
7. Workbench with a Dust Collection System
Keeping your workspace clean is essential for both your health and the longevity of your tools. Workbenches with integrated dust collection systems help you maintain a tidy environment. These systems capture dust and debris, preventing them from circulating in the air and settling on your workspace, tools, and projects. A cleaner workspace not only improves air quality but also reduces the risk of accidents caused by slipping on debris.
8. Workbench with a Sink
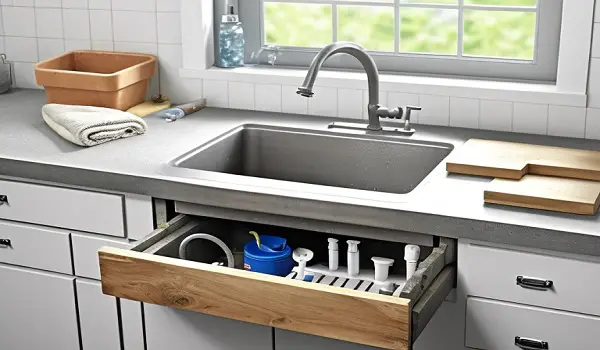
A workbench with a built-in sink is a practical choice if you often find yourself needing to wash your hands or tools while working.
The sink provides a convenient water source, making cleanup easier and more efficient. This feature is especially beneficial if your projects involve messy materials or substances that require frequent cleaning.
9. Workbench with a Built-in Air Compressor
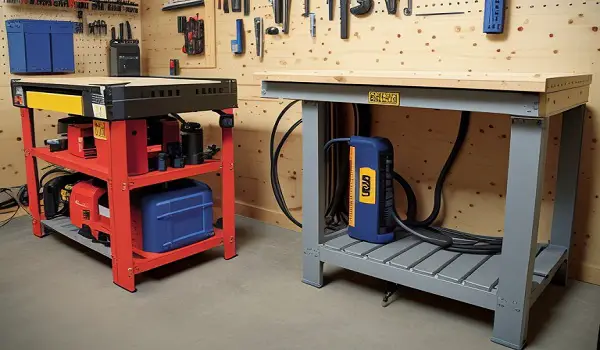
If you frequently use pneumatic tools like nail guns or air wrenches, a workbench with an integrated air compressor can streamline your workflow.
Having a compressor on hand means you don’t have to transport it separately, saving time and effort. It’s a convenient addition that ensures you have a reliable power source for your pneumatic tools right at your workbench.
10. Custom Workbench
When none of the standard options quite meet your requirements, a custom workbench is the solution. While it may be a bit more expensive, it allows you to design a workbench that perfectly suits your unique needs and preferences. You can select the size, materials, features, and layout to create a workspace tailored to your specific projects and workflow. .
Conclusion
A well-designed garage workbench is the cornerstone of an organized and efficient workspace. Whether you opt for a simple, mobile, or specialized workbench, careful planning and attention to detail are key.
Select the right materials, tools, and accessories, and prioritize safety to ensure your garage workbench becomes a versatile and enjoyable space for all your projects. So, roll up your sleeves, gather your tools, and get started on your garage workbench project today.
With these garage workbench ideas, you’ll be well on your way to creating a functional and inspiring workspace tailored to your needs. Get ready to transform your garage into a haven of creativity and productivity with these garage workbench ideas!