Beam Size Calculator
In the realm of structural engineering, beam size calculation plays a pivotal role in ensuring the stability and integrity of structures. Beams, being horizontal members that support loads, are crucial components in various constructions, ranging from buildings and bridges to machinery and equipment. Their proper sizing is paramount to prevent excessive deflection, stress, or even failure under applied loads.
Traditional beam size calculation methods involve manual computations and reference to design tables, which can be time-consuming and prone to errors. T
o address these challenges, beam size calculators have emerged as valuable tools for engineers and designers. These calculators utilize advanced algorithms and integrated design codes to streamline the beam selection process, ensuring optimal performance and safety.
This comprehensive guide delves into the world of beam size calculators, providing a detailed understanding of their principles, applications, and benefits. By equipping readers with the knowledge and tools necessary for effective beam selection, we aim to contribute to the construction of safer and more resilient structures.
Factors Influencing Beam Size
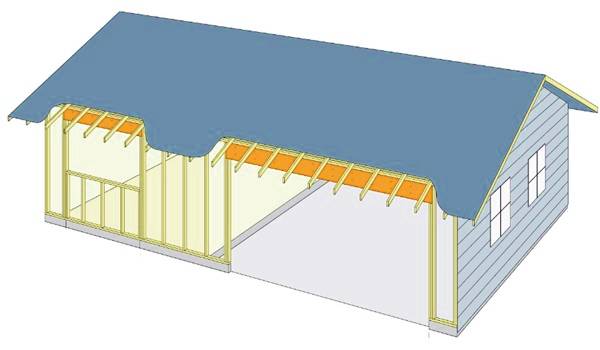
Beam Design
The design of a beam is a complex process that considers various factors, such as the span, load-bearing capacity, and material properties. Each of these elements plays a pivotal role in determining the appropriate size for a given application.
Beam Properties
Understanding the inherent properties of different materials is paramount. Whether it’s steel, concrete, or wood, each material has distinct characteristics that directly impact the load-bearing capacity and overall performance of the beam.
Load-Bearing Capacity
The ability of a beam to support a load without experiencing failure is a critical consideration. Live loads, including occupants or equipment, and dead loads, representing the self-weight of the beam and other permanent elements, collectively influence the beam’s load-bearing capacity.
Deflection
Deflection, or the amount of bending or sag in a beam under load, is another crucial factor. Balancing the desired structural rigidity with permissible deflection limits ensures the beam meets both safety and performance criteria.
Beam Size Calculators
The evolution of technology has brought forth tools that simplify the intricate process of beam selection. Beam size calculators have become indispensable for engineers and construction professionals, providing accurate recommendations based on a variety of parameters.
Types of Beam Size Calculators
- Online Calculators: Accessible through web browsers, these calculators offer convenience in determining beam sizes for diverse applications.
- Software Programs: Specialized beam design software enhances analysis capabilities, allowing for consideration of complex load scenarios and additional design considerations.
- Design Manuals: Manuals such as the AASHTO LRFD Bridge Design Software and STAAD.Pro offer beam size tables and guidelines for specific applications like bridge design and structural analysis.
Benefits of Using Beam Size Calculators
1. Accuracy
Beam size calculators ensure precision in size recommendations by leveraging established engineering principles and formulas.
2. Efficiency
These calculators streamline the beam selection process, eliminating the need for manual calculations and saving valuable time in the design phase.
3. Cost-Effectiveness
By optimizing beam size, calculators play a pivotal role in minimizing material costs and overall construction expenses.
Calculating Beam Depth
Thumb Rule Formula
Determining the depth of a beam is not an arbitrary process; it involves a systematic approach using a thumb rule formula. This formula, denoted as depth of beam = l/10 to l/12, where ‘l’ represents the clear span, serves as the foundational step in beam size calculation. The clear span, in essence, is the inner-to-inner distance between columns, a fundamental parameter in the structural equation.
Clear Span Definition
Clear span, a term frequently encountered in structural engineering, holds immense significance in the realm of beam calculations. It precisely refers to the inner-to-inner distance between columns, providing a crucial input for determining the size of the beam. The clear span acts as the canvas upon which the structural dimensions are painted.
Illustration: Clear Span of 6 Meters
Let’s put the formula into practical perspective by considering a beam with a clear span of 6 meters. Applying the formula (6000/10 or 6000/12), we unveil a depth range spanning from 500mm to 600mm. For a clear span of 6 meters, the depth becomes a critical parameter, oscillating within the specified range to ensure optimal structural integrity.
Example: Clear Span of 3 Meters
Similarly, for a 3-meter clear span, the depth calculation involves 3000/10, resulting in 300mm, or 3000/12, yielding 250mm. Thus, for a 3-meter clear span, the depth exhibits variability, ranging from 250mm to 300mm. This exemplifies the dynamic nature of beam sizing, adjusting according to the unique parameters of each construction scenario.
Determining Beam Width
Width-to-Depth Ratio
The width-to-depth ratio emerges as a pivotal factor in the meticulous process of beam sizing. As per the guidelines set by IS 13920, this ratio (w/d) should surpass the threshold of 0.4 to 0.45. Here, ‘w’ symbolizes the width, and ‘d’ denotes the depth—a delicate balance ensuring structural stability.
Minimum Depth Requirement
Beyond the ratio, there exists a minimum depth requirement that plays a non-negotiable role in maintaining safety standards. A minimum depth of 200mm acts as a safety net, ensuring that structural elements can withstand the rigors of real-world applications.
Example: Clear Span of 3 Meters
To illustrate this, let’s examine a beam with a 3-meter clear span and a depth of 300mm. Assuming a width of 200mm, the resulting w/d ratio is 200/300, yielding 0.66. This surpasses the recommended ratio, underscoring the importance of adhering to structural guidelines.
Example: Clear Span of 6 Meters
Contrastingly, for a 6-meter clear span with a depth of 600mm, providing a width of 200mm results in a w/d ratio of 200/600, or 0.36—below the recommended range. Adjusting the width to 250mm rectifies this, producing a ratio of 250/600, equating to 0.45. This meticulous adjustment aligns with safety criteria, demonstrating the dynamic nature of beam sizing.
Safety Considerations
Width-to-Depth Ratio Guidelines
Adherence to the recommended width-to-depth ratio is not merely a suggestion but a prerequisite for ensuring the structural integrity of beams. These guidelines act as a compass, guiding engineers through the complex terrain of beam sizing.
Minimum Depth Standard
Beyond ratios, maintaining a minimum depth of 200mm emerges as a foundational standard. This minimum depth acts as a safety benchmark, underlining the commitment to constructing robust and secure structures.
Practical Examples
3-Meter Clear Span
In a practical application with a 3-meter clear span, we delve into the intricacies of beam sizing. This real-world example illustrates the delicate interplay between depth and width, emphasizing the significance of both parameters in ensuring optimal safety.
6-Meter Clear Span
Expanding our exploration, a 6-meter clear span presents unique challenges. This example underscores the need for adjustments in width to meet safety criteria, showcasing the adaptability of beam sizing principles.
Conclusion
The determination of beam size is an intricate dance, weaving together the elements of clear span, depth, and width. Adhering meticulously to recommended ratios and minimum standards is not a mere formality; it is the essence of ensuring the structural robustness required for any construction.
This symphony of calculations and adjustments culminates in structures that not only stand tall but do so with the enduring resilience necessary for longevity and safety.