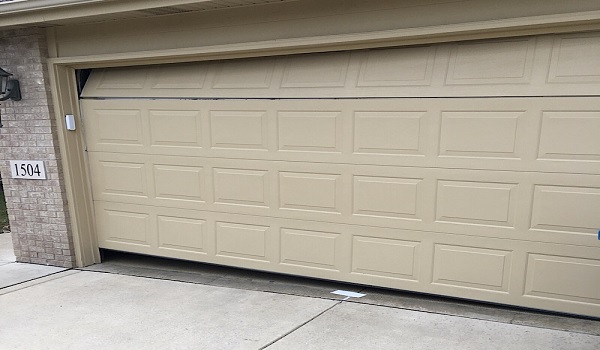
Garage door shifted to one side when opening
Garage doors, often overlooked yet integral components of our homes, play a dual role in providing security and convenience. As we drive into our homes, we expect the garage door to seamlessly open, granting us access to the safety of our personal space.
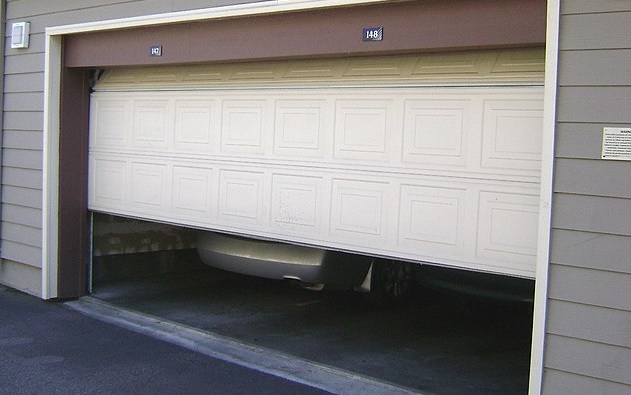
Like any mechanical system, garage doors are susceptible to issues, and a prevalent concern faced by homeowners is the unsettling occurrence of a garage door shifting to one side during the opening process. Here I will explore the many reasons that can cause a garage door to deviate from its intended path and provide a thorough troubleshooting guide for those facing this confusing problem.
Understanding Garage Door Mechanics
Before we delve into the intricacies of a garage door shift, let’s acquaint ourselves with the fascinating mechanics that power these daily gateways. A typical garage door system is a harmonious ensemble of various components, each playing a vital role in ensuring the smooth operation of the door. Tracks guide its trajectory, rollers facilitate movement, and torsion springs maintain the delicate balance required for optimal functioning.
The synergy between these components is crucial, akin to a well-choreographed dance, where any misstep can lead to disruptions in performance. Understanding these mechanics is foundational to comprehending why a garage door might deviate from its intended path.
Common Causes of a Shifted Garage Door
1. Broken Torsion Spring
The torsion spring is a critical part of the garage door mechanism that counterbalances its weight, making it easier to lift and lower.
When a torsion spring breaks, the door becomes imbalanced, causing it to shift to one side during operation. This is a serious issue that requires immediate attention from a professional garage door repair technician.
2. Broken Lift Cable
Lift cables are essential components that connect the garage door to the springs, allowing for smooth and synchronized movement.
If one or more lift cables break, the door’s balance is compromised, leading to a noticeable shift when opening or closing the door.
Again, this is not a problem to be tackled without proper knowledge and experience, so contacting a professional is crucial.
3. Misaligned Tracks
Over time, the tracks that guide the garage door can become misaligned due to various factors, such as regular wear and tear or accidental impacts.
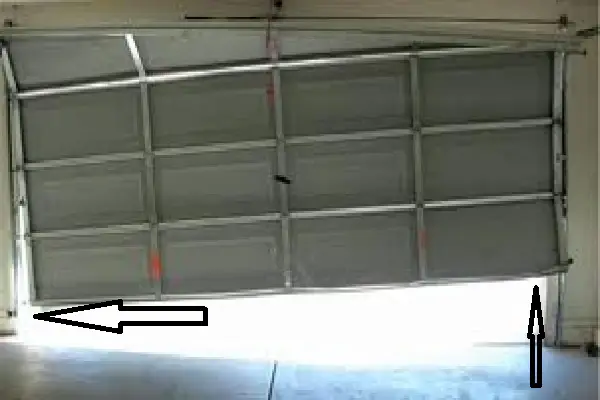
Misaligned tracks cause the door to rub against them, leading to friction and hindering smooth operation. This friction can force the door to move unevenly, resulting in the door being shifted to one side.
Proper realignment of the tracks by a skilled technician is necessary to resolve this issue.
4. Faulty Rollers
Garage door rollers facilitate the door’s movement along the tracks. Continuous usage and exposure to external elements can cause them to wear out or become damaged.
When the rollers are not functioning correctly, the door may drag or jerk during operation, causing a noticeable shift to one side.
Replacing the faulty rollers and ensuring they are well-lubricated will help maintain smooth movement.
Impact of a Shifted Garage Door
Beyond the immediate inconvenience of a garage door off-kilter, there are profound consequences that may unfold if the issue is left unaddressed. Potential damage to the door itself is a looming threat, and the safety of residents is compromised. This is not merely a matter of aesthetics; it’s a concern that warrants prompt attention to avert further complications.
As we embark on this troubleshooting guide, our aim is not only to rectify the immediate problem but also to shed light on the overarching importance of maintaining the integrity of our garage doors.
DIY Inspection and Initial Steps
As responsible homeowners, taking the initiative to conduct a preliminary inspection can be instrumental in resolving issues with a garage door shift. The following are essential steps you can undertake before considering professional help:
Visual Checks of Tracks and Rollers
Begin by visually inspecting the tracks and rollers. Look for any visible misalignments, obstructions, or debris that may hinder the smooth movement of the garage door. Ensure that the tracks are parallel and free from any hindrances.
Lubrication of Moving Parts
Lubrication is the lifeblood of a well-functioning garage door. Apply a high-quality garage door lubricant to all moving parts, including rollers, tracks, hinges, and springs. This simple step can often alleviate friction and improve the overall operation of the door.
Manual Balance Checks
Perform a manual balance check to assess the equilibrium of the garage door. With the door in the closed position, disconnect the automatic opener and manually lift the door halfway. A balanced door should stay in place, while an imbalanced one might shift or feel heavy on one side.
Adjusting Misaligned Tracks
Misaligned tracks are a common culprit behind a garage door shift. If you’ve identified this issue, fear not. Follow this step-by-step guide to realign tracks, ensuring safety precautions are observed to avoid injuries during the procedure:
- Tools and Safety Gear: Gather the necessary tools, including a rubber mallet and a level. Ensure you wear safety glasses and gloves for protection.
- Loosen Bolts: Loosen the bolts securing the tracks to the frame. This allows for adjustment.
- Realign Tracks: Use the level to ensure the tracks are straight, and then gently tap them with the rubber mallet to realign. Tighten the bolts once the tracks are straight.
- Test the Door: Open and close the door manually to confirm the realignment. Make further adjustments if necessary.
Roller Replacement and Maintenance
Worn-out rollers can contribute to a garage door shift. Here’s how to identify and replace them safely, along with tips for regular maintenance:
- Identification: Inspect the rollers for signs of wear, such as cracks or unevenness. Noisy operation or jerky movements may also indicate worn-out rollers.
- Replacement: If you find damaged rollers, replace them with new ones. Detach the roller brackets, slide out the old rollers, and insert the new ones. Secure the brackets back in place.
- Regular Maintenance: Regularly lubricate the rollers to prevent premature wear. This simple act can significantly extend the lifespan of these critical components.
Addressing Torsion Spring Imbalance
The torsion spring’s role in balancing the garage door is pivotal. If you suspect an imbalance, follow these steps to decide whether it’s a DIY project or requires professional assistance:
- Signs of Imbalance: Look for signs like uneven door movement, difficulty opening or closing, or visible gaps in the spring coils.
- DIY Adjustment: Some homeowners may feel comfortable adjusting the torsion spring. However, it’s crucial to follow manufacturer guidelines and exercise extreme caution, as mishandling can lead to serious injuries.
- Professional Assistance: If in doubt or uneasy about the task, seeking professional help is advisable. Certified technicians have the expertise to address torsion spring imbalances safely.
When to Seek Professional Help
While DIY solutions are feasible for certain issues, there are instances where professional intervention becomes imperative. Pay attention to the following indicators that suggest a complex problem:
- Persistent Issues: If DIY attempts fail to resolve the problem, it’s time to consult professionals.
- Unusual Noises: Strange noises during operation, such as grinding or banging sounds, may indicate a more intricate problem.
- Structural Damage: Visible damage to the door, tracks, or other components requires professional assessment and repair.
Certified technicians bring specialized knowledge and experience to tackle complex garage door issues efficiently.
Preventive Measures for Garage Door Maintenance
Preventing future complications involves proactive maintenance. Here are some tips for regular inspections and lubrication:
- Routine Inspections: Conduct visual inspections monthly, looking for any signs of wear, misalignments, or damage. Address minor issues promptly to prevent escalation.
- Lubrication Schedule: Establish a lubrication schedule, applying a recommended garage door lubricant to all moving parts at least twice a year. Increase frequency if the door is frequently used.
A well-maintained garage door is less likely to encounter issues like a shift to one side, enhancing its longevity and performance.
Common Mistakes to Avoid
In our quest for a solution, we may inadvertently make mistakes that worsen the problem. To ensure you navigate the troubleshooting process effectively, here are common DIY errors to avoid:
- Overlooking Safety Precautions: Safety should always be a priority. Ignoring safety guidelines can lead to accidents and injuries. Use protective gear and follow proper procedures.
- Ignoring Professional Advice: If professional help is recommended, seeking it promptly is crucial. Ignoring expert advice may exacerbate the problem and lead to more extensive repairs.
- Incomplete Repairs: Rushed or incomplete repairs can result in temporary fixes, only to have the issue resurface later. Take the time to address the root cause comprehensively.
By steering clear of these pitfalls, you enhance the effectiveness of your DIY efforts and contribute to a successful resolution of the garage door shift.
Cost Estimates for Garage Door Repairs
Understanding the factors influencing repair costs empowers homeowners to budget effectively. Here’s an insight into cost estimates and budget-friendly tips:
Factors Influencing Repair Costs
- Type of Repair: The nature of the repair, whether it involves realigning tracks, replacing rollers, or addressing torsion spring issues, affects costs.
- Severity of the Problem: The extent of the problem influences the complexity of the repair and, consequently, the associated costs.
- Professional Fees: Hiring certified technicians comes with a cost. However, their expertise ensures a thorough and lasting solution to the garage door issue.
Budget-Friendly Tips
- DIY Repairs: For minor issues like lubrication, basic adjustments, and roller replacement, DIY solutions can save on professional fees.
- Regular Maintenance: Investing in routine maintenance, including inspections and lubrication, can prevent major issues, reducing the likelihood of hefty repair bills.
By understanding the dynamics of repair costs and adopting proactive measures, homeowners can navigate the financial aspects of garage door maintenance more effectively.
Case Studies
Real-life examples add a practical dimension to our troubleshooting guide. Let’s delve into case studies of garage door shifts, comparing outcomes of timely repairs versus delayed interventions:
Timely Repairs
In the case of Mr. and Mrs. Johnson, they noticed a slight shift in their garage door’s trajectory during opening. Swiftly conducting a DIY inspection, they identified a misaligned track. Following the guide provided, they realigned the track and replaced a worn-out roller. The prompt action prevented further damage, and their garage door continued to function seamlessly.
Delayed Interventions
Contrastingly, the Smith family ignored the subtle signs of a garage door shift for several months. When they finally addressed the issue, the damage had escalated, requiring extensive repairs and roller replacements. The delay in intervention not only incurred higher costs but also led to inconveniences and potential safety risks.
Conclusion
In the grand scheme of homeownership, a garage door shifting to one side may seem like a minor hiccup, but its consequences can reverberate through the daily rhythms of our lives. As we draw the curtains on our exploration into the intricacies of garage doors, it becomes abundantly clear that this common issue demands attention and prompt resolution.
The key takeaway is that solutions are not elusive; they are well within reach. Whether you embark on the do-it-yourself route or enlist the expertise of certified technicians, taking timely action is paramount. The functionality and safety of your garage door, a sentinel guarding the entrance to your home, hinge on your proactive approach to addressing issues.
FAQs
Why does my garage door shift to one side?
Garage door shifts can result from misaligned tracks, roller issues, or torsion spring imbalance. Identifying the specific cause is crucial for effective troubleshooting.
Can I fix a misaligned track without professional help?
Yes, misaligned tracks can be fixed as a DIY project. However, it’s essential to follow safety precautions and seek professional assistance if needed.
How often should I lubricate my garage door?
Regular lubrication is vital for smooth operation. Aim for every six months, but increase frequency if the door is frequently used.
Is it safe to manually adjust the torsion spring?
Adjusting the torsion spring can be risky. It’s recommended to seek professional assistance to ensure safety and proper adjustment.
What are the signs of worn-out rollers?
Grinding or squeaking noises during operation, visible wear on the rollers, and uneven movement are signs of worn-out rollers.


