Are you experiencing issues with your Genie SilentMax 1000 garage door opener? Maybe it’s not functioning properly or has stopped responding altogether.
In such cases, resetting the opener can often solve the problem. In this comprehensive guide, we will walk you through the step-by-step process of resetting the Genie SilentMax 1000 garage door opener, specifically the Tela G1000 Model 3024.
Whether you’re a professional installer or a homeowner looking to troubleshoot, this guide has got you covered.
Before You Begin
Before diving into the process of resetting your Genie SilentMax 1000 garage door opener, ensure you have the necessary tools and follow these preliminary steps:
- Familiarize yourself with the installation process outlined in the installation poster provided.
- Follow the installation poster instructions to assemble and install the power head and rail, safety beam system, and wall console.
- Plug the unit into an electrical outlet according to the installation manual.
These steps will ensure you have a smooth reset process without any complications.
Have experienced this:
Familiarize Yourself with the Installation Process
To ensure a successful reset, it’s crucial to have a solid understanding of the installation process.
Make sure you’ve followed the instructions on the installation poster provided with your Genie SilentMax 1000 garage door opener.
Properly assembling and installing the power head and rail, safety beam system, and wall console is essential for the reset process to work effectively.
Engaging the Carriage Bullet

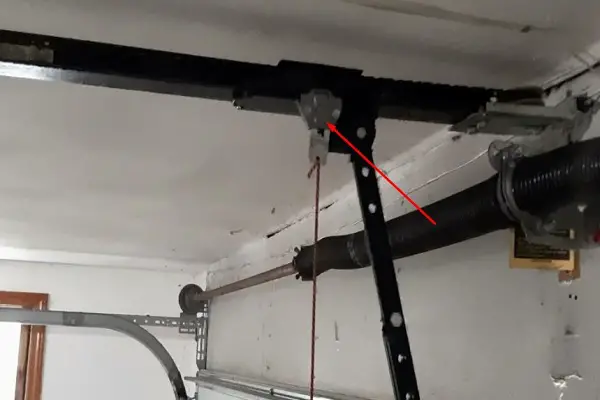
Before moving forward with resetting your Genie SilentMax 1000 garage door opener, it’s important to ensure that the carriage bullet is engaged. This step is crucial for accurate limit setting. Here’s what you need to do:
- Pull the release handle down and toward the power head.
- Make sure the carriage is engaged by verifying that the bullet is in place.
- Only proceed to the next step once you have confirmed that the carriage is engaged.
Ensuring the carriage is engaged is a simple yet vital step that should not be overlooked.
Exploring Smart Set Programming Technology

One of the standout features of the Genie SilentMax 1000 garage door opener is its smart set programming technology.
This technology allows for quick and easy programming. The power head software offers a menu of options, including a remote program, limits program, speed program, and force program.
Let’s delve into the programming process and explore these options in more detail.
Accessing the Programming Menu

To enter the programming menu, follow these steps:
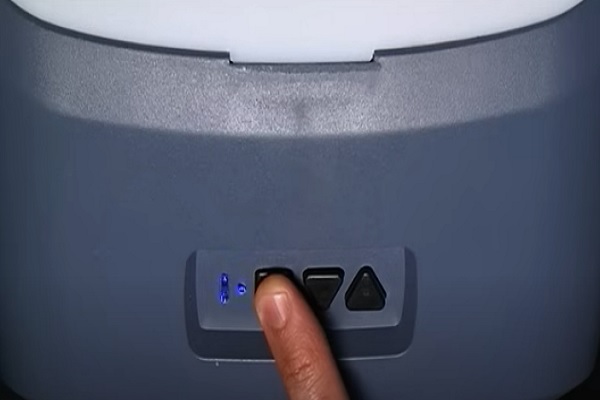
- Press and hold the program set button until both LED lights come in blue.
- The programming menu will start with the remote program option.
- Use the open travel button to navigate through the menus.
- Scroll back through the menu by pressing the open travel button to return to the previous options.
- To enter your desired menu, press the program set button.
- If you want to start over, wait for 30 seconds until all lights go off, then press and hold the program set button again.
By following these steps, you’ll be able to access the programming menu and proceed with the reset process.
Read Also:
Solid Red Light on Genie Garage Door Opener
Setting the Limits
Properly setting the limits is crucial for the optimal functioning of your garage door opener. Here’s how you can do it:
- Enter the programming menu by pressing and holding the program set button.
- Press the open travel button to navigate to the limits program option.
- Press the program set button to select limits programming.
- Hold the close travel button to set the door in the fully closed position.
- Press the program set button to save the close limit position.
- Hold the open travel button to set the door in the desired open position.
- Press the program set button to save the open limit position.
- To complete the limit setting, use the wall console to open and close the door for one full cycle and set the force profile.
Setting the limits accurately ensures that your garage door opens and closes as intended, without any issues.
Adjusting the Speed and Force
The Genie SilentMax 1000 garage door opener allows you to adjust the speed and force settings according to your preferences. Follow these steps to make the necessary changes:
- Access the force program menu on the power head panel.
- Make the desired adjustments to the force profile.
- Refer to the troubleshooting section of the operations manual included with the unit for detailed instructions on changing the force settings.
Adjusting the speed and force settings provides you with more control over the operation of your garage door.
Programming the Intellicode2 Remote

If you have an Intellicode2 remote that you want to program for your Genie SilentMax 1000 garage door opener, follow these steps:
- Press and hold the program set button.
- Press the program set button again to select the remote program menu.
- Press and release your desired remote button.
- Press and release the remote button again.
- Press and release the remote button for the final time to operate the door.
- Your Intellicode2 remote is now successfully programmed.
By following these steps, you can easily program your Intellicode2 remote and enjoy the convenience it offers.
Programming the Intellicode 1 Remote
To program an Intellicode 1 remote, you need to have an Intellicode 2 remote that is already programmed. Here’s how you can do it:

- Press and hold the program set button.
- Press the program set button again to select the remote program menu.
- Press and release the button on the already programmed Intellicode 2 remote.
- Press and release the desired button on the Intellicode 1 remote.
- Press and release the button on the Intellicode 1 remote again to operate the door.
- Your Intellicode 1 remote is now programmed successfully.
By following these steps, you can easily program an Intellicode 1 remote using an already programmed Intellicode 2 remote.
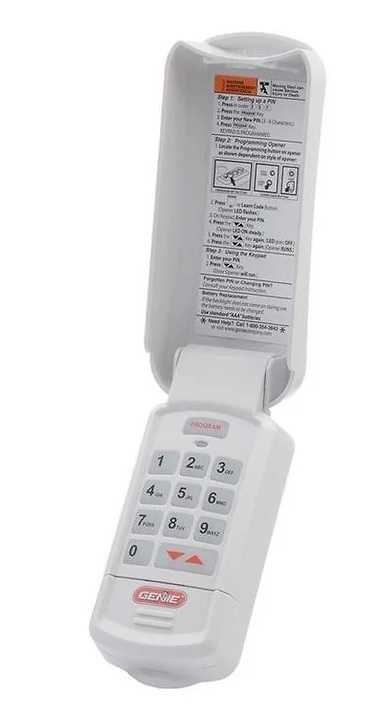
Programming the Intellicode 2 Wireless Keypad
If you have an Intellicode 2 wireless keypad and want to program it, follow these steps:

- Set the PIN by pressing and holding the program button and the up/down arrow buttons until the lights go out.
- Press 3, 5, 7, and the program button.
- Enter your desired PIN.
- Press the program button and wait for the lights to turn off.
- Your PIN is now set.
- On the power head, press and hold the program set button to enter the programming menu.
- Press the program set button again to enter the remote program menu.
- On the wireless keypad, enter your PIN number and press the up/down arrow button once.
- Press the up/down arrow button again.
- Press the button once more to operate the unit.
- Your Intellicode 2 wireless keypad is now programmed.
Following these steps will allow you to program your Intellicode 2 wireless keypad and enhance the accessibility of your garage door opener.
Understanding Diagnostic Codes
The Genie SilentMax 1000 garage door opener comes with diagnostic codes indicated by LED lights on the power head. Refer to the manual provided for detailed information on how to interpret these codes.
The manual will help you understand any potential issues or malfunctions and guide you through the troubleshooting process.
Additional Support and Contact Information
If you encounter any difficulties or have further questions regarding the reset process or the functionality of your Genie SilentMax 1000 garage door opener, you can contact Genie’s technical support line at 1-800-843-4084.
Their team of experts is available Monday through Friday, from 8 am to 7 pm Eastern Time, to assist you.
Conclusion
Resetting your Genie SilentMax 1000 garage door opener is a straightforward process that can resolve many common issues.
By following the step-by-step guide provided in this article, you can successfully reset your garage door opener and ensure its optimal performance.
Remember to refer to the installation manual, operations manual, and troubleshooting section for additional guidance and support.


