Peel and Stick Tiles Garage Floor
Peel and stick tiles have gained immense popularity in recent years as a cost-effective and practical flooring option for various spaces, including garages. If you’re looking to upgrade your garage floor, peel and stick tiles can be a fantastic choice.
In this article, we will explore the advantages of peel and stick tiles, guide you through the process of selecting the right tiles, provide tips for estimating the required quantity, and offer a step-by-step installation guide.
Additionally, we will discuss the importance of maintaining and cleaning peel and stick tiles to ensure their longevity. By the end, you’ll have all the information you need to transform your garage floor with ease.
Advantages of Peel and Stick Tiles
Peel and stick tiles offer several significant advantages that make them a desirable option for garage flooring. Understanding these benefits will help you make an informed decision for your project.

Durability and Resistance to Wear and Tear
One of the primary advantages of peel and stick tiles is their durability. These tiles are designed to withstand heavy loads, foot traffic, and the occasional impact from tools or equipment in your garage.
With their robust construction, they can handle the demands of a garage environment without showing signs of wear and tear easily.
Easy Installation Process
Peel and stick tiles are known for their user-friendly installation process. Unlike traditional tiles that require adhesive and grout, peel and stick tiles come with an adhesive backing.
This feature eliminates the need for additional materials and simplifies the installation process. Even if you’re a DIY novice, you can achieve professional-looking results with ease.
Versatile Design Options
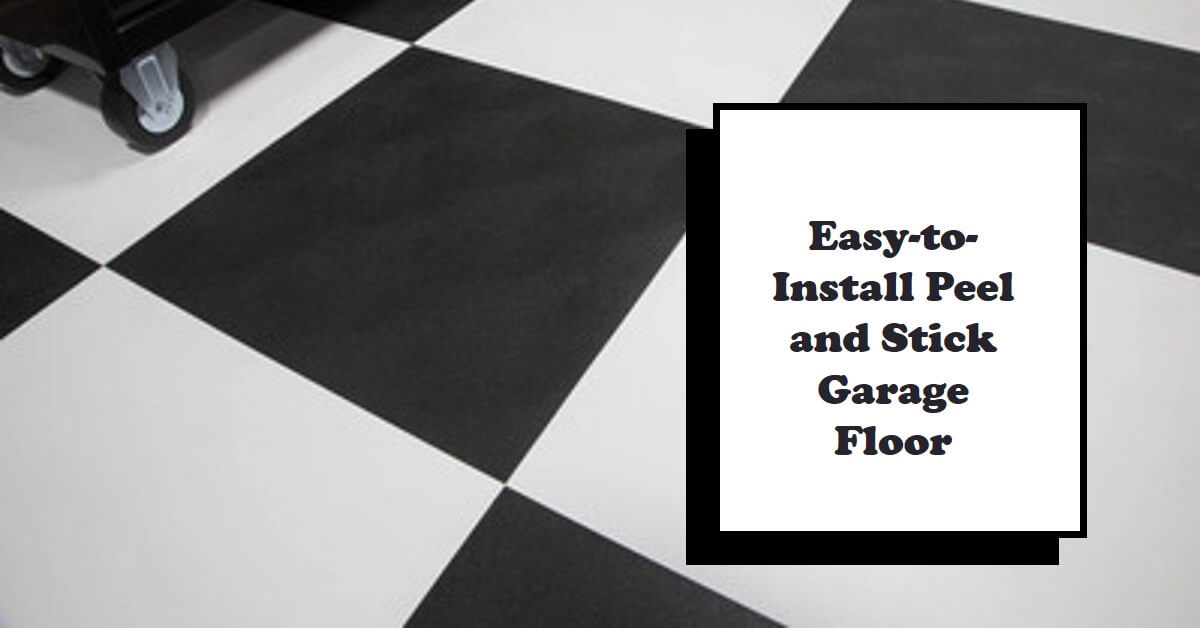
Peel and stick tiles offer a wide range of design options, allowing you to customize the look of your garage floor.
Whether you prefer a sleek and modern aesthetic or a more traditional style, you can find peel and stick tiles to match your preferences. From vibrant colors to realistic stone or wood textures, the design possibilities are virtually endless.
Read Also:
Inexpensive Garage Flooring Ideas
Selecting the Right Peel and Stick Tiles
Before diving into the installation process, it’s crucial to select the right peel and stick tiles for your garage floor. Here are some key factors to consider when making your choice.
Exploring Different Options Available in the Market
Start by exploring the various peel and stick tile options available in the market. Look for reputable manufacturers and read customer reviews to ensure you’re choosing a high-quality product.
This research phase will give you a better understanding of the options available and help you narrow down your choices.
Considering Factors such as Material, Texture, and Color
Consider the material, texture, and color of the peel and stick tiles you want to use.
For garage flooring, it’s important to choose tiles that are specifically designed for heavy-duty use and can withstand the demands of the space.
Opt for materials that are resistant to oil, chemicals, and stains to ensure the longevity of your garage floor.
Importance of Choosing Tiles Suitable for Garage Use
When selecting peel and stick tiles, it’s essential to choose options specifically suitable for garage use.
These tiles are engineered to withstand the unique conditions found in garages, such as temperature fluctuations, moisture, and potential exposure to chemicals.
By choosing tiles designed for garages, you ensure they will perform optimally in this environment.
Estimating the Required Quantity of Tiles
Before making your purchase, it’s crucial to accurately estimate the quantity of peel and stick tiles you’ll need for your garage floor. Here are some tips to help you with this estimation process.
Calculating the Square Footage of Your Garage
Start by measuring the length and width of your garage to calculate the square footage. Multiply these measurements to obtain the total square footage of your garage floor.
This calculation will serve as a basis for determining the number of tiles you require.
Determining the Number of Boxes Needed
Refer to the specifications provided by the manufacturer to determine how many tiles are included in a box.
Divide the total square footage of your garage floor by the coverage area of a box to estimate the number of boxes you need.
It’s advisable to purchase some extra tiles to account for any mistakes during installation or for future replacements.
Tips for Ordering the Right Amount of Tiles
When placing your order, consider the delivery time and potential availability issues. It’s recommended to order all the tiles you need in a single batch to ensure consistency in color and design.
If you plan on installing a pattern or design, ensure you have enough tiles to complete the desired layout without running out of specific patterns or colors.
Tools and Preparation
To ensure a smooth installation process, gather the necessary tools and prepare your garage floor adequately. Here’s what you need to do:
Essential Tools for Installation
Before you begin installing peel and stick tiles, gather the essential tools required for the process.
These typically include a tape measure, utility knife, straight edge or ruler, roller, and a notched trowel.
Having these tools readily available will make the installation process more efficient.
Preparing the Garage Floor for Installation
Prepare your garage floor by clearing the area of any items or debris. Sweep or vacuum the floor thoroughly to remove any dust or loose particles.
It’s important to start with a clean and smooth surface to ensure optimal adhesion of the peel and stick tiles.
Clearing and Cleaning the Area
Remove any obstructions from the garage floor, such as vehicles, storage items, or workbenches. Clearing the space will provide you with a clean canvas to work on.
Consider cleaning the floor with a suitable cleaner to remove any stains or grime that could interfere with the installation process.
Step-by-Step Installation Guide
Now that you have selected the right peel and stick tiles and prepared your garage floor, it’s time to dive into the step-by-step installation process. Follow these guidelines to achieve a successful installation:
1. Preparing the Garage Floor
- Start by checking the garage floor for any damage or cracks. If you spot any significant cracks or uneven areas, consider repairing and leveling the surface before proceeding with the installation.
- If required, apply a primer recommended by the tile manufacturer. The primer helps create a strong bond between the peel and stick tiles and the garage floor, ensuring long-lasting adhesion.
2. Starting in the Middle
- Establish a reference line in the middle of the garage floor. Use a chalk line or a straightedge to create a guideline that will serve as your starting point.
- Begin laying the first peel and stick tile at the intersection of the reference line. Remove the backing from the tile, align it with the guideline, and press it firmly onto the floor.
- Continue laying tiles in a grid pattern, working outward from the center. Make sure to leave a small gap between the tiles for expansion and contraction.
3. Aligning and Securing the Tiles
- Follow the manufacturer’s instructions for aligning and securing the tiles. Some tiles have interlocking edges that allow for seamless connections, while others require adhesive tape or glue for added stability.
- Apply even pressure on each tile as you install it to ensure proper adhesion. A roller can be used to go over the tiles and further enhance the bond between the tiles and the floor.
4. Trimming and Installing Border Tiles
- Measure and cut peel and stick tiles to fit along the edges and corners of the garage floor. Use a utility knife and a straightedge to create clean and precise cuts.
- Install the border tiles, ensuring they align perfectly with the rest of the floor. The border tiles provide a finished look to the installation, giving your garage floor a professional appearance.
Maintaining and Cleaning Peel and Stick Tiles
To keep your garage floor in top condition, regular maintenance and cleaning are essential. Here are some tips to help you maintain and clean your peel and stick tiles:
- Sweep or vacuum the floor regularly to remove any dirt, dust, or debris. This simple step will prevent scratches and prolong the life of your tiles.
- Clean up spills promptly to prevent staining. Use a mild detergent or cleaner recommended by the tile manufacturer and a soft cloth or mop to clean the affected area.
- For stubborn stains or heavy dirt buildup, you can use a non-abrasive scrub brush or a floor cleaner specifically designed for peel and stick tiles. Always follow the manufacturer’s instructions for cleaning products.
- Avoid using harsh chemicals or abrasive cleaners, as they can damage the surface of the tiles.
- Place mats or rugs in high-traffic areas or under vehicles to prevent excessive wear on the tiles.
Conclusion
Peel and stick tiles offer a convenient and budget-friendly solution for upgrading your garage floor. With their durability, easy installation process, and versatile design options, they are an excellent choice for homeowners seeking a DIY project.
By selecting the right tiles, estimating the required quantity, and following a step-by-step installation guide, you can transform your garage floor into a functional and visually appealing space.
Remember to maintain and clean your peel and stick tiles regularly to ensure their longevity and preserve their attractive appearance. Get started on this simple and rewarding DIY project to enhance the overall aesthetics of your garage.


