Gather Necessary Tools: Preparation Is Key
Before beginning the process of tightening your garage door chain, it’s essential to gather the necessary tools. Here’s what you’ll need:
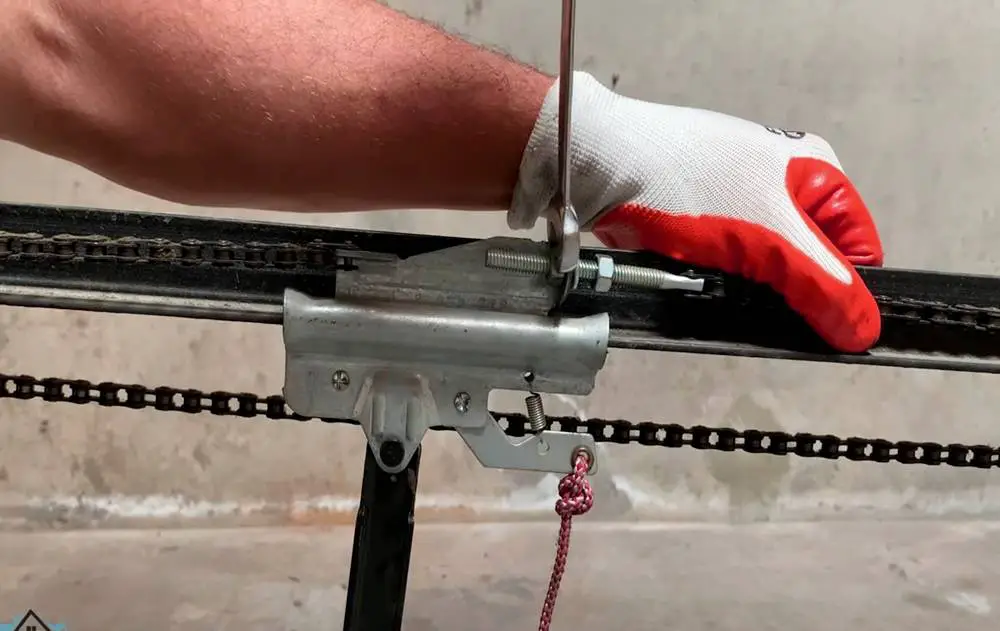
- Adjustable Wrench or Pliers: Depending on the type of garage door opener you have, you’ll require either an adjustable wrench or pliers to tighten the chain effectively. These tools will allow you to adjust the tension with precision and ease.
Having these tools readily available will streamline the process and ensure that you can adjust the garage door chain efficiently. By preparing in advance, you can tackle the task with confidence and achieve optimal results.
Tightening the Chain: Step-by-Step Process

Now that you’ve taken the necessary safety precautions and gathered your tools, it’s time to tighten the garage door chain. Follow these steps carefully to achieve the desired tension:
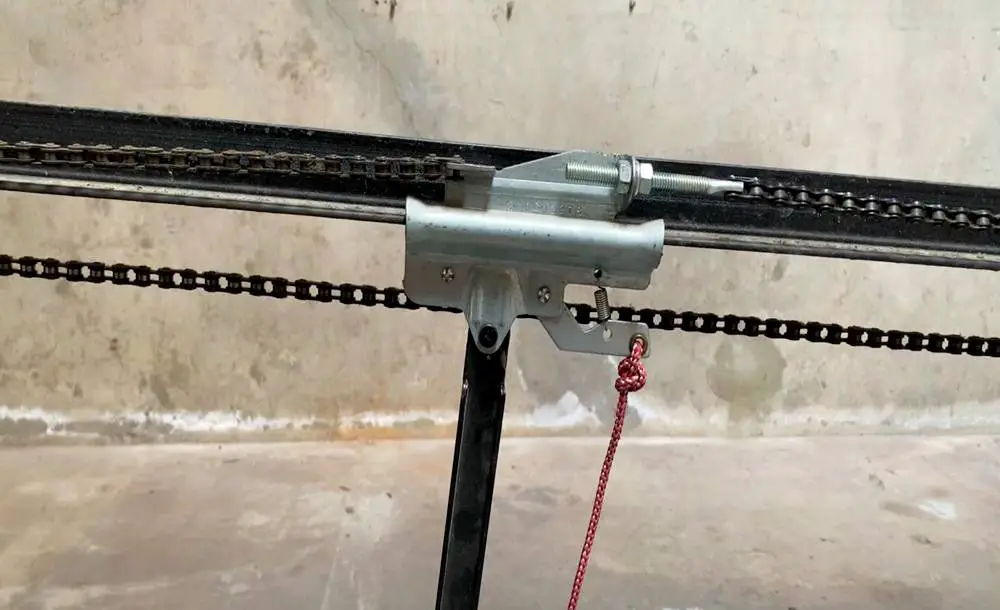
- Locate the Adjustment Point: The adjustment point is usually located near the trolley where the chain connects to the opener arm. Look for two nuts—an inner and an outer one—adjacent to the chain.
- Loosen the Outer Nut: Begin by loosening the outer nut slightly. This action provides some slack in the chain, allowing for easier adjustment.
- Tighten the Inner Nut: Gradually tighten the inner nut, turning it a small amount at a time. As you do this, observe the chain’s tension, ensuring it tightens evenly without becoming too taut.
- Check for Proper Tension: Once you’ve tightened the inner nut sufficiently, check the chain’s tension. The ideal tension is when the chain exhibits minimal sag, approximately 1/2 inch, without binding or jumping off the sprockets.
- Tighten the Outer Nut: After achieving the desired tension, secure the inner nut’s adjustment by tightening the outer nut. This step ensures that the tension remains consistent and prevents any accidental loosening.
- Reconnect the Garage Door: With the chain properly adjusted, re-engage the garage door to the opener. This involves reversing the process you followed to disengage it initially, ensuring the door is securely connected for operation.
- Test the Operation: To verify that the adjustment was successful, test the garage door’s operation. Open and close the door several times to ensure it moves smoothly and operates without any issues related to chain tension.
Additional Tips for Optimal Maintenance
While the steps outlined above provide a basic guide to tightening a garage door chain, consider the following tips to enhance maintenance and prolong the lifespan of your garage door system:
Avoid Over-tightening
While it’s essential to achieve proper tension, avoid over-tightening the chain. Excessive tension can place undue strain on the opener, leading to premature wear and potential damage. Aim for a balance between tension and flexibility to ensure optimal performance.
Seek Professional Help if Needed
If you encounter any difficulties or are unsure about any step in the process, don’t hesitate to seek professional assistance. Garage door technicians have the expertise and tools necessary to address complex issues safely and effectively, minimizing the risk of damage or injury.
Utilize Video Tutorials
For visual learners or those who prefer a hands-on approach, consider watching video tutorials specific to your opener model. Many manufacturers provide instructional videos online, offering visual guidance on adjusting the chain and resolving common issues.
Conclusion
Tightening the garage door chain is a straightforward task with substantial implications for the performance and safety of your door. By adhering to the steps provided in this guide and integrating the supplementary maintenance advice, you can guarantee that your garage door functions seamlessly and remains dependable for an extended period.
FAQs
How often should I tighten my garage door chain?
It’s recommended to inspect and adjust the tension of your garage door chain at least once a year. However, if you notice any signs of sagging or unusual noise during operation, it’s wise to check the tension more frequently.
What if my garage door chain continues to sag after tightening?
If the chain continues to sag even after tightening, it could indicate underlying issues such as worn-out components or improper alignment. In such cases, it’s advisable to consult a professional garage door technician to diagnose and address the problem effectively.
Can I use WD-40 to lubricate the garage door chain?
While WD-40 is a popular lubricant, it’s not the best choice for lubricating garage door chains. Instead, opt for a silicone-based or lithium-based lubricant specifically designed for garage door systems. These lubricants provide better protection against friction and wear, prolonging the life of your chain and other components.
Is it normal for the garage door chain to make noise during operation?
Some degree of noise is normal during garage door operation, including the sound of the chain moving along the tracks. However, excessive or unusual noise could indicate issues such as lack of lubrication, loose hardware, or worn-out components. If the noise persists or worsens over time, it’s advisable to investigate and address the underlying cause promptly.
What should I do if I encounter resistance while tightening the chain?
If you encounter resistance while tightening the chain, stop immediately and assess the situation. Resistance could indicate issues such as debris or obstructions in the chain’s path, improper alignment, or damaged components. Carefully inspect the chain, tracks, and other moving parts for any signs of damage or obstruction. If the issue persists, seek professional assistance to avoid causing further damage to your garage door system.


